Vermicomposting Food Scraps
#VeganMoFo18 Day 28 – Vermicomposting Food Scraps
Vermicomposting food scraps—say what? Vermicomposting is a fancy what of saying composting with worms! Cool, right? Heck yeah!
The last post talked about composting your food waste in compost piles, bins, or tumblers. Today we’re going to talk about composting them in worm bins. As I eluded to last time, we use both systems for dealing with our food waste.
Vermicomposting uses a particular type of worm, called red wriggler or red wiggler, depending on what source you read, sometimes called tiger worms due to their tiger stripe-like banding. Their scientific name are Eisenia fetida. These worms are not the earthworms or nightcrawlers you find when you dig in your yard or garden, nor are they worms you buy at a bait shop, they are the worms you find in piles of wet leaves on the sidewalk, small red worms that break down organic material. While you could search around and find some red wriggler worms among your leaves, it is easiest and most productive to buy them from a composting worm distributor. We got wonderful red wrigglers from NW Redworms, who shipped them to us from Camas, Washington.

Box of Worms in the Mail!
Composting worms can process a surprisingly large amount of material. A red worm can process half of their weight of food scraps a day! So this gives you a number to go by to determine how many worms you need for processing your food scraps. If you estimate you produce about one pound of food scraps a day, you’ll want two pounds of red worms. But since the worms will reproduce, start with one pound of worms and let them build up the colony. One pound of red worms will equate to approximately 1,000 breeding worms, so you’ll have a lot of worms with just a pound!
Worms eat your scraps and the bedding, and then poop. This poop is called worm castings and is composted food and newspaper scraps! It’s really that simple.

My Large Outside Wood Worm Bin
To house your worms, you need an appropriately-sized bin. The rule of thumb is 1 square foot of surface for each pound of worms. There are a multitude of choices for worm bins, whether you build your own from wood or repurpose a plastic storage container, or buy a commercially-made option. Tilth Alliance has instructions for building bins on their website. We started with the Off-the-Shelf worm bin, but had more food waste than that could handle, so we built a large wooden bin to better accommodate our situation. We have the smaller off-the-shelf bin in our garage for when we don’t want to go all the way outside to dump our scraps, and I use it to transport worms to tabling events for Tilth Alliance as part of my Soil and Water Steward outreach activities. The smaller bin works just as great as the larger one.
We used strips of newspaper as bedding in our worm bin, for both of the bins. We wet the strips down after separating them and filled the bin about 3/4 full. Like your compost bin, you want the bedding to be damp as a wrung-out sponge, not dripping wet. Worms don’t like it if it gets too wet or too dry and will try to escape your bin in search of better conditions.
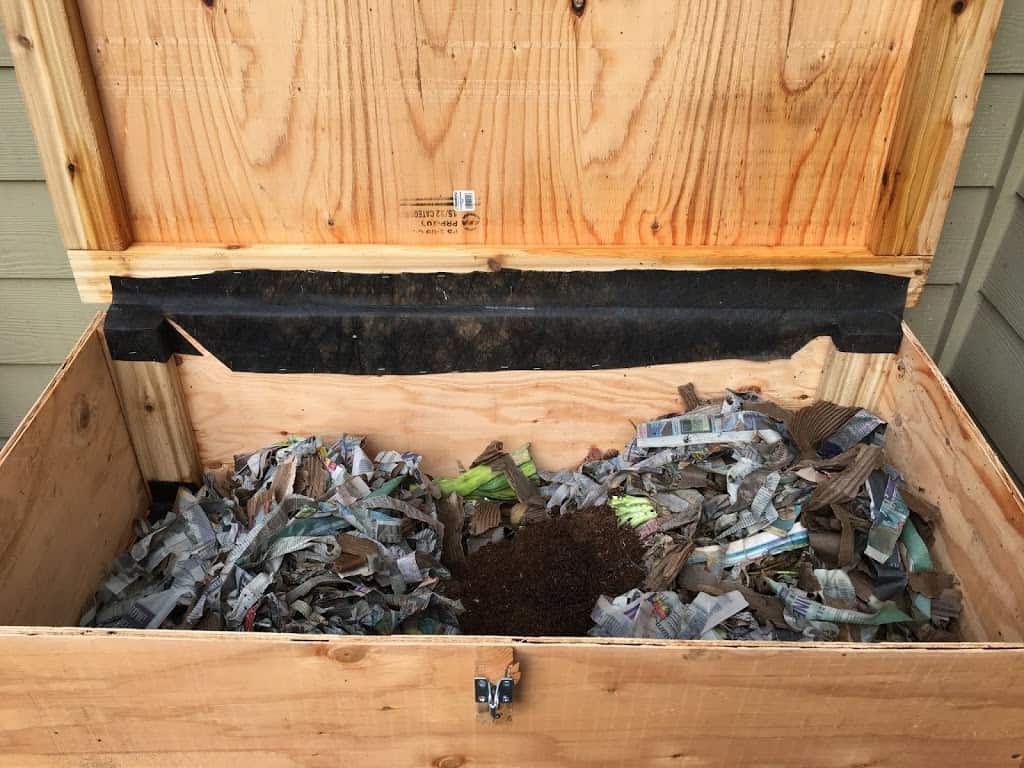
Newspaper Strip Bedding with Pile of New Worms On Top
Where to keep your Worm Bin
Worms like similar temperatures as humans, preferring a climate between 50-80˚F. Most resources will tell you to keep them inside your house or garage, protecting them from high heat and freezing temperatures. Lots of people keep them in their closets and basements. The bins don’t smell, the worms consume the food so it doesn’t rot, so that isn’t an issue at all for folks.
We keep our large worm bin outside and our smaller tote in the garage. Alan did not want it inside at all, and, I wasn’t too excited about that either. We started with the small bin in our garage, but the big bin is just too big, so it lives outside. Even when it was really hot out, the bedding inside stayed cool and damp. In cooler temperatures, worms move into the center of the bin and huddle together to create their own heat.
We’d read that worms don’t withstand freezing temps, however, we left our large worm bin outside all winter, which was unseasonably cold, and our worms survived and thrived! I put some sheets of styrofoam on top inside the bin to help hold in the heat and we fed only once a month as they were slower than usual and I also didn’t want to harm them if it was frozen. Despite two sessions of three-weeklong periods of sub-freezing temps, they made it and even tripled in population! However, if the bin was to freeze, the adult worms may die their eggs will survive and hatch in the spring.
Feeding your Worms
To feed them, we simply bring out our food scraps, lift up the bedding and place the food on the bottom, making sure to cover the scraps completely. We put food in different spots each time.
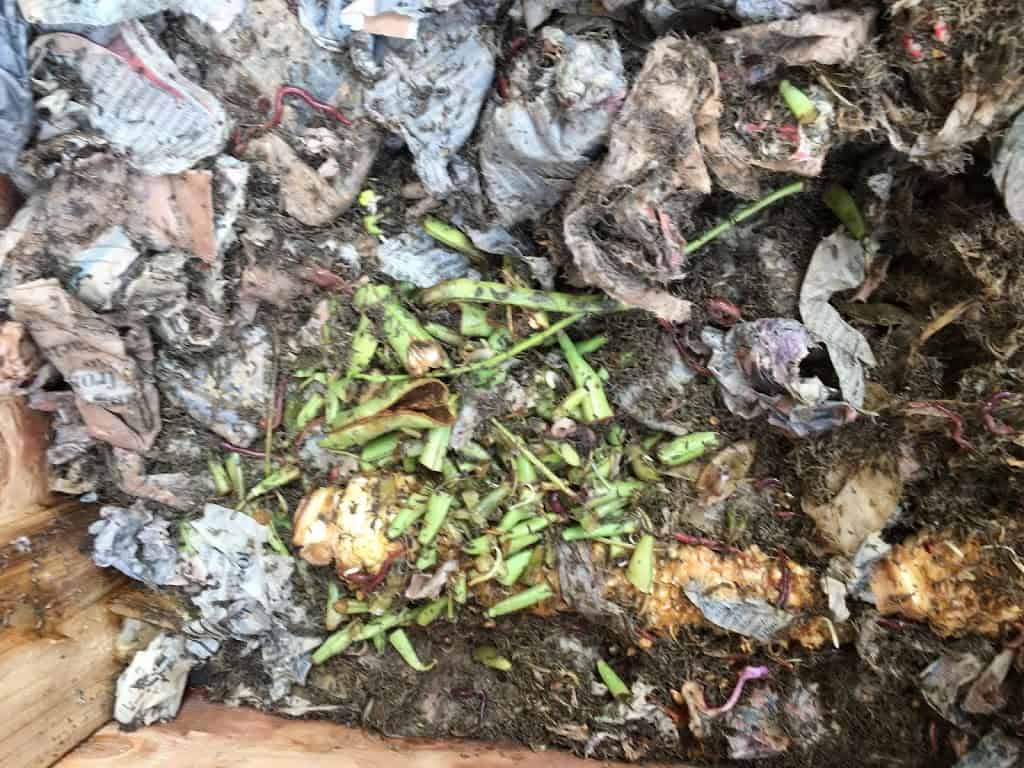
Adding Food Scraps to Worm Bin (Corn on the Cob and Green Bean Trimmings) to be Buried with Bedding
If you fail to cover your scraps, you can get fruit flies, which happened to us. To deal with that, remove the food, cover the bedding with additional new bedding, close the bin and don’t open it again for about 3 weeks. Your worms will be fine, they’ll eat bedding, but the fruit flies won’t have enough food, causing them to not reproduce, and by three weeks, they will have met the end of their life cycle and perished. Then you can start feeding your worms again, making sure to bury the food.
The other thing we do to help keep fruit flies out is to put a single layer of cardboard across the entire top surface. This has been a huge help, we think. It also keeps moisture in and helps maintain a constant temperature.
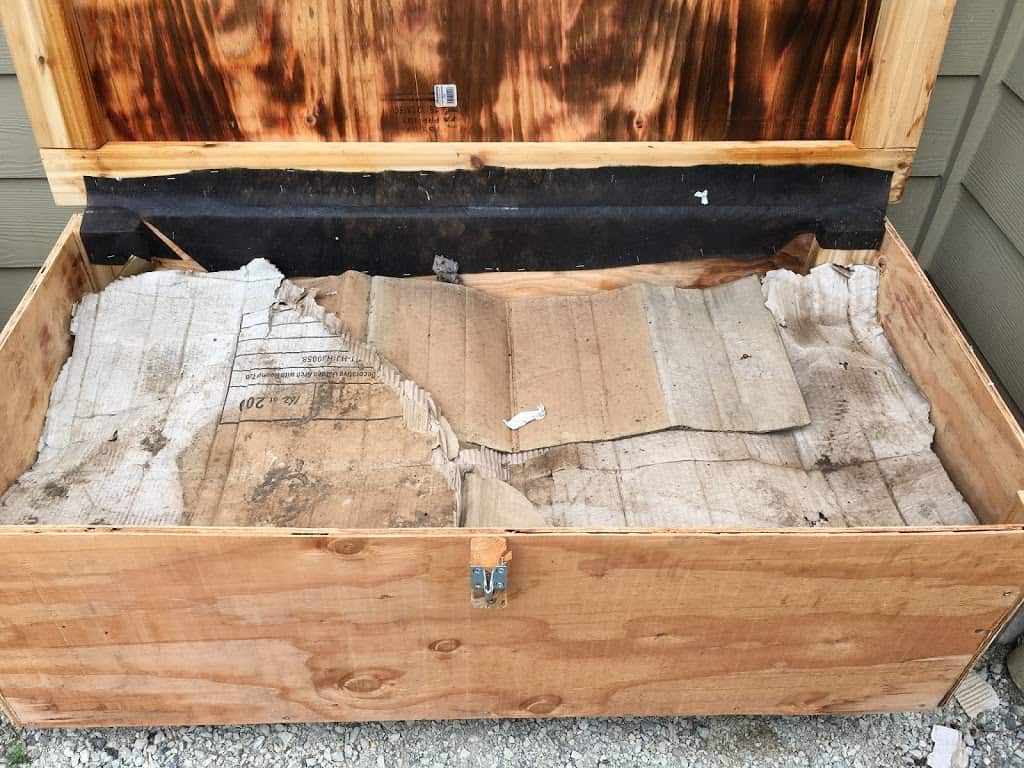
Protective Layer of Cardboard on top of Bedding
Feed your worms:
- Fruit and vegetable scraps
- Bread
- Grains
- Coffee grounds (some sources say these are too acidic, but they’ve been fine in ours)
- Tea
- Cooked fruit and vegetable scraps, especially from making veggie stock or apple sauce or plate scrapings
Don’t feed your worms:
- Human or animal feces
- Oil
- Meat
- Dairy
- Fish
Some sources say not to give worms high acid. particularly citrus, or spicy foods, as it could burn the worm’s skin. Others say it’s ok to add bits of that at a time, but not a huge load of it at once. We simply just put citrus and hot pepper scraps a little at a time or if we have large amounts, but in our compost bin instead. We’ve never had any problems with our worms and citrus, onions, garlic, or peppers.
Other Things that Live in your Worm Bin
You’re going to get other things living in your worm bin other than worms, and that’s good and normal, most of the time. As I mentioned earlier, you can get fruit flies. They don’t harm anything, they’re just annoying and I hate breeding them with the chance that they can get inside the house. Other things you can get in your bin:
Good Critters – won’t hurt the worms and actually help with decomposition
- Earwigs
- White or pot worms
- Springtails
- Pill bugs
- Millipedes
- Mites
- Black soldier flies and their larvae
- Spiders – they kill the flies! We have a big spider who lives in the corner of the lid. We let it be. Sometimes we surprise it and find it on top of the bedding, we’re just careful not to bury it.
Bad Critters
- Centipedes – can kill worms
- Earthworm mites – show up if your bin is too wet. Your worms will stop eating if there are too many of these present
- Ants
- Roaches – rare, means your bedding is too dry
Harvesting the Worm Castings (Compost)
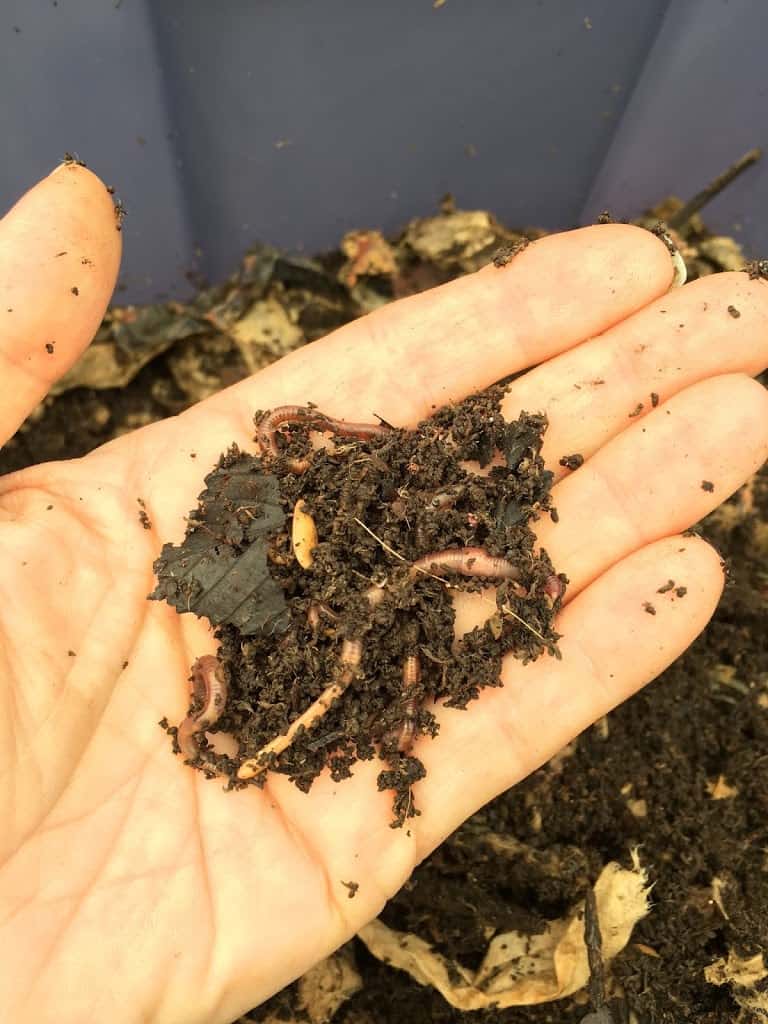
After four to six months, the bedding starts to turn dark and crumbly, but there’s worms mixed in with this compost. Simply move all of the old bedding and castings to one side of the bin and add new bedding to the empty space. Feed the worms ONLY under this new bedding and after a month, most of the worms will have migrated to the new area for food and to get out of their poop (they don’t like to live in their castings), and you can harvest mostly-worm-free compost.

Castings with Red Wriggler Worms in it
Alan wasn’t too excited about the worms at first, but now he is our household worm wrangler! He loves to feed them so he can check on his brood. Any visitor to our house is quickly escorted out to get a personalized introduction to the worms, before they can even answer the question, “You wanna see my worm bin?” The grandkids are encouraged to explore them as well!
It’s been a great way to keep up with our supply of food scraps. Without the worm bin, we would probably have too much nitrogen-rich material for our compost tumblers, so this helps spread the load.
Resources about Vermicomposting
Book: Worm’s Eat my Garbage, by Mary Appelhof
Do you like this post? Please share....
2 Comments
Leave a Comment
If you liked this post, you might like one of these:
Categories:
Tags:

[Trī-māz-ing]
Cindy wants you to be Trimazing—three times better than amazing! After improving her health and fitness through plant-based nutrition, losing 60 pounds and becoming an adult-onset athlete, she retired from her 20-year firefighting career to help people just like you. She works with people and organizations so they can reach their health and wellness goals.
Cindy Thompson is a national board-certified Health and Wellness Coach, Lifestyle Medicine Coach, Master Vegan Lifestyle Coach and Educator, Fitness Nutrition Specialist, Behavior Change Specialist, and Fit2Thrive Firefighter Peer Fitness Trainer. She is a Food for Life Instructor with the Physicians Committee for Responsible Medicine, Rouxbe Plant-Based Professional, and Harvard Medical School Culinary Coach, teaching people how to prepare delicious, satisfying, and health-promoting meals.
She provides health and lifestyle coaching at Trimazing! Health & Lifestyle Coaching. Cindy can be reached at info@trimazing.com.
Subscribe to the Trimazing Blog
Receive occasional blog posts in your email inbox.
Subscribe to the Trimazing Blog
Receive occasional blog posts in your email inbox.











I’m having trouble deciding wether buying and using worms for our own benefit is vegan
We considered this as well. As we naturally get composting worms in our compost bins, we decided hosting them and feeding them in a safe environment was appropriate for us. We started out with some starter worms, but in the end, they would have naturally come into our compost and wasn’t even necessary for us to buy them. It is an individual choice for people to consider.