Vegan Wax Wraps!

#VeganMoFo18 Day 24 – Vegan Wax Wraps
When we went zero waste, one of the things we did was work to eliminate plastic from our kitchen. Moving from plastic containers to glass was fairly easy, we just moved things from tubs to glass jars, whether ones we had or ones we bought from thrift or other stores. But we needed something to seal large bowls that we didn’t have lids for and things that didn’t fit into glass containers, something to replace plastic wrap or aluminum foil. Even though aluminum foil is recyclable, we wanted to find a reusable option. I’d seen beeswax wraps, but we personally don’t use bee products (honey, beeswax, etc).
I figured there had to be a vegan alternative to the beeswax food wraps, so I did some internet searching. Lo and behold, I found vegan wraps, but I also discovered instructions for making beeswax wraps in the process. So I did some searching on that, and came across a great resource for making non-beeswax vegan food wraps! I absolutely love Joan from Break + Remake, and she has an awesome video on how to make vegan wax wraps! The recipe amounts are in the notes under her YouTube video, so please go there for the exact details.
DIY Vegan Reusable Food Wraps – candelilla vs soy
Here is the best recipe I have come up with for reusable food wraps made with vegan wax. In this video, I try candelilla and soy waxes and guess what, the candelilla worked the best.
A friend from my Tilth Alliance Soil and Water Stewardship program came over to do this project with me. We had so much fun!
I have a big supply of cotton quilting fabrics, so opted to use what I had instead of going out and buying something new. In my stash I had a bunch of garden veggie and water droplet prints that I’d been storing for years, looking for the perfect project, and they were perfect for it! I washed, dried, and ironed my fabric and then we used a rotary cutter with a pinking blade to cut a zigzag edge that wouldn’t fray.
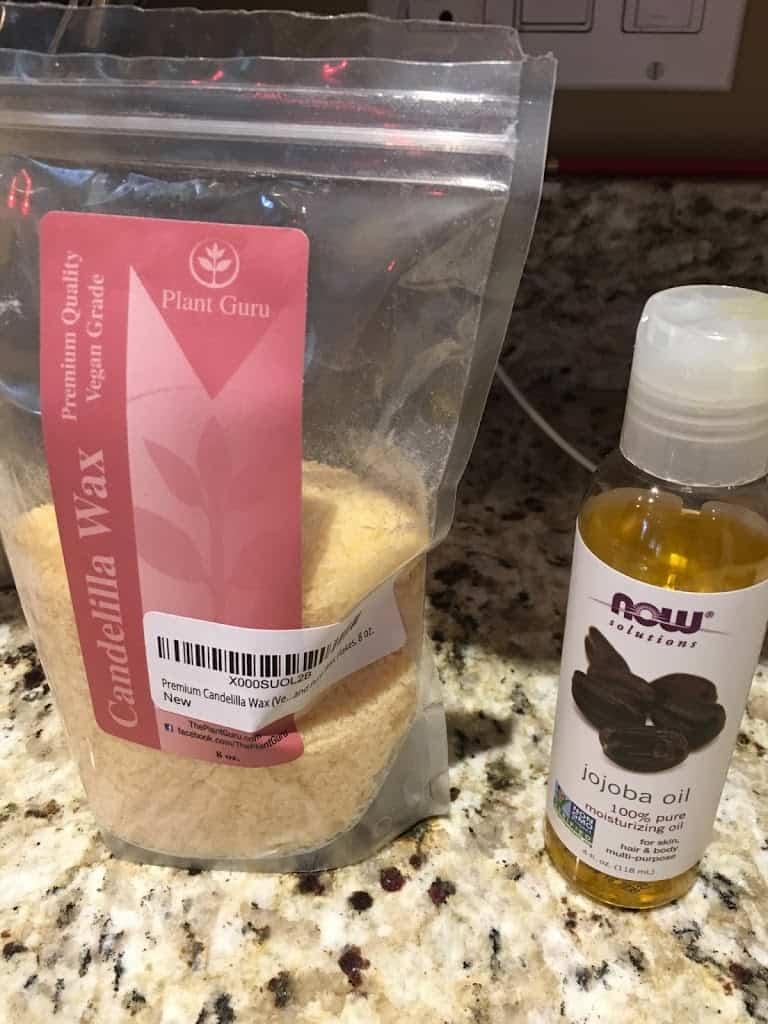
The ingredients for the wraps includes candelilla wax, jojoba oil, and pine resin. We got our supplies from Amazon and PCC market, but have since discovered other bulk and less-packaging intensive options from Zenith Supply. Here are the links for the products we used:
- Jenny Joy’s Organic Pinon Pine Refined Resin
- Plant Guru Premium Candelilla Wax
- NOW Solutions Jojoba Oil

Package of Pine Resin
The pine resin is hard but super sticky. To get the resin out of the container, we used the technique Jenny Joy’s Soap suggested:
No Title
We have had several customers who purchased our Organic Pinon Pine Resin and asked about how to use a Bain Marie. Using a small pot or pan pour 1-2 inches of water inside. Place a metal trivet or silicone matt inside. Place a Mason jar or custard dish with the contents you wish to melt.
We put the resin container in a half-pint wide mouth mason jar in a pan of boiling water (see photo above with supply list) and stirred it with a chop stick. It was soft enough to remove some with a hot metal measuring spoon that we’d heated in the boiling water for a moment.
Then we melted the resin, candelilla wax, and jojoba together in a double boiler we made by setting a metal bowl over a pot of simmering water:
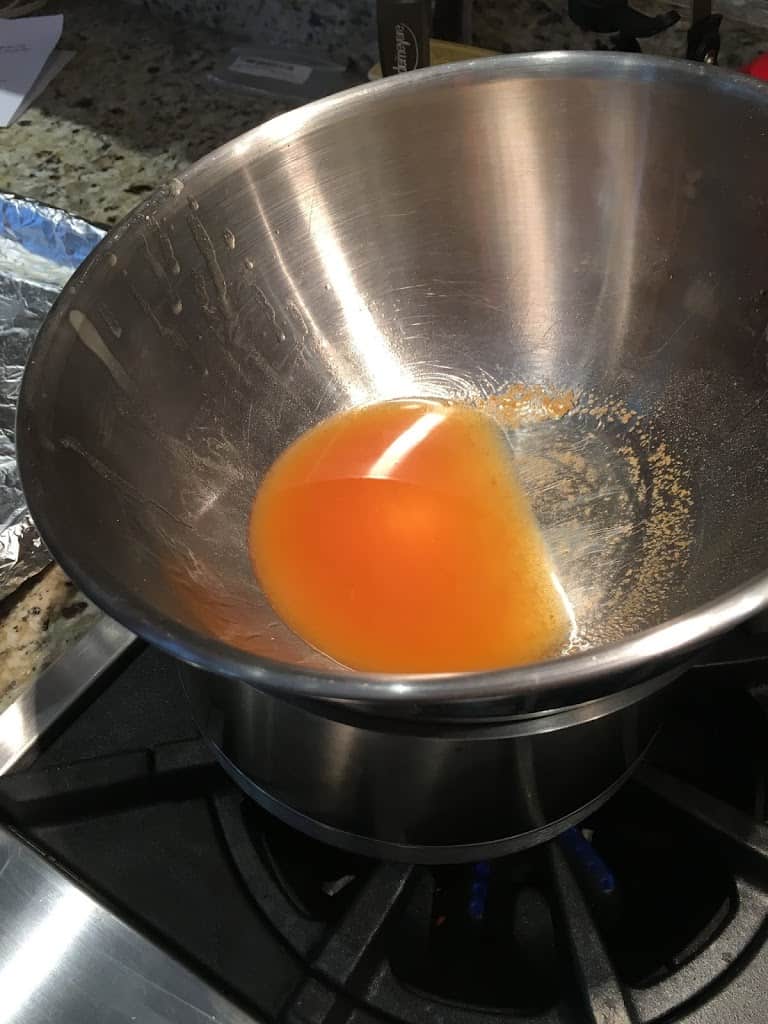
Ingredients Melted in Bowl Set Over Pot of Boiling Water
Next we painted the mixture on our prepared fabric with a pastry brush. I’d bought an old metal sheet baking tray at a thrift store for this purpose and also covered one of my good ones with a couple layers of aluminum foil; both worked fine:

Brushing Melted Ingredients with a Pastry Brush
Then this was popped into a low oven to allow the brushed mixture to melt through the fabric and spread out:
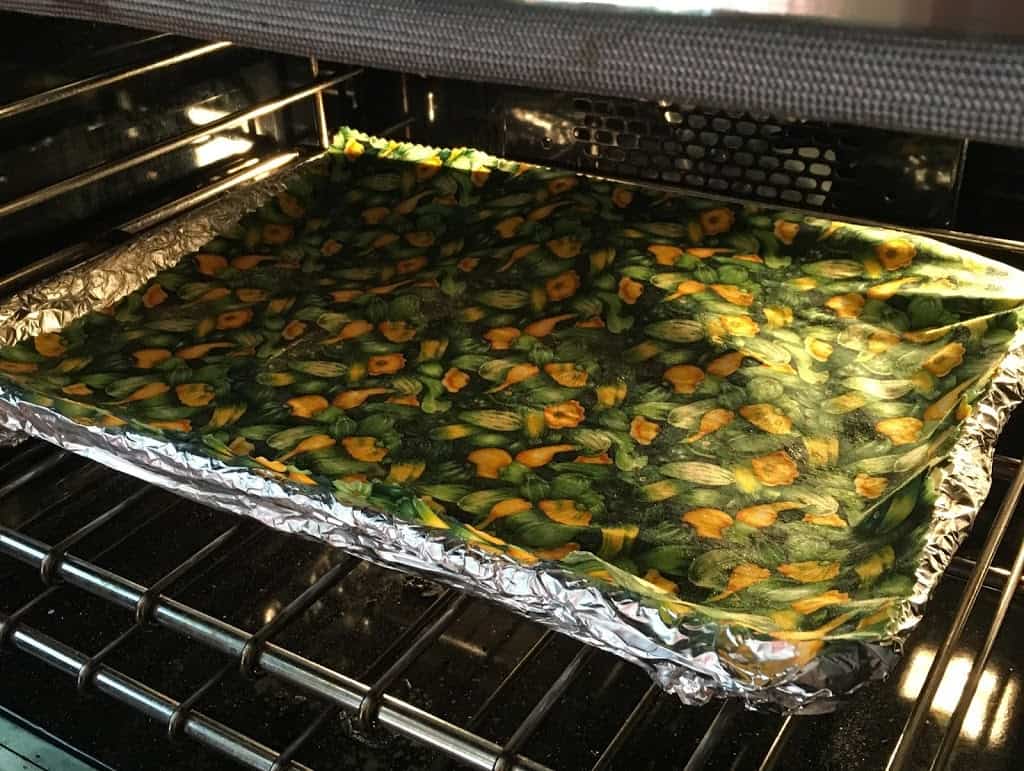
Melting Ingredients into Fabric in the Oven
Then we added a step Joan didn’t do in her process. We noticed we were getting uneven coverage of the waxy mixture even when melting everything together in the oven. Because of this, we had thick areas of wax in some spots and areas that were not waxed at all. I’d read some posts by others who’d done beeswax wraps using a clothes iron, so we decided to try that. It worked like a charm! We placed an old bath towel on the granite countertop, sandwiched the brushed fabric between two pieces of parchment paper, and pressed with a hot iron:

Using a Clothes Iron to Evenly Melt the Wax into the Fabric
When we peeled the parchment off, the fabric had perfect coverage!
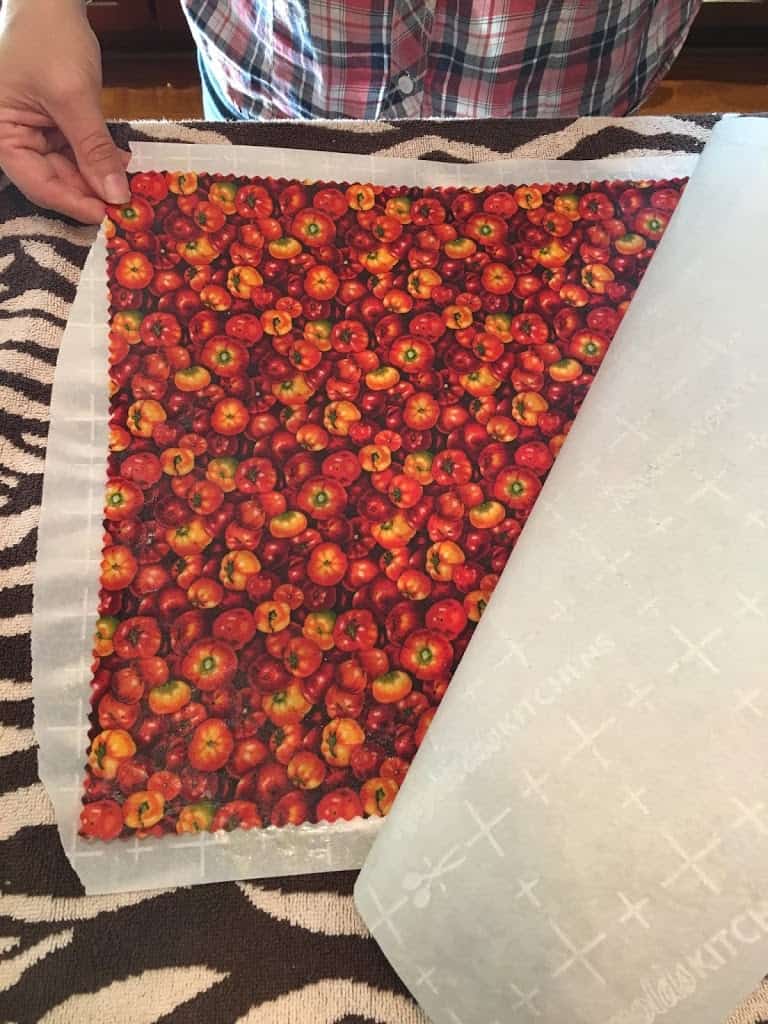
Peeling Parchment Paper Off of the Fabric After Pressing with a Clothes Iron
Then we hung the waxed sheets outside on a clothes line to cool:

Finished vegan wax wraps hanging on a clothesline to dry
The sheets are perfect! They have enough tack to stick together but not so sticky that they get your hands all gooey. They work around veggies and on bowls! I’m going to try to sew one and see how that works for making storage bags.
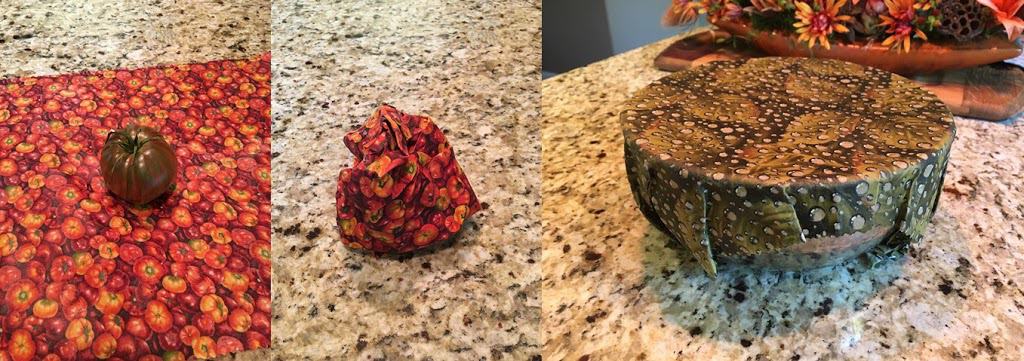
Using the Vegan Wax Wraps
We are really pleased with these wraps!
Things we learned:
- Pine resin is sticky! Protect your kitchen!
- Plan on just losing your bowl, pastry brush, and baking sheet to the cause and reusing it only to make wraps in the future.
- To clean your measuring spoons and chopsticks afterward, put them in a pot of boiling water and boil until all the goo comes off and floats to the surface. Carefully pull out your utensils and wipe with a rag, then put in the dishwasher for final cleaning. DON’T POUR THE BOILED WATER WITH THE FLOATING WAX DOWN YOUR SINK DRAIN! It’ll never come out. We carefully took it outside and poured it on the ground. Wipe out the pot with an old rag and then run through the dishwasher.
- Skip the oven step. Brush the melted ingredients on your fabric and then iron between parchment.
Note about pine resin. Joan did try using the powdered pine resin instead of the gooey resin, and it didn’t work out. I may play with this another time to see if I can get it to work. It’d sure be nice to have a powder instead of that goo that is so sticky to work with!
DIY Vegan Food wraps with Powder Resin
This DIY is for those of you who can only find powder resin/rosin to make reusable vegan food wraps! It’s a great way to make the wraps form a tight seal around food so things don’t get stale while wrapped.
Do you like this post? Please share....
If you liked this post, you might like one of these:
Categories:

[Trī-māz-ing]
Cindy wants you to be Trimazing—three times better than amazing! After improving her health and fitness through plant-based nutrition, losing 60 pounds and becoming an adult-onset athlete, she retired from her 20-year firefighting career to help people just like you. She works with people and organizations so they can reach their health and wellness goals.
Cindy Thompson is a national board-certified Health and Wellness Coach, Lifestyle Medicine Coach, Master Vegan Lifestyle Coach and Educator, Fitness Nutrition Specialist, Behavior Change Specialist, and Fit2Thrive Firefighter Peer Fitness Trainer. She is a Food for Life Instructor with the Physicians Committee for Responsible Medicine, Rouxbe Plant-Based Professional, and Harvard Medical School Culinary Coach, teaching people how to prepare delicious, satisfying, and health-promoting meals.
She provides health and lifestyle coaching at Trimazing! Health & Lifestyle Coaching. Cindy can be reached at info@trimazing.com.
Subscribe to the Trimazing Blog
Receive occasional blog posts in your email inbox.
Subscribe to the Trimazing Blog
Receive occasional blog posts in your email inbox.

