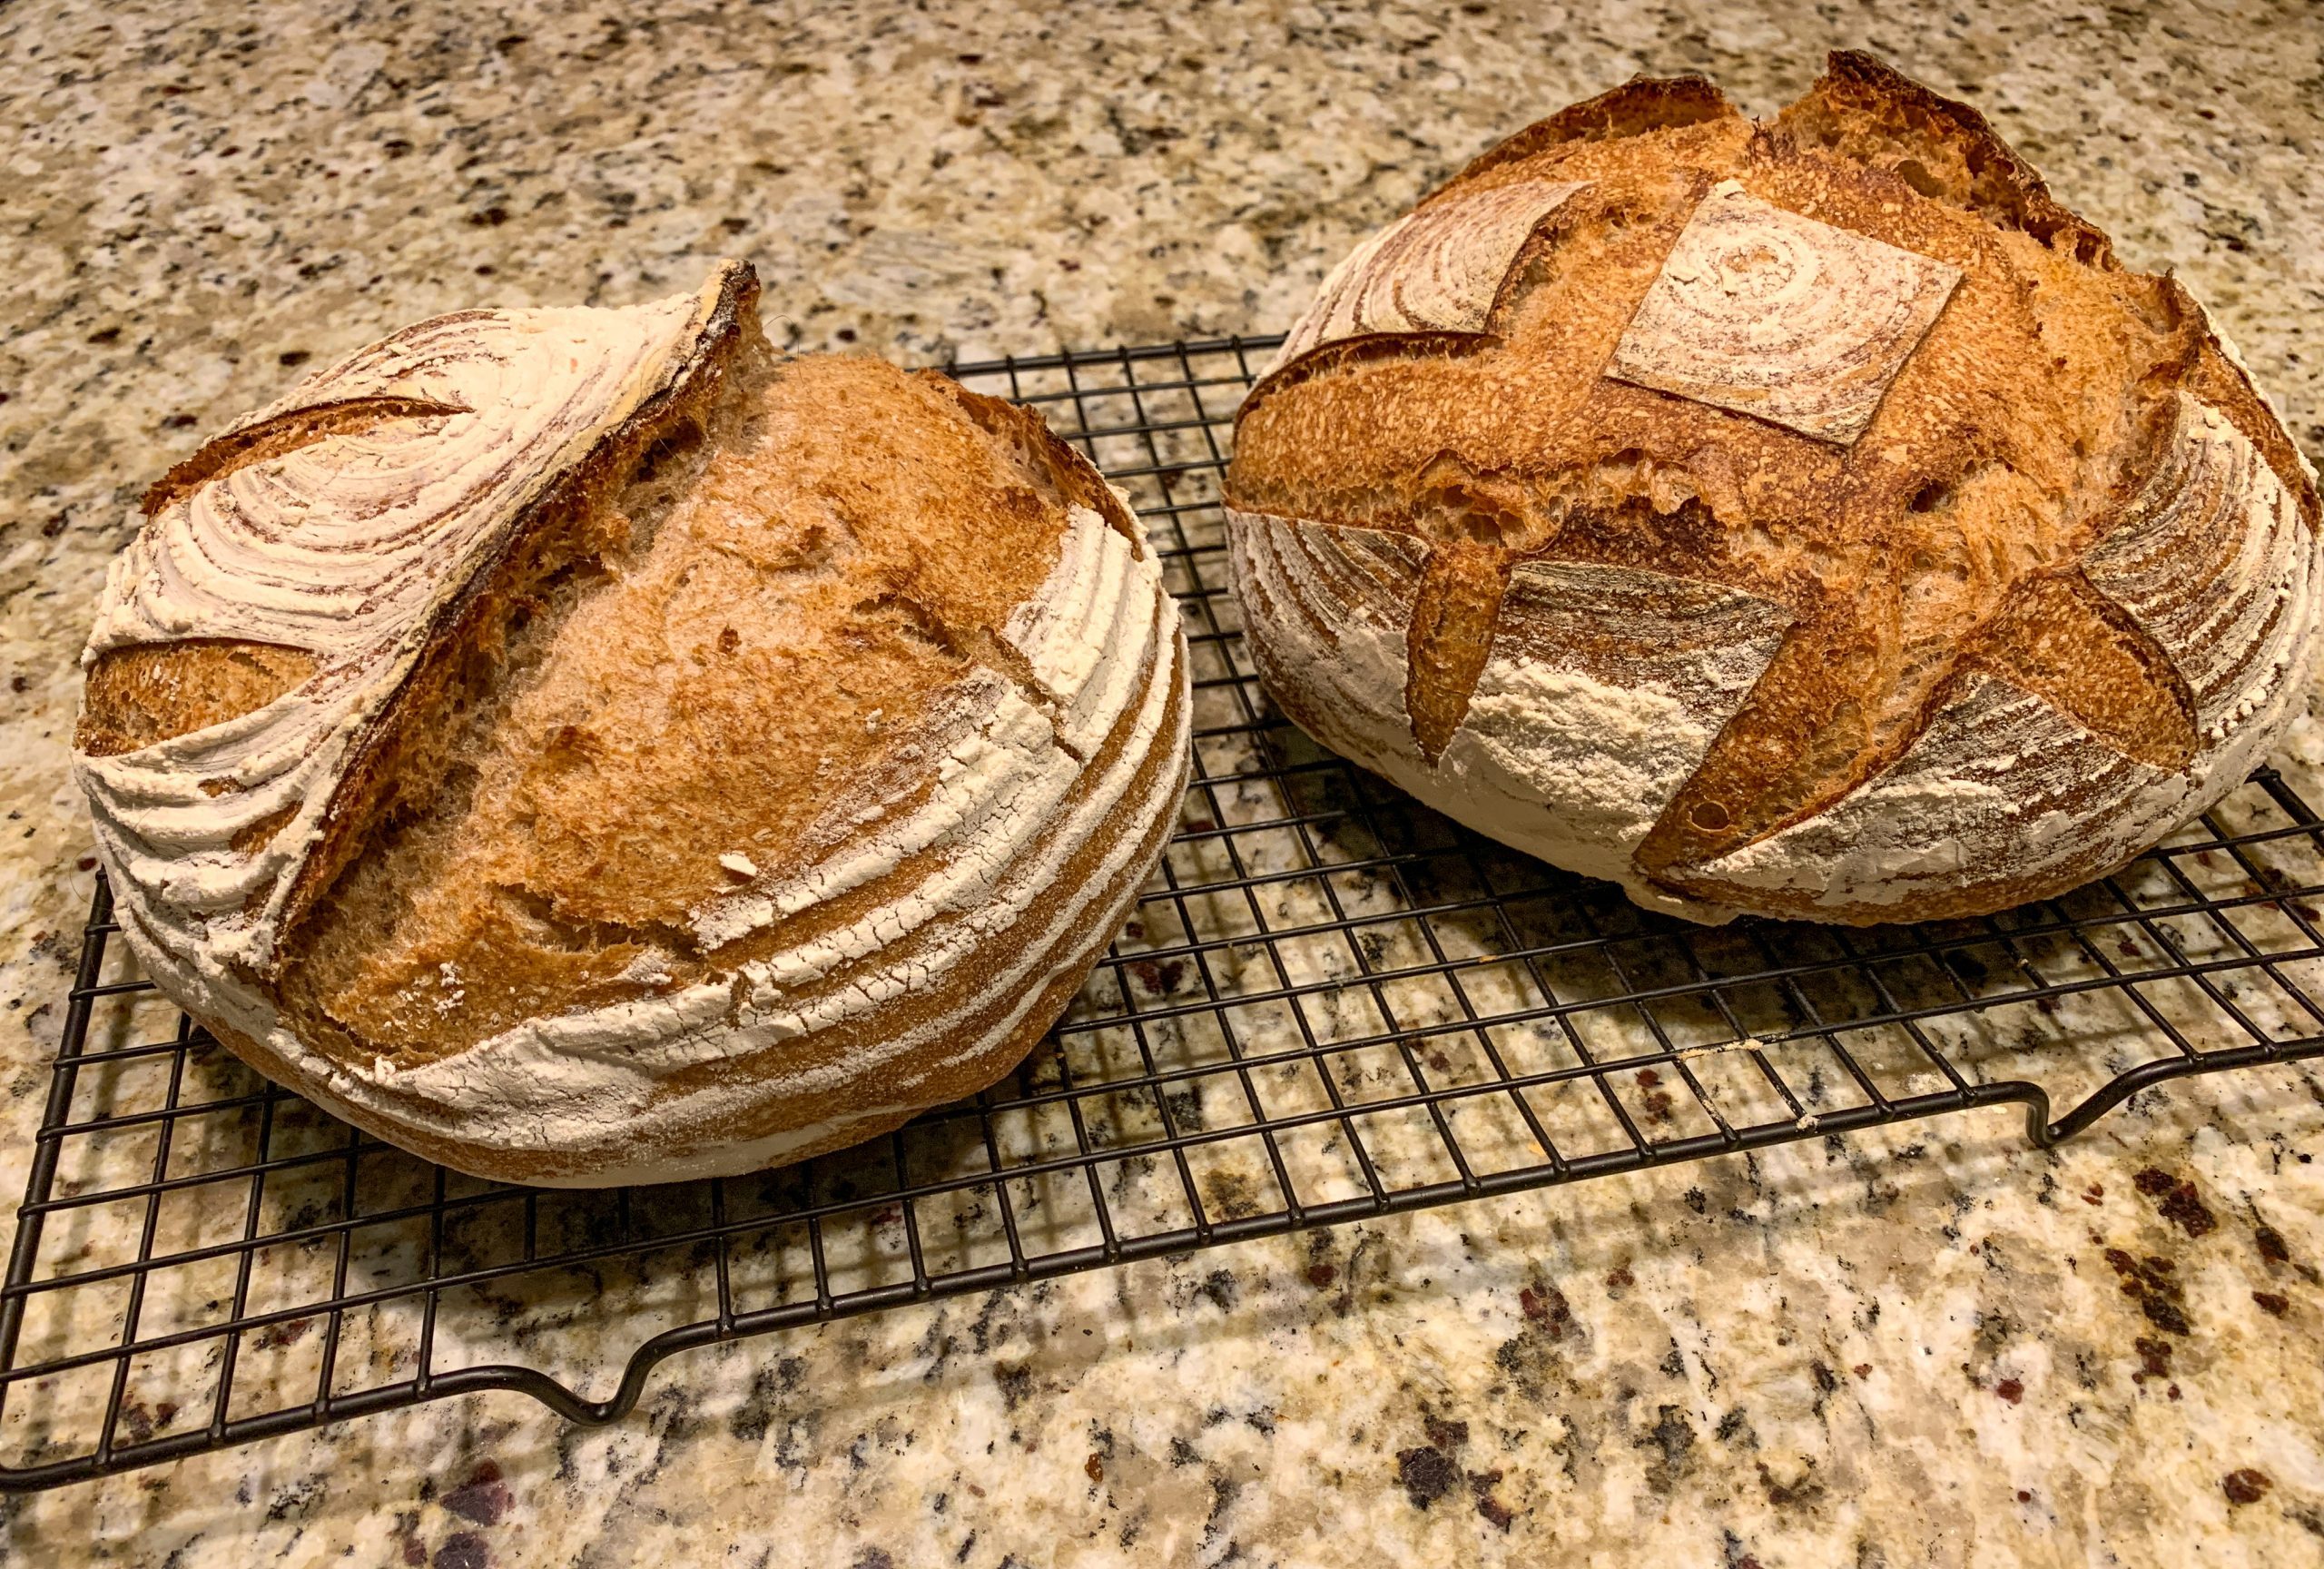
Whole Wheat Sourdough Bread
I’m so excited for this post! Sourdough is making a huge resurgence and lots of people are looking for tips and recipes for using it. Besides being plant-based, it is zero waste and can be whole food and oil-free! No more foil yeast packets needed, just cultivate and use wild yeast floating around our environment.
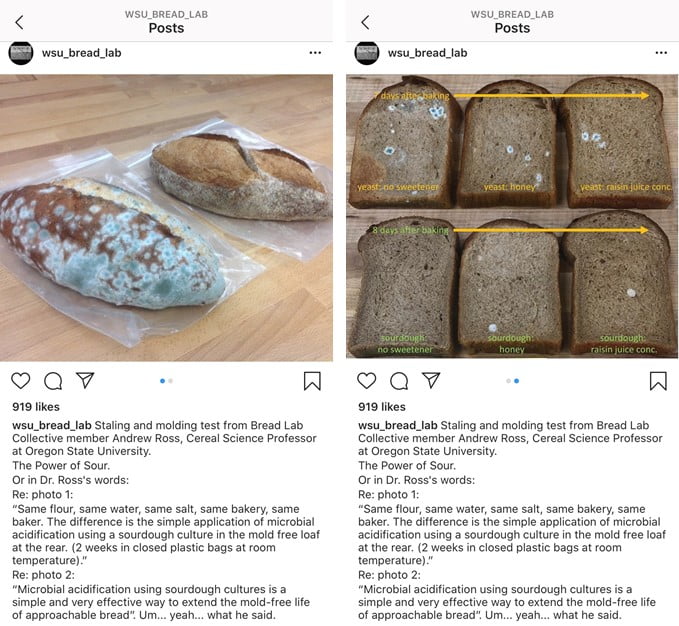
Not only are sourdough breads delicious, the fermentation process makes the grains easier for us to digest and adds a huge depth of flavor. And on that note, sourdough breads are not necessarily sour—that depends on how long you ferment the dough. Sourdough itself, is just the process of using lactobacillus culture and wild yeast to leaven dough. Interestingly, breads made with sourdough resist spoilage and mold for longer periods of time than conventionally yeasted breads. Check out this test done by a professor at Oregon State University, posted on the WSU Bread Lab’s Instagram:
This will be a long post so I can show you and explain the process of making sourdough bread. You will need a sourdough starter, so if you don’t have one yet, you’ll want to either make one (get the instructions from my previous post on how to make a sourdough starter) or get some from someone else’s established starter. You can often get some starter from a Buy Nothing group, or if you live near me, in the Seattle area, I can give you some. There are some you can buy online as well, either wet or dry. I’ve not tried these so I don’t have one to recommend.
This recipe is for a part whole wheat, part all-purpose flour boule, so not entirely whole food. The reason for starting people with this ratio, rather than 100% whole grain, is that it is easier for people to be successful with this blend when starting out. Whole grains contain bran, which is sharp and cuts gluten strands, which can keep you from having a loaf that rises. Furthermore, whole grains ferment rocket-fast, making it difficult for new sourdough bakers to prevent over-fermented doughs. Both of these characteristics can lead to deflated, hard loaves (believe me, I’ve been there and made a lot of bread crumbs with failed bread) so I’m starting you out with a blend so you are successful! This recipe is whole grain, with some not whole grain, so it still has healthy properties, which I’m completely happy serving to my family and friends!
The Process
The first thing to remember is that this is an old, old process. Our great-grandparents baked sourdough bread in wood-fired ovens and in Dutch ovens over campfires. So we can definitely do this! And we really don’t need any fancy new equipment, either. The fanciest I get is a nice scale and a digital food thermometer, but you don’t need a pizza stone, proofing baskets, bowl scrapers, special sourdough starter containers, etc.
What you do need is:
- Sourdough starter
- Whole Wheat Flour
- All-Purpose Flour
- Water
- Salt
- Molasses or Maple Syrup
- A scale, that reads in grams (or you can use a conversion calculator to change to ounces). I love this one, after trying several others.
- A thermometer (In worse case scenario, use warm water, if you don’t have this. You’ll just need to watch your dough more carefully so it’s not under- or overproofed.)
- A big bowl for mixing and fermenting
- Towel for covering
- 2 baskets or medium bowls with towels for proofing
- Large Dutch Oven or even clay baker for baking. I’ve found that this 7¼ quart by Le Crueset is a perfect size.
- Sharp knife or razor blade for slashing
Optional, completely unnecessary:
- Bowl scraper
- Bench scraper
- Bannetons, special bread proofing baskets
- Pizza Stone
- Special bread slashing blade called a lame (pronounced lahm)
What Type of Whole Wheat Flour?
There are lots of different types of whole wheat flour out there, and it can get confusing. You want a whole wheat flour, but NOT whole wheat pastry flour. Whole wheat pastry flour has less protein, so there’s less gluten developed. This is why its used for pastries, things you want light and flaky, like a crust or cookie. We want gluten so that it traps air bubbles, making the dough rise and get airy. Without gluten, there’s nothing to hold air and the bread will be flat!
You’ll also see white whole wheat and red whole wheat. These are just different varieties of wheat and have different amounts of tannins in them, which amounts to differences in flavors. It’s just like tannins in grapes or wine. Imagine white (green) grapes versus red (purple) grapes; white are more mild while red are more flavorful/bitter due to increased tannins. White whole wheat is more mild and red whole wheat has more tannins and more of a “whole wheat” flavor. Red whole wheat is what makes some people not like the flavor of whole wheat bread. So if you are introducing people to whole wheat, start with the more mild white whole wheat.
As I mentioned at the beginning, whole grains ferment faster than refined grains. There’s just a lot more stuff for the wild yeast to feed on. This is important for understanding an upcoming section on water temperature.
Building the Sourdough Starter
I do this the morning I want to make bread. You’re going to make a big sourdough starter, which is often called a levain.
For this recipe, we want 568 grams of ripe 100% hydrated sourdough starter. What does this mean and how do you make it?
A 100% hydration sourdough simply means there is an equal amount of water, by weight, to flour. So half of the 568 grams of sourdough starter is water and half of it is flour.
In the morning, add a couple tablespoons of your sourdough starter to a bowl on a zeroed out scale, it’ll be about 20 grams or so. Subtract that number from the 568 grams of sourdough starter you want and divide in half to determine the amount of water and flour you need to add. For example, 568 grams needed – 20 grams starter = 548 grams ÷ 2 = 274 grams of water and 274 grams of flour. This will make your sourdough a total of 568 grams.
Cover and put in a warm place until it’s ripe. It will at least double in size, get bubbly, and then start to fall. You want to use it right after it doubles, bubbles, and starts developing cracks in the top. This is the point where you’ll move to the next step.
Determine Water Temperature for Making the Dough
This is probably the most mind-bending thing of this whole process. And it doesn’t have to be, you can just use the formula:
312 – (air temp + flour temp + sourdough starter temp + friction temp) = Water temperature
What does this mean? The desired range for fermenting our dough is 75-78°F. The warmer the dough, the faster it ferments. So we’re measuring the water temperature so that we can control the rate of fermentation, making life easier for us. In a hurry, use a warmer dough, but you need to watch it. Want to slow down, use a cooler dough.
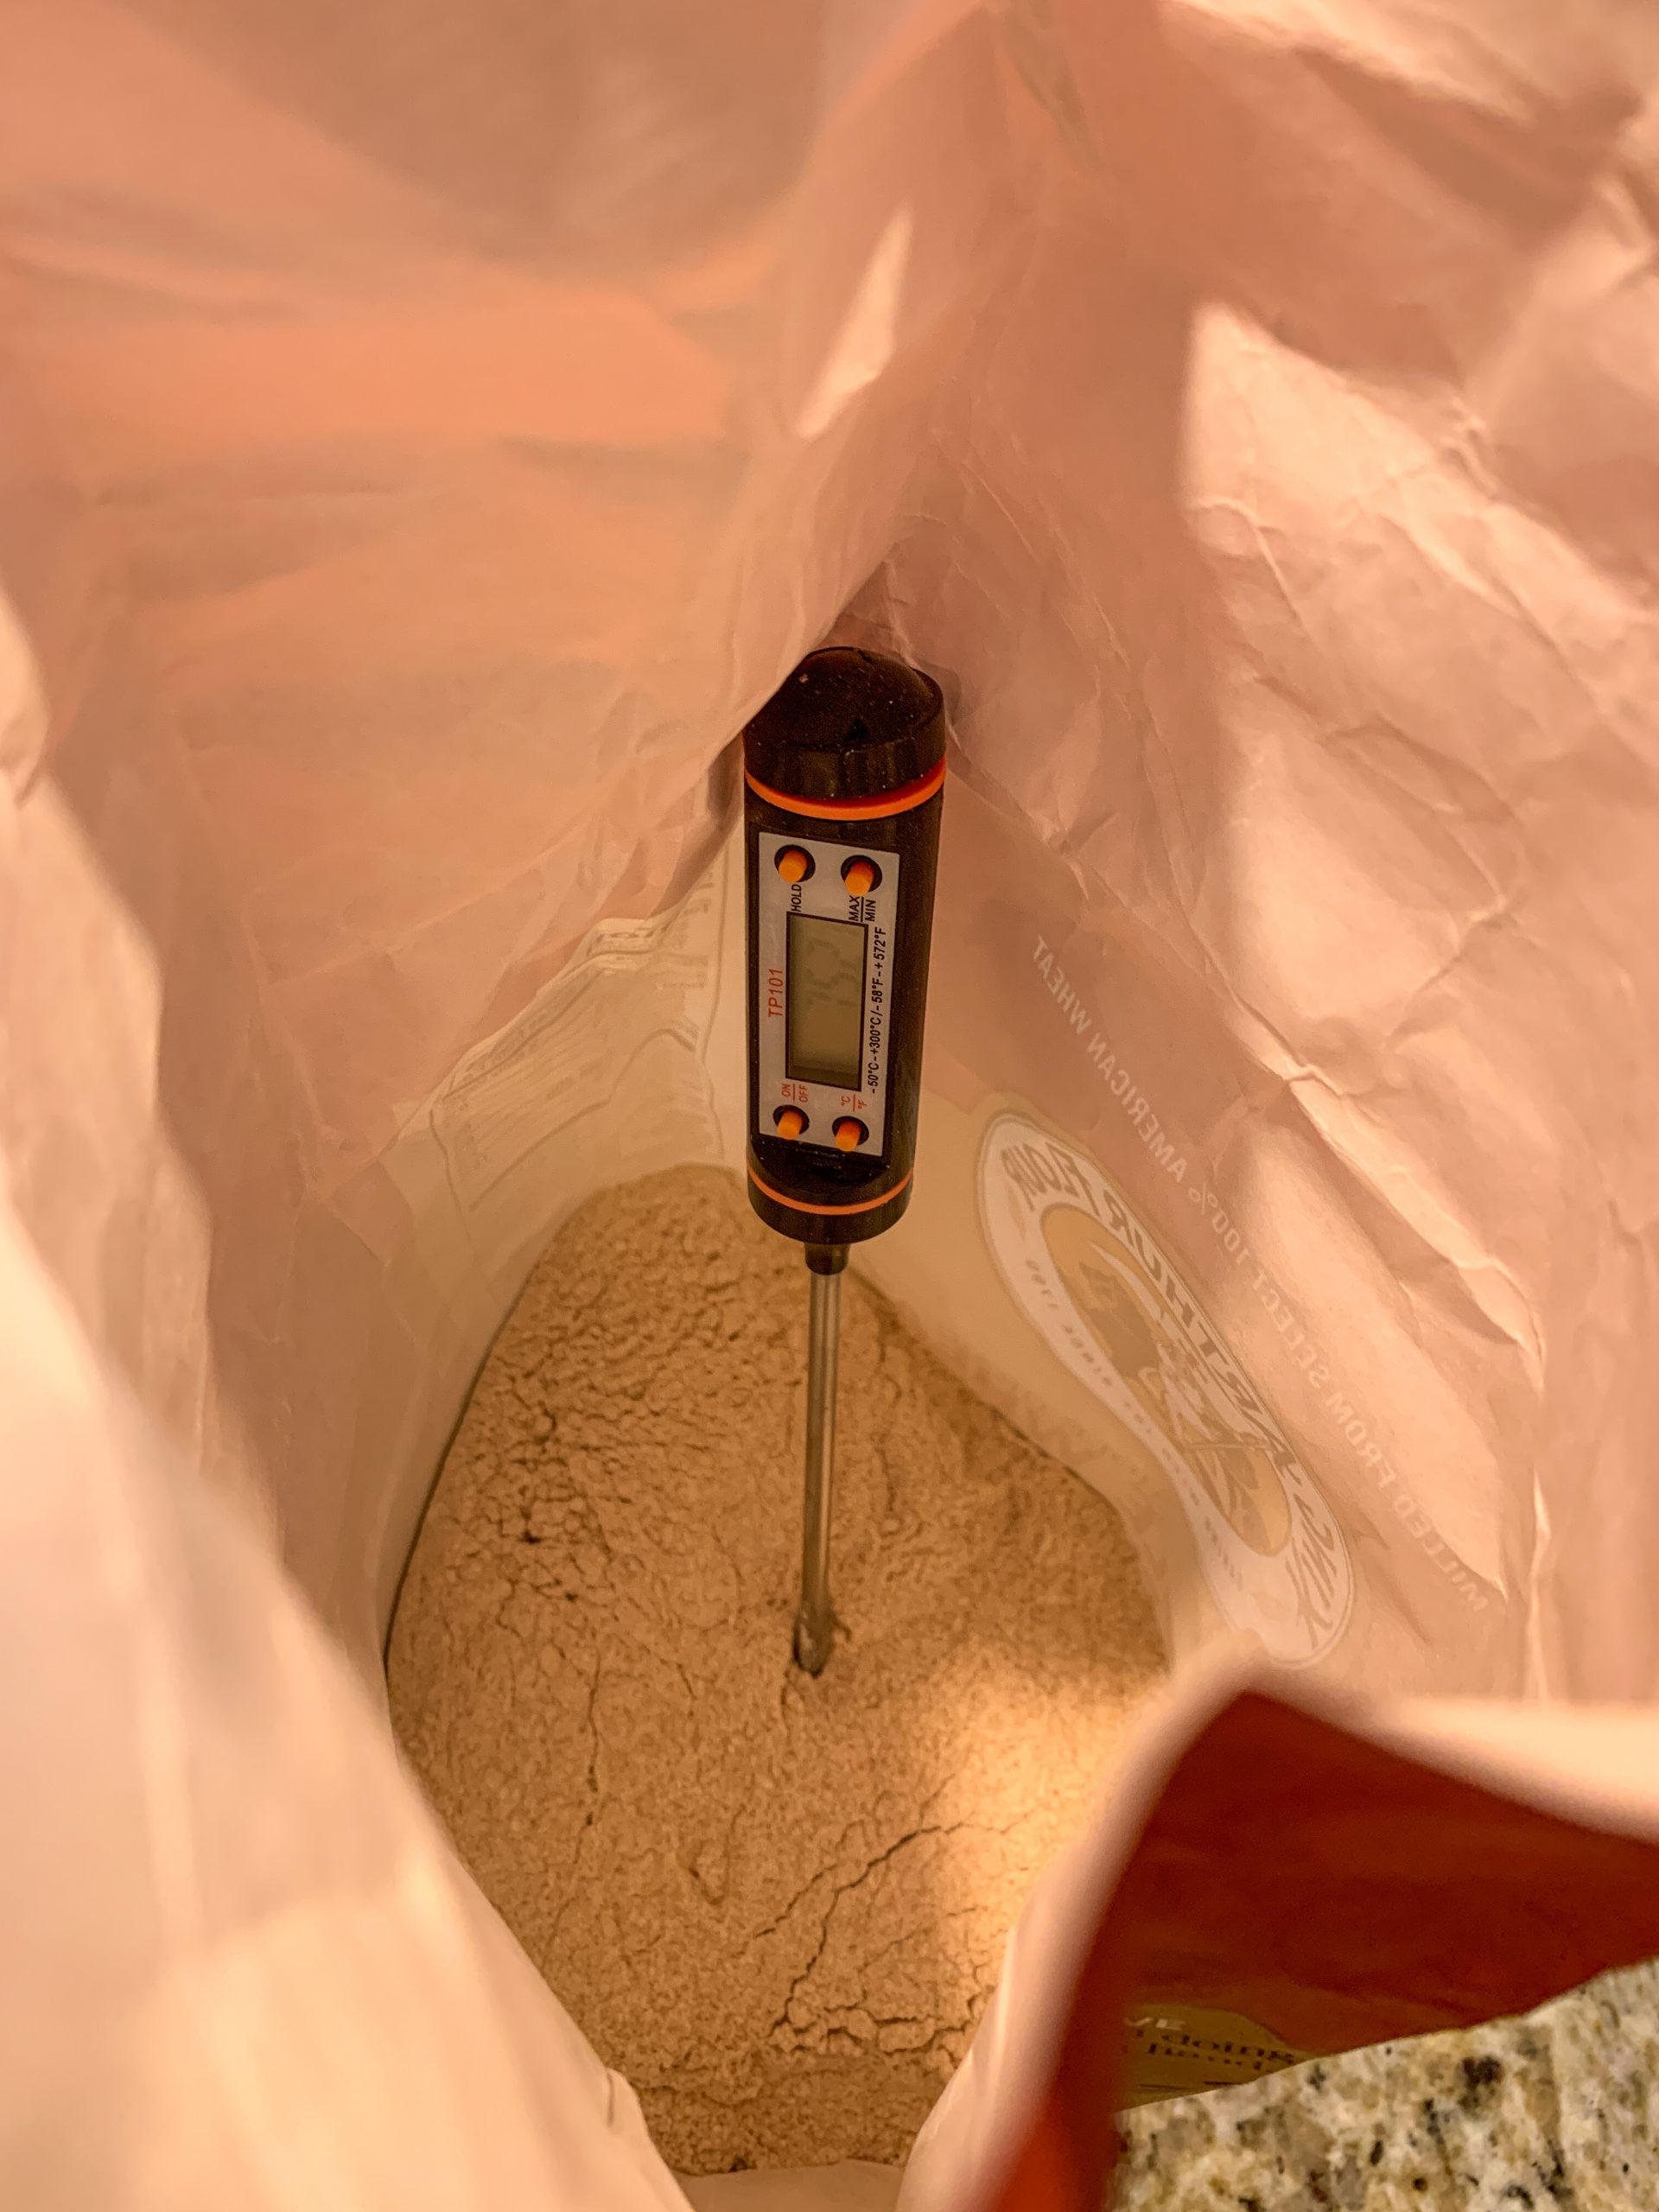
Take the temperature of your room, flour, and sourdough starter. Add these together. For example:
Room temperature: 70 (use what your house thermostat is set at)
Flour temperature: 66
Sourdough temperature: 68
Friction temperature: 0, because we’re kneading by hand. If we were using a mixer with a dough hook, your friction temperature would be 17 (this is the amount of heat the mixer adds to the dough through friction).
70 + 66+ 68 + 0 = 204
Where did the 312 come from? We have four variables and we want an average of 78°
78 x 4 = 312
So now we simply subtract the combined temperatures from desired temperature. This is the water temperature you want. For example:
312 – 204 = 108°F water needed
It’s perfectly ok to just remember the formula: 312 – (air temp + flour temp + sourdough starter temp + friction temp) = Water temperature
Make the Dough
Now put your sourdough in a large bowl. Add 340 grams whole wheat flour, 284 grams all-purpose flour, 18 grams salt, and 28 grams molasses/maple syrup. Pour in almost all of the 368 grams of water you brought to the needed temperature, but reserve some for adjusting the dough in a bit, if necessary. Mix together. You are looking for a wet, sticky dough. Add some of the reserved water if it’s too dry.
Because this has whole grains in it, we need to hydrate the flour before proceeding. Whole grain has bran in it, which is sharp and will cut gluten strands that we want, unless we soak it in water and soften it. The bran will take up any water present in the dough. This is why we want a wet dough, so that there’s enough water for the softening the bran and for hydrating the dough.
Let this wet dough rest in the bowl 15 minutes to hydrate the bran. You’ll notice it’s a lot less wet after resting.
Knead (Slap and Fold)
Because this dough has high hydration, you can’t knead it the typical way we’re used to kneading yeasted breads. It’s so sticky and messy, all it would do would stick you your hands and counters and be a big mess. We have to use a different technique.
Kneading is the process for building gluten in our dough. And we want strong gluten development to trap air bubbles released by the fermentation process so our bread rises. Here is the slap and fold method for kneading a high hydration sourdough. It takes about 5-10 minutes, depending upon the hydration. Don’t add any flour to counter or dough. You want the dough to stick to the counter for the stretch, which helps develop gluten. Any flour added now will just rob your dough of desired hydration, so don’t do it!
Note, I decided to keep the whole video intact, which is 10 minutes, so you can see how the dough progresses, rather than shorten it. I have information in the middle and at the end of the video that is important to kneading and shaping.
Slap & Fold Kneading for High Hydration Sourdough
Uploaded by C. Thompson on 2020-03-30.
Your dough will fairly quickly firm up and eventually become smooth—its pretty remarkable how quickly the gluten starts to form and turn the dough more workable!
You’ll know it’s ready when you push the dough with a floured finger and the indentation springs back out like a doorbell; this is called the Doorbell Test.
There is something out there called a Windowpane Test where you try to stretch a piece of the dough so thin you could see light through it, like a windowpane. However, the doorbell test is easier and the whole grains in this recipe won’t allow the dough to stay together for the windowpane test, it would tear before getting thin enough (remember, sharp bran, even when softened).
Ferment
Now its time to ferment the dough. Form the kneaded dough into a ball and put dough back into mixing bowl. Cover and place in warm location for 2 hours. I simply put the bowl in my oven with just the oven light on, it works as an amazing proofing box! Just remember your dough’s in there and maybe put a little sign on the oven to remind you or others to remove the dough before heating the oven! You’ll ferment the dough for two hours.
After one hour, you’ll do a fold. To do this, scrape the dough from the bowl, onto the counter (no flour). Insert your hand under one side of the dough and pull the dough up and out, stretching it, not breaking it, and flop that stretched section onto the top of the dough. Turn 90-degrees and repeat. Do this four times so you’ve folded all four sides (north, south, east, and west). Then insert a bench scraper underneath and flop the whole dough ball over, back into the bowl. Cover back up and continue fermentation another hour.
Pre-Shape
Scrape your fermented dough out of the bowl and onto an un-floured counter. Divide it into two loaves and shape into boules. Use the tensioning technique I shared in at the end of the kneading video. You want the surface of the dough to have tension to hold it’s shape. Leave these shaped boules on the counter, covered with towel, 20 minutes. Don’t worry, they will sag and kind of pool by the end of this 20 minutes, you haven’t done anything wrong!
Prepare your proofing baskets or bowls. Sprinkle banneton with all-purpose flour or line a medium-sized bowl or basket with a towel and sprinkle with flour with a fine sieve. Note, you really don’t need anything fancy here. A few months ago my mom and I went to the beach and I forgot my proofing basket. We went to Goodwill and bought an old Easter basket for 25¢, lined it with a towel, floured it, and it worked beautifully!
Proof
Shape and tension the boules again. Scoop the boule up from the counter with a bench scraper or just your hands and place top-side down in prepared bannetons, baskets, or bowls. You can grab the bottom of the boule to place it in the proofing basket/bowl—the top of the dough in the proofing basket will be the bottom of your finished loaf, so don’t worry if it looks messed up by your hand.

Pre-fermented dough put into bowl for proofing. Notice you can see where I grabbed it. No worries, this will be on the bottom of the loaf later.
Now it’s time to proof the boule. Proofing time and location depends on when you’re going to bake your bread.
- If baking the same day, cover and place in a warm spot until risen and jiggly, like a bowl of jelly, about 1½-2 hours.
Here’s what you’re looking for in the jiggle:
Checking proof of dough
Uploaded by C. Thompson on 2020-03-30.
- If baking the next day, cover and place in the refrigerator overnight. In the morning, you’ll pull the basket/bowl out of the refrigerator, and go right to the next step of baking. You’ll bake the loaf right from cold.
Why bake now or later? If you want fresh bread with dinner, bake now. If you want fresh bread for breakfast, bake in the morning. However, there’s another reason proofing in the refrigerator (called a retarded proof)—flavor! Bread proofed overnight in the refrigerator will have more of a sourdough flavor with a longer time to ferment. We prefer the bread proofed overnight in the refrigerator in our house.
Baking
These are baked in a hot, hot, hot oven. Whether you’ve proofed overnight or are baking same day, you’ll be baking at 500°F.
Your oven, or whether you have a pizza stone or not, determines the method you use for baking your boule. You want a steamy environment for the best crust on your boule. Electric ovens are generally well-sealed and will hold in steam, but gas ovens are vented so they release carbon dioxide and monoxide created when gas is burned. This venting in gas ovens also vents out steam, which we really want for our bread, so we have to use a different technique.
Electric Oven
If using an electric oven, bake on pizza stone, preheated from cold to 500°. If you don’t have a pizza stone, use the gas oven method described next. Position the pizza stone in center of oven with another rack below pizza stone to hold a cast iron pan. Bring some water to a boil in a kettle or in the microwave.

To turn the dough out of the proofing bowl or basket, place a sheet of parchment over the proofing container, then a cookie sheet. Gently flip the whole thing over, remove the bowl or basket, and carefully peel the floured towel from the proofed dough.
Carefully turn the risen boule out onto parchment, or a cookie sheet or pizza peel. Be gentle with this so you don’t deflate your beautiful loaf you’ve worked so hard to rise!
Now you’ll slash top with a razor blade or sharp knife. We slash the dough for more than just a pretty decoration, its to control where the bread splits while it bakes. While baking, the bread will rapidly rise at the beginning as air quickly builds in the dough from the rapid growth of yeast and conversion of water into steam. The outside of the dough cannot accommodate this expansion without splitting. To make a prettier loaf, we make a slash or slashes in the dough where we want the bread to split. There’s no problem with not slashing the dough beforehand, you just don’t know where the split will occur and it may prevent your loaf from rising as well until it naturally splits and releases.
Use a sharp, clean razor blade to make your slash. You can buy a special tool, called a lame, which is a stick that holds the razor blade for more agility and safety. There are hundreds of designs for slashing your loaves. You can be as simple or complex as you want. However, you do want to be quick about it and get your loaf into the oven as soon as you can after slashing as the loaf can start to deflate a bit after being cut, so keep that in consideration. I use a simple single slash, like a long C, a plus-sign, or pound-sign most often. Here are some more ideas for slashing patterns from King Arthur Flour.
Slide the dough onto the heated stone. Pour 1/2 cup of boiling water into a cast iron pan and put it on the rack beneath pizza stone (water will evaporate out in 15 minutes).
Bake 500° for 15 minutes, then reduce heat to 400° and bake 20 minutes more, until crusty and golden. Remove from oven and cool.
Gas Oven
If using a gas oven or don’t have a pizza stone, place a large Dutch oven with lid on in cold oven and preheat to 500°.
Turn your risen boule out onto parchment. Slash top as desired, as described above in the electric oven section.
Carefully remove the hot lid from Dutch oven and use the parchment paper to lower the boule into the pot. You’ll bake right on that parchment paper in the Dutch oven. Put the lid back on. Bake at 500° for 15 minutes. Remove lid and check. If you see color on the top of the boule, keep the lid off, reduce heat to 400° and bake 20 minutes more, until crusty and golden. If no color yet, bake 5 minutes longer with lid on, then remove lid, reduce heat to 400° and bake 15-20 minutes longer, until crusty and golden. Remove from oven and cool.
The first reveal!
Uploaded by C. Thompson on 2020-03-30.
Cool and Wait!
This is the hardest part! I have to ban Alan from the kitchen at this point because all he wants to do is to grab a knife and cut into the bread. But this is the worst time to cut the loaf—its actually still baking. Cutting into the boule now may give you a gummy loaf. Let it finish baking and wait until it’s cooled down to touch before slicing.
Storing Your Bread
As one of my instructors at the King Arthur Baking School at the Bread Lab advised, sourdough bread has it’s own Tupperware. That golden crust, baked with steam, will keep your bread fresh for days and days, unwrapped. In fact, it’s why you see unwrapped heritage breads stacked behind bakery counters, that crust is it’s own protection. After the loaves are cool, I put them in fabric bags I made from sewing up old worn out tea towels, and that works great. This keeps them clean but doesn’t hold moisture on the crust. I’ve also frozen my loaves in these fabric bags, no problem.
After slicing, I do put the loaves in containers, to keep the slices from drying out. I typically use metal cookie tins for this, because they’re a great size and freezer-safe as well.
Don’t let these steps scare you. Remember, people baked this way during wagon trains. It looks long and complicated only because I shared a lot of information in each step. But you can do this, I assure you!! The big keys are making sure you have a sourdough starter that is mature and ready to bake with, hydrating the whole grain flour so the bran doesn’t cut your gluten, knowing how to knead a wet dough, and how to bake it off in the oven you have.
Give it a try, and show me your loaves!!
Whole Wheat Sourdough Boule
Ingredients
- 568 grams Ripe Sourdough Starter Check out this post to make a sourdough starter.
- 340 grams Whole Wheat Flour white or red whole wheat, your choice
- 284 grams All-Purpose Flour
- 368 grams water temperature to be determined
- 18 grams salt
- 28 grams molasses or maple syrup
Instructions
Determine Water Temperature
- Take the temperature of your room, flour, and sourdough starter. Add these together. For example:Room temperature: 70Flour temperature: 66Sourdough temperature: 68Friction temperature: 0, because we're kneading by hand= 204
- You want your combined dough to be in a range of 75-78 degrees (75 degrees ferments slower, 78 degrees faster). Take your desired temperature and multiply by 4 (because we have four variables, room, flour, sourdough, and friction temps). For example:78 x 4 = 312
- Subtract combined temperatures from desired temperature. This is the water temperature you want. For example:312 - 204 = 108°F water needed
Make Dough
- Put sourdough starter in a large bowl. Add flours, salt, and molasses/maple syrup. Pour in almost all the water, but reserve some for adjusting the dough in a bit, if necessary.
- Mix together. You are looking for a wet, sticky dough. Add some of the reserved water if it's too dry. Let it rest in the bowl 15 minutes to hydrate the bran.
Knead
- Use slap and fold method to knead the dough and develop the gluten. about 5-10 minutes. Do not add any flour to counter or dough. It should firm up and become smooth. Form into a ball.
Ferment
- Put dough back into mixing bowl. Cover and place in warm location for 2 hours.
- After 1 hour, do a fold. Cover and continue fermentation.
Pre-Shape
- Divide the dough into two loaves. Shape into boules.
- Leave on counter, covered with towel, 20 minutes.
- Prepare proofing basket or bowl. Sprinkle banneton with AP flour or line a medium-sized bowl or basket with a towel and sprinkle with AP flour.
Proof
- Shape into boules. Place them in prepared bannetons, baskets, or bowls.
- If baking the same day, cover and place in a warm spot until risen and jiggly, about 1½-2 hours.
- If baking the next day, cover and place in the refrigerator overnight.
Baking
- Preheat oven to 500°F
- If using an electric oven, bake on pizza stone, preheated to 500°. (If don't have a pizza stone, use gas oven method)Position pizza stone in center of oven. Position another rack below pizza stone to hold a cast iron pan.Bring some water to a boil. Turn risen boule out onto parchment, or a cookie sheet or pizza peel with a slight amount of flour to keep it from sticking. Slash top as desired.Slide dough onto heated stone. Pour 1/2 cup boiling water into cast iron pan and put on rack beneath pizza stone (water will evaporate out in 15 minutes).Bake 500° for 15 minutes, then reduce heat to 400° and bake 20 minutes more, until crusty and golden. Remove from oven and cool.
- If using a gas oven or don't have a pizza stone, place Dutch oven with lid on in cold oven and preheat to 500°. Turn risen boule out onto parchment . Slash top as desired.Carefully remove hot lid from Dutch oven and use parchment paper to move boule into the pot. Put lid back on. Bake 500° for 15 minutes. Remove lid and check. If you see color on the top of the boule, keep lid off, reduce heat to 400° and bake 20 minutes more, until crusty and golden. If no color yet, bake 5 minutes longer with lid on, then remove lid, reduce heat to 400° and bake 15-20 minutes longer, until crusty and golden.Remove from oven and cool.
Do you like this post? Please share....
[mashshare]
If you liked this post, you might like one of these:
Categories:
Tags:

[Trī-māz-ing]
Cindy wants you to be Trimazing—three times better than amazing! After improving her health and fitness through plant-based nutrition, losing 60 pounds and becoming an adult-onset athlete, she retired from her 20-year firefighting career to help people just like you. She works with people and organizations so they can reach their health and wellness goals.
Cindy Thompson is a national board-certified Health and Wellness Coach, Lifestyle Medicine Coach, Master Vegan Lifestyle Coach and Educator, Fitness Nutrition Specialist, Behavior Change Specialist, and Fit2Thrive Firefighter Peer Fitness Trainer. She is a Food for Life Instructor with the Physicians Committee for Responsible Medicine, Rouxbe Plant-Based Professional, and Harvard Medical School Culinary Coach, teaching people how to prepare delicious, satisfying, and health-promoting meals.
She provides health and lifestyle coaching at Trimazing! Health & Lifestyle Coaching. Cindy can be reached at info@trimazing.com.
Subscribe to the Trimazing Blog
Receive occasional blog posts in your email inbox.
Subscribe to the Trimazing Blog
Receive occasional blog posts in your email inbox.

