In the Gutter—Vertical Gardening
If you’ve been following my Instagram or Facebook feed the last couple of weeks you’ve probably seen glimpses of my gutter garden as I’ve been posting updates on the robin family nesting there.
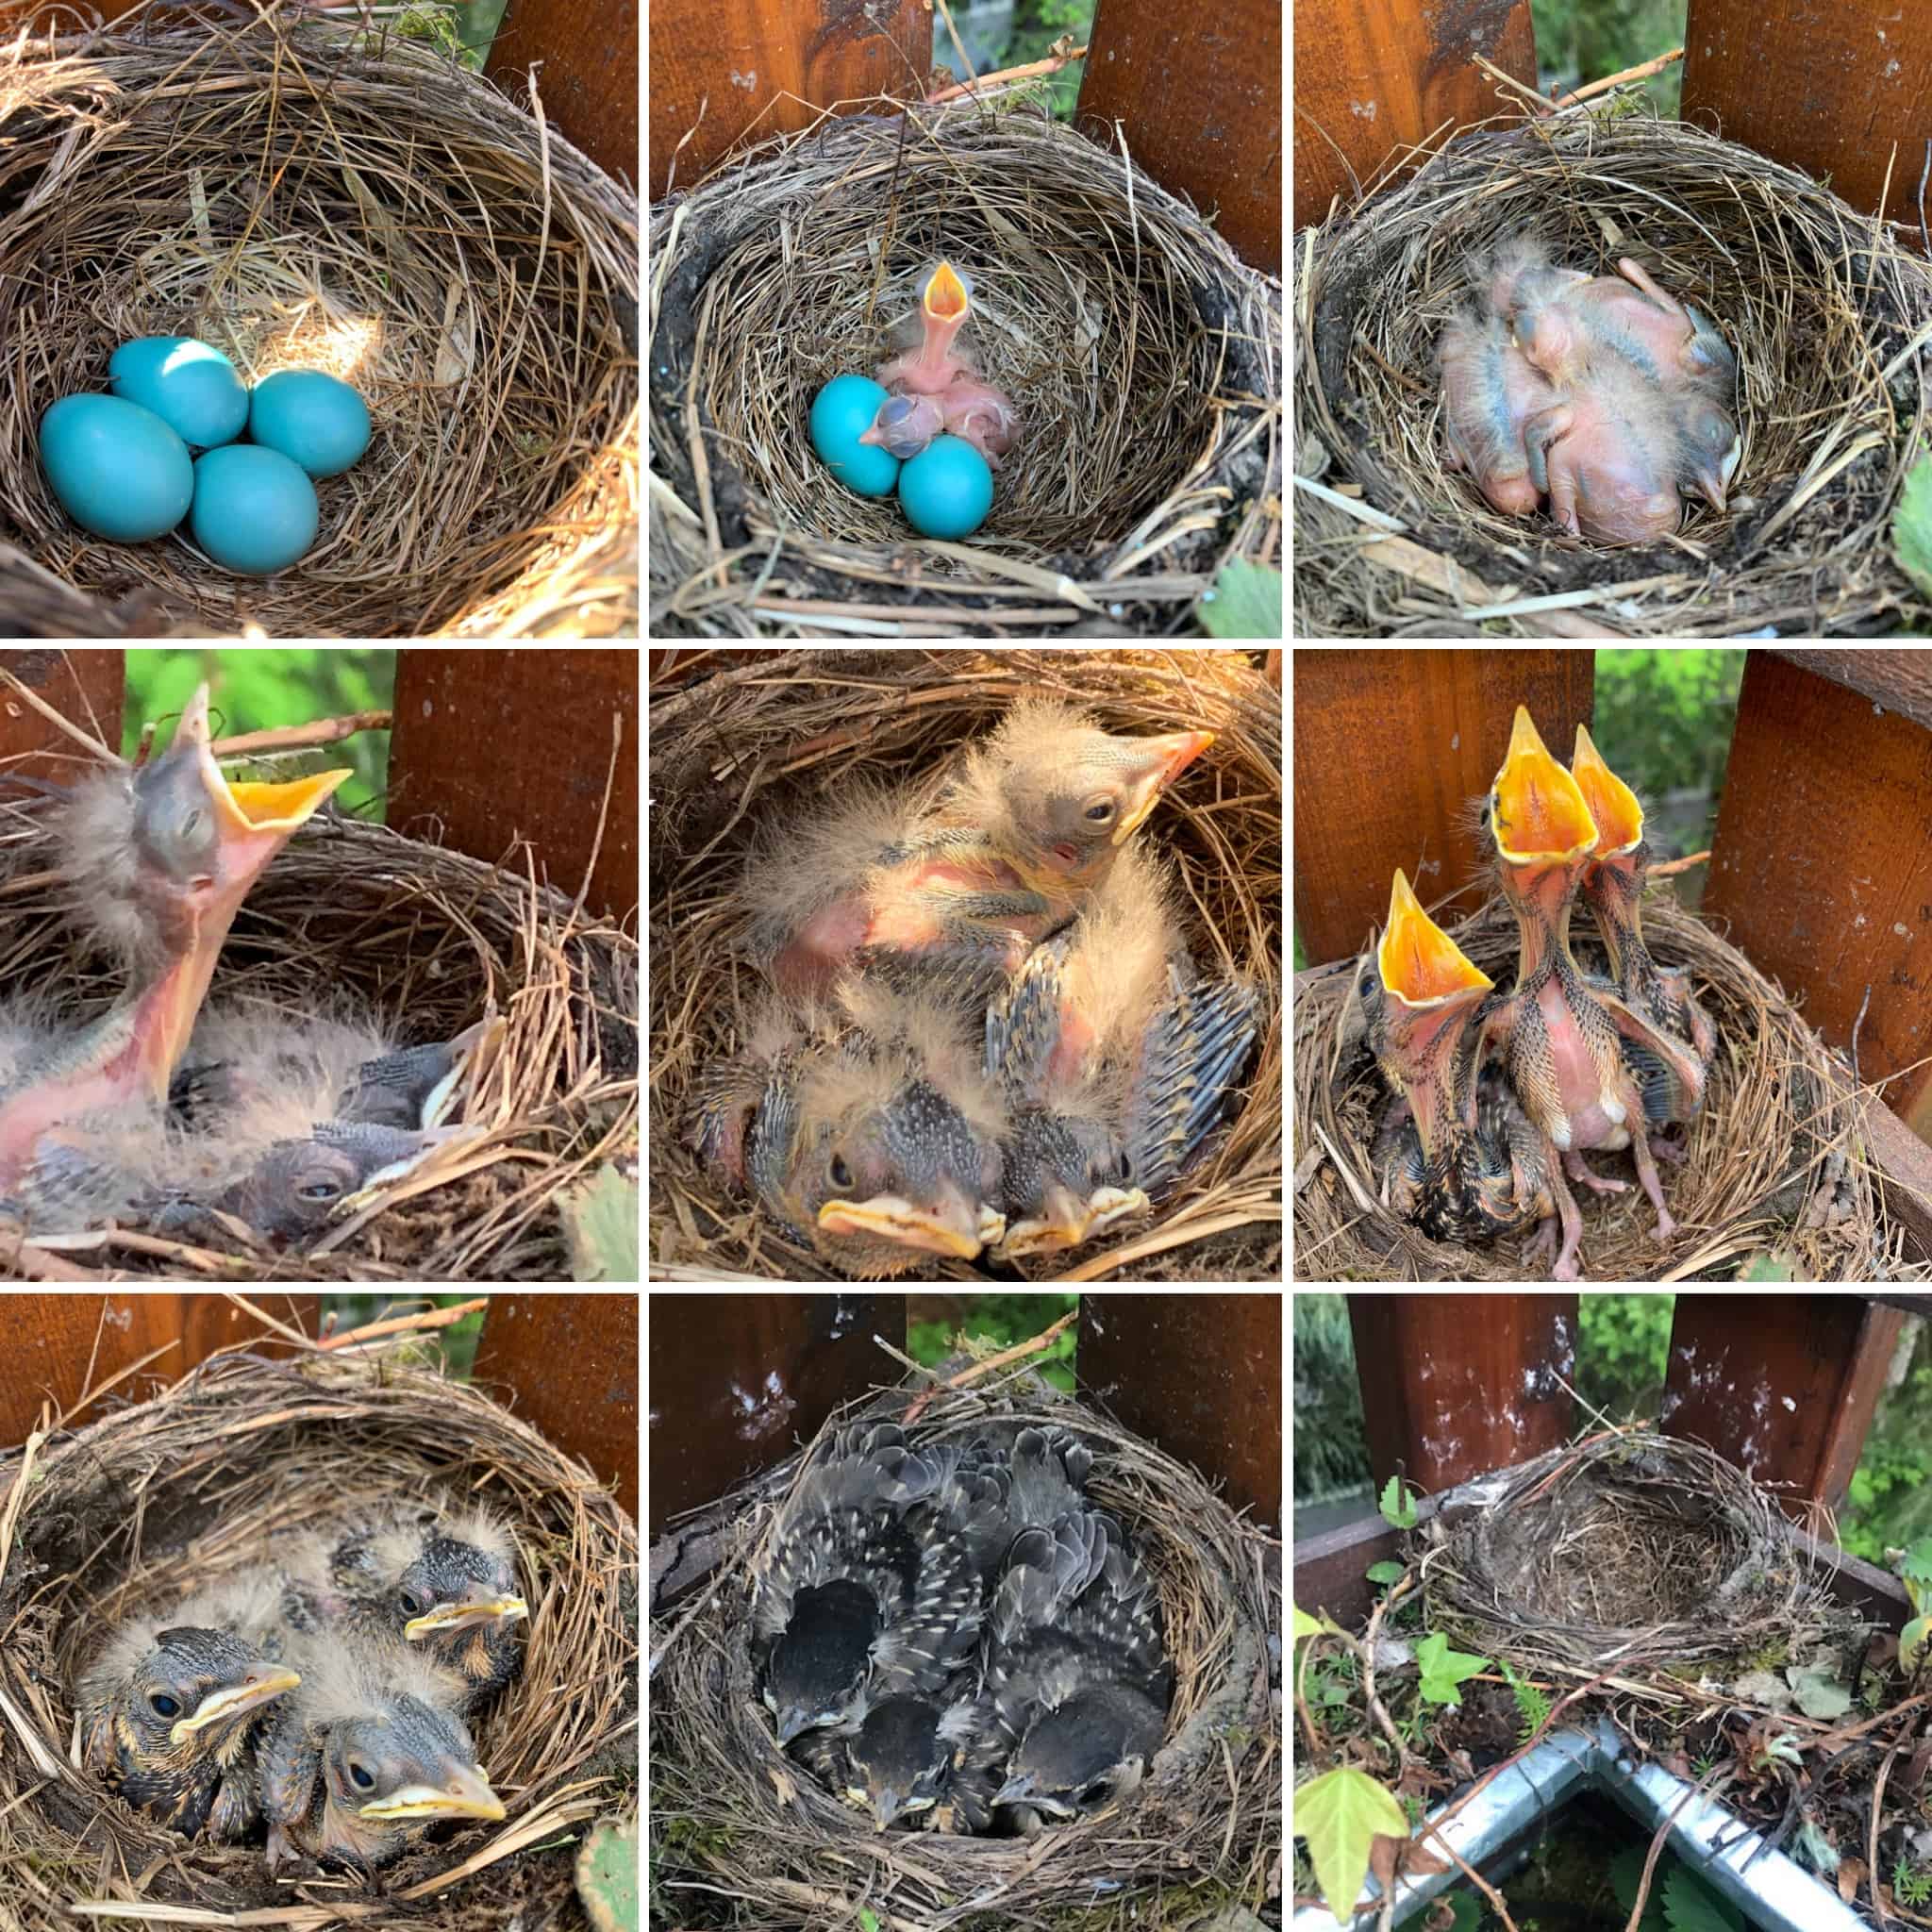
Some notable days in the development of the three baby robins in my gutter garden.
I had lots and lots of questions about the gutter garden and requests for more photos of that, so today I’m going over how I made my gutter garden and some information on growing vertical gardens.
When we moved into our house a couple of years ago, Alan walked out onto the back patio off the kitchen and said, “We’ll never use this space.” We don’t have super close neighbors, but this deck overlooks one and is in direct line-of-sight of their kitchen window, so no privacy for them or us. It’s true, it wasn’t really a comfortable space. We needed a privacy wall and after some brainstorming, I came up with the idea of a vertical garden.
My dilemma was how to construct it as I didn’t want to rebuild the deck. I was stymied until inspiration struck while wandering through one of my favorite gardening centers, Molbak’s in Woodinville, Washington, and saw the dividers they’d made to separate areas for patio furniture designs. We loved the circular galvanized steel planters but they were $75 each, wayyy over my budget! But after staring at it for a while, it dawned on me that gutters come in galvanized steel and I could run them along each horizontal board for the same effect with more planting area and a lot less money!

Inspiration at Molbak’s!
Here is the design I came up with when I got home! I only needed it to be one-sided and could construct with 2x4s and fence boards.
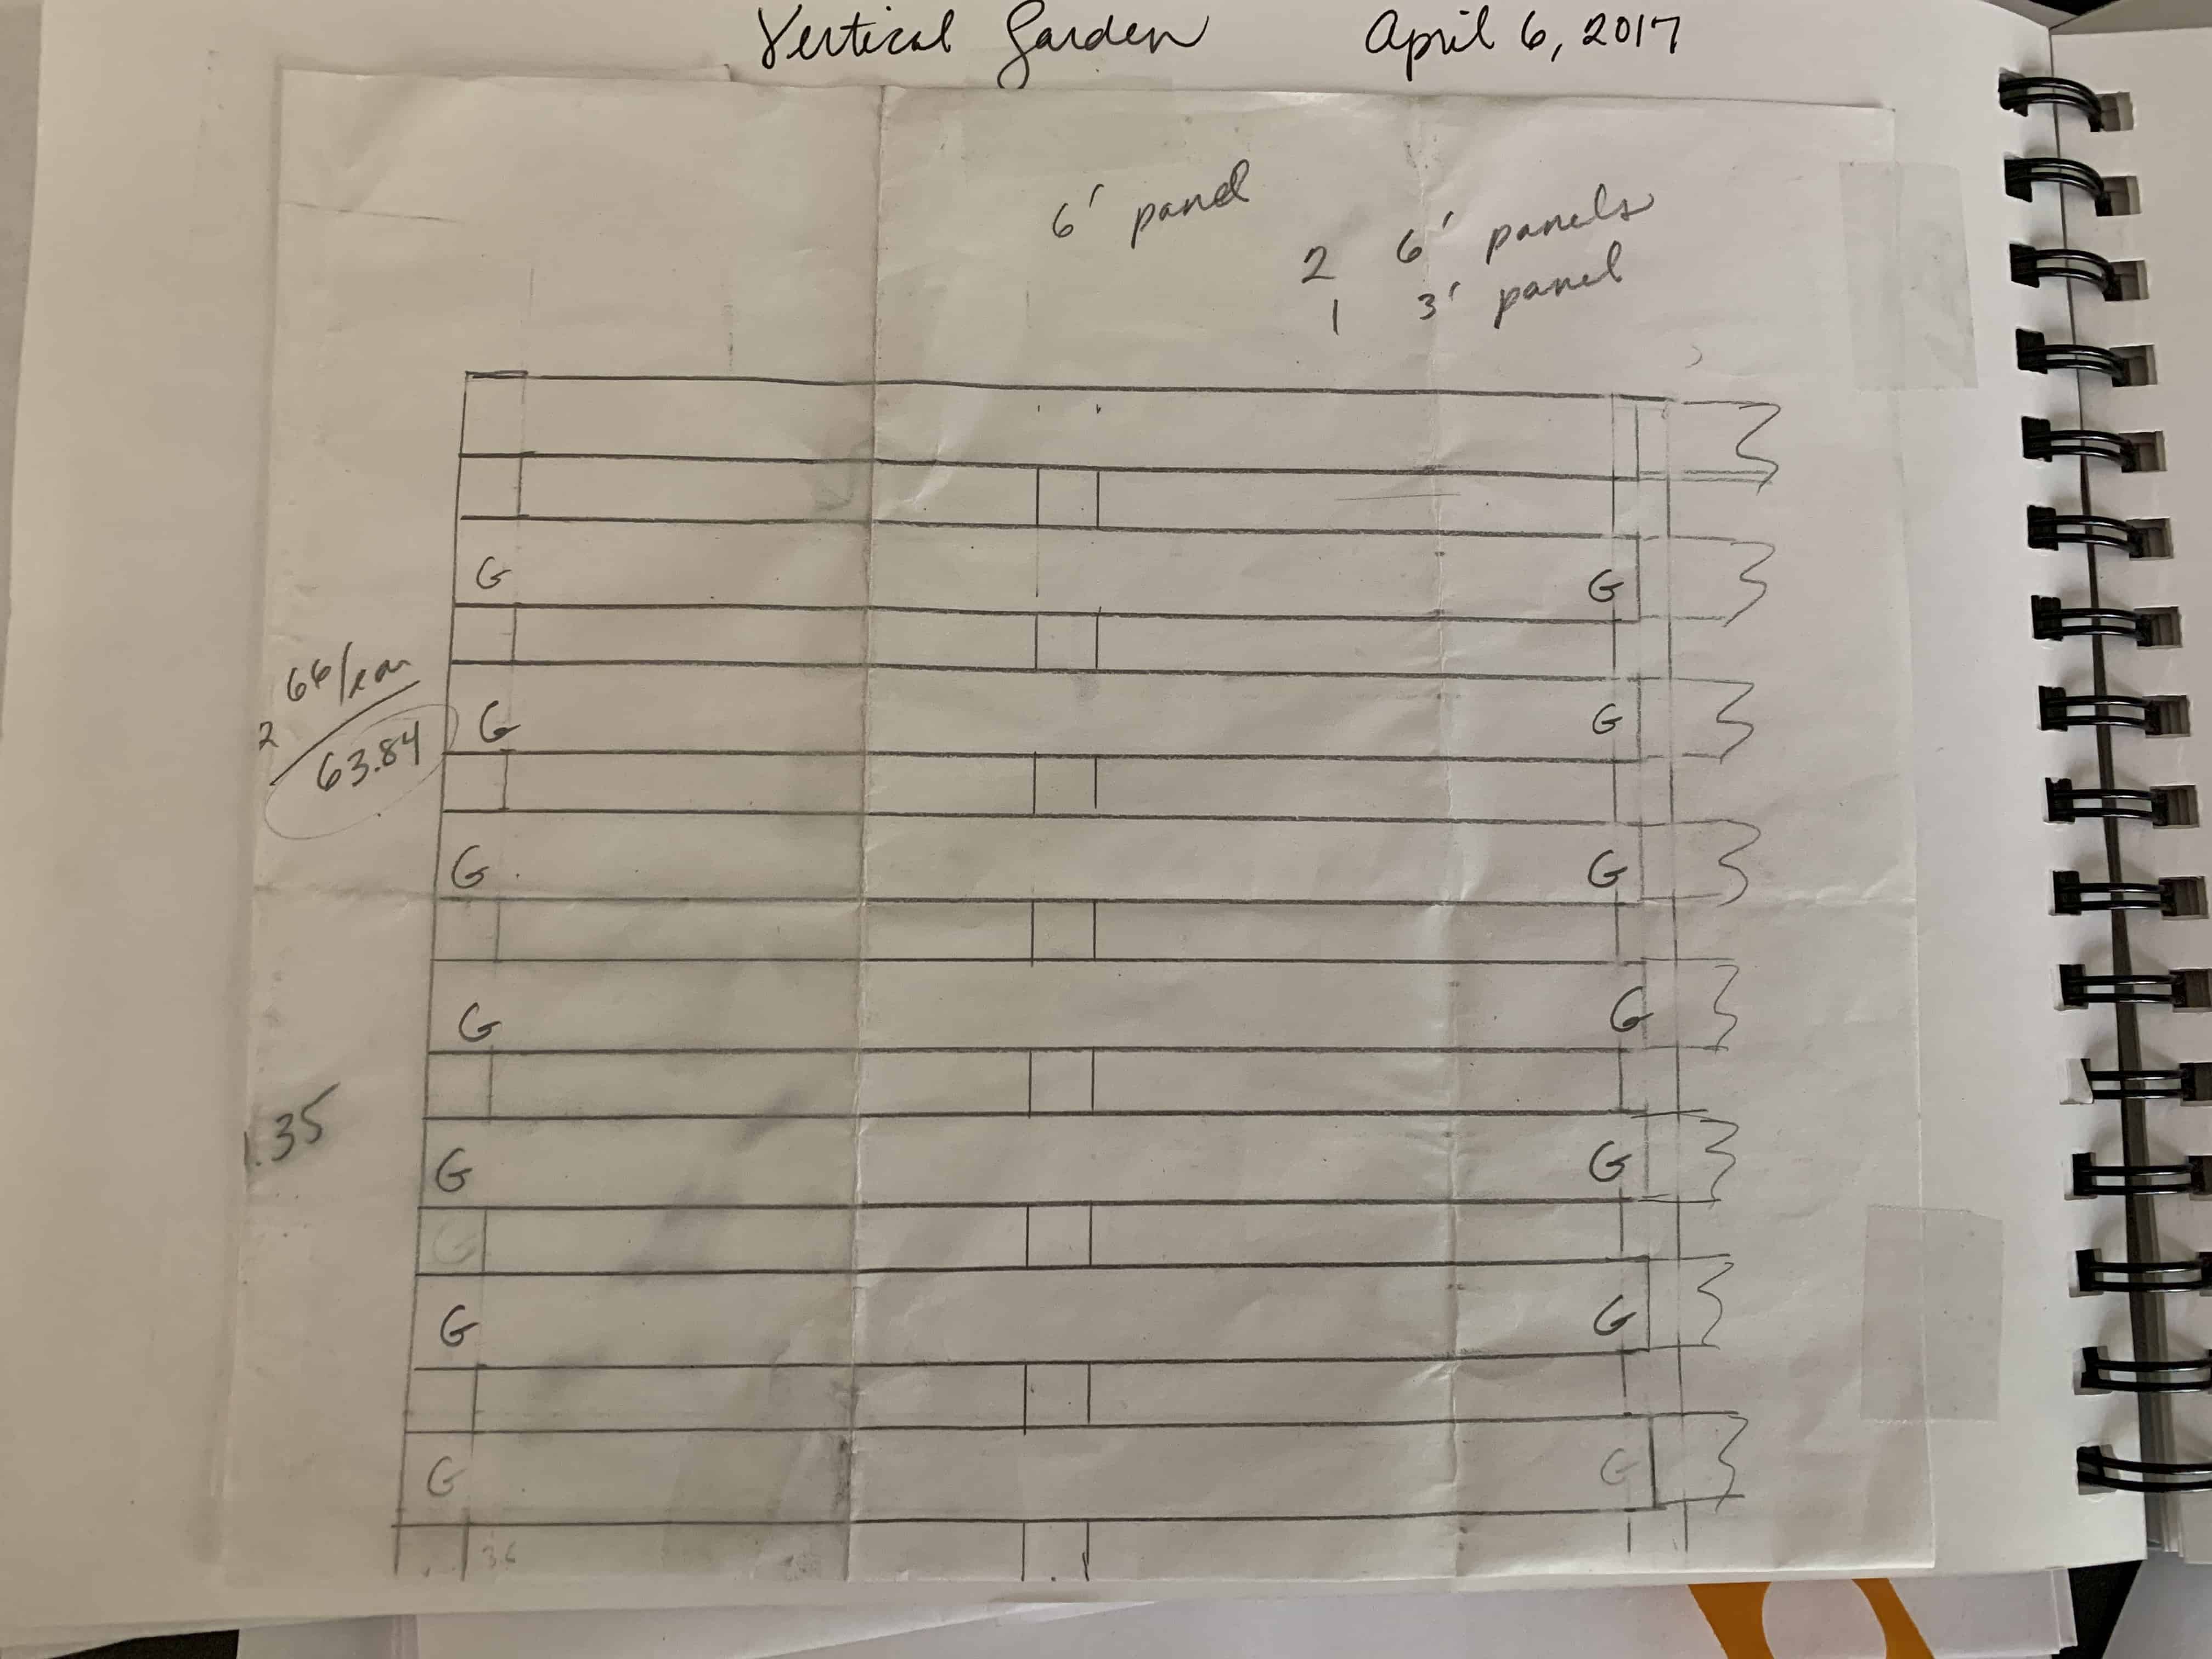
Design drawing from my gardening journal (everyone should keep a gardening journal, they’re so handy!)
We had a couple cedar 2×2’s, 2×4’s, cedar fence posts, screws, nails, and stain already, I just bought a few more so I’d have enough. I stained the wood prior to building because I wasn’t going to have access to the back side along the railing after it was built. The 2×4’s are 6-feet tall and are attached to the 4×4 posts of the deck railing and to the corner of the house for stability. I used 2×2’s and shims to plumb out the 2×4’s as the top rail and front face of balusters are not flush. The fence boards are spaced horizontally 3-1/2 inches apart (I used a chunk of 2×4 as a spacer) and nailed on with galvinized fence nails.
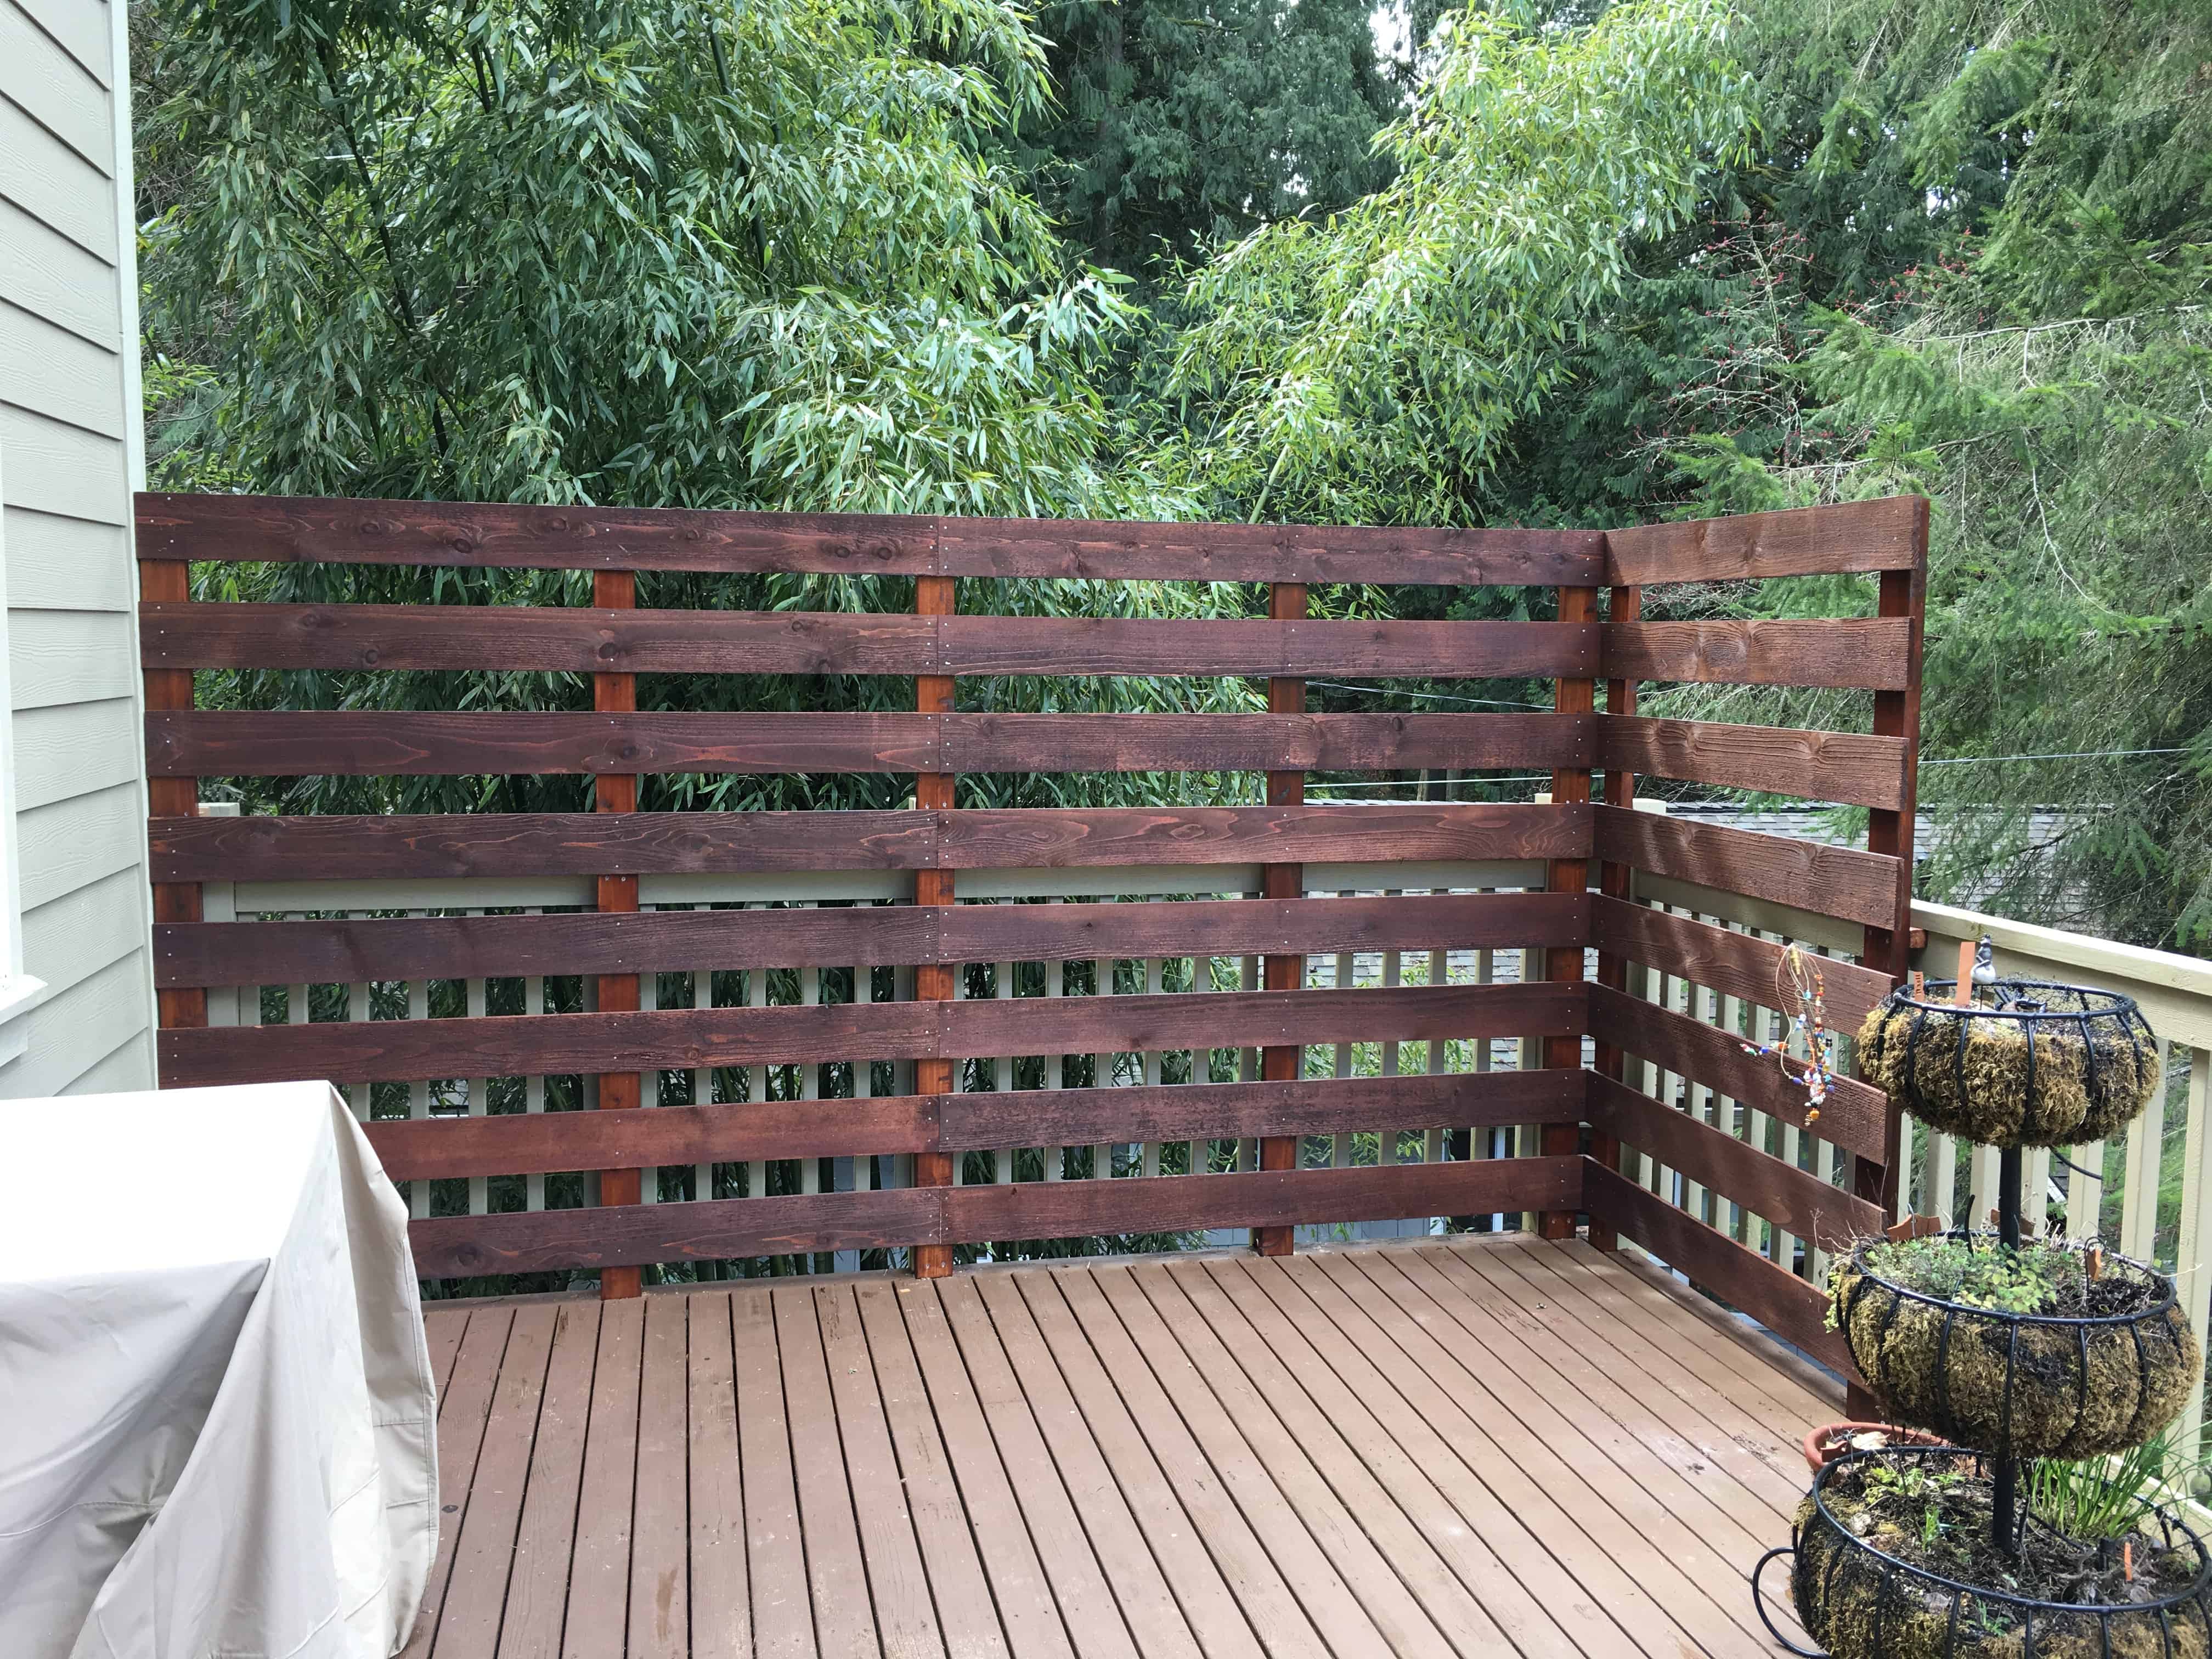
Framework of the gutter garden.
Next was building the gutters. I couldn’t find used gutters that worked for this project due to the L-shape, so I bought new gutters at Home Depot. They have galvanized and plastic gutter systems with all the joining pieces you’d want to customize your gutter runs.
Alan was gone while I was doing this project so I built each gutter section in the garage rather than trying to build on the frame. It was too unwieldy to do otherwise by myself. I used a metal-cutting blade in my chop saw to cut the straight pieces to length—it shoots out scary sparks when you do that, but is the best way I found to cut them (make sure to wear eye protection and gloves). I added the corner pieces and crimped them together with gutter sealant before letting them dry overnight with masking tape. I did the left side first and then the right side after the sealant dried overnight.
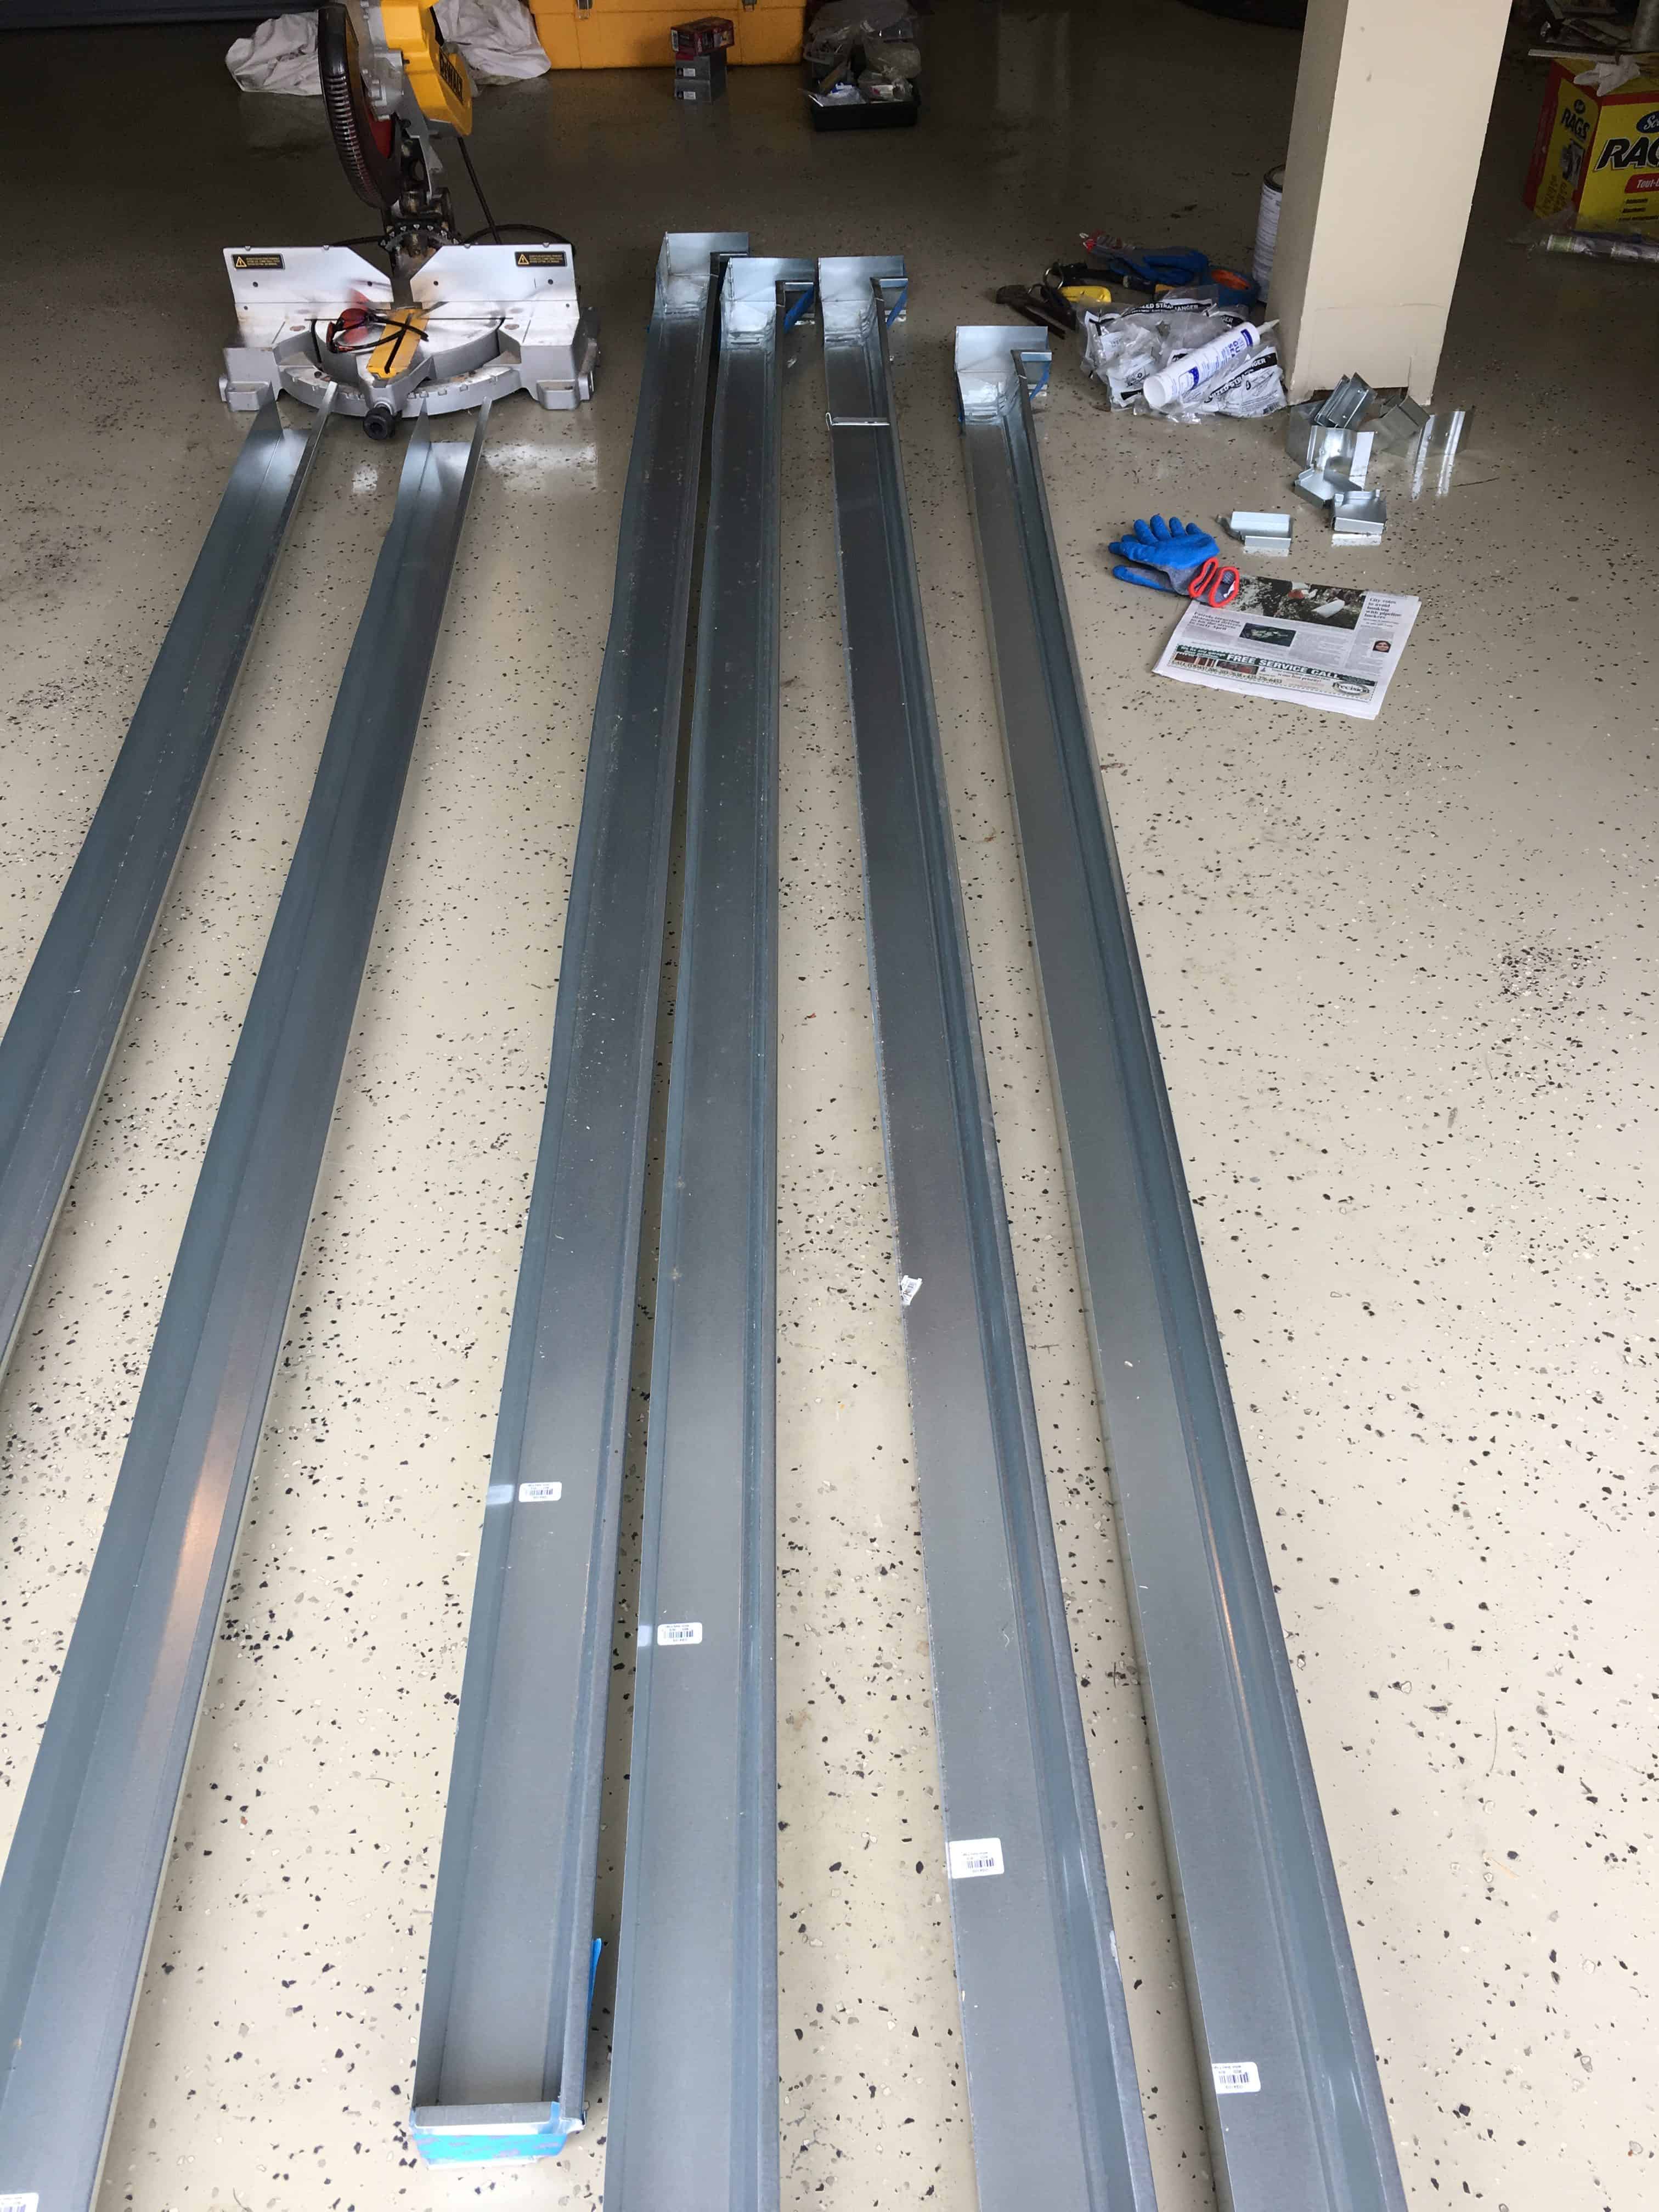
Adding the ends and corner pieces to the gutter runs.
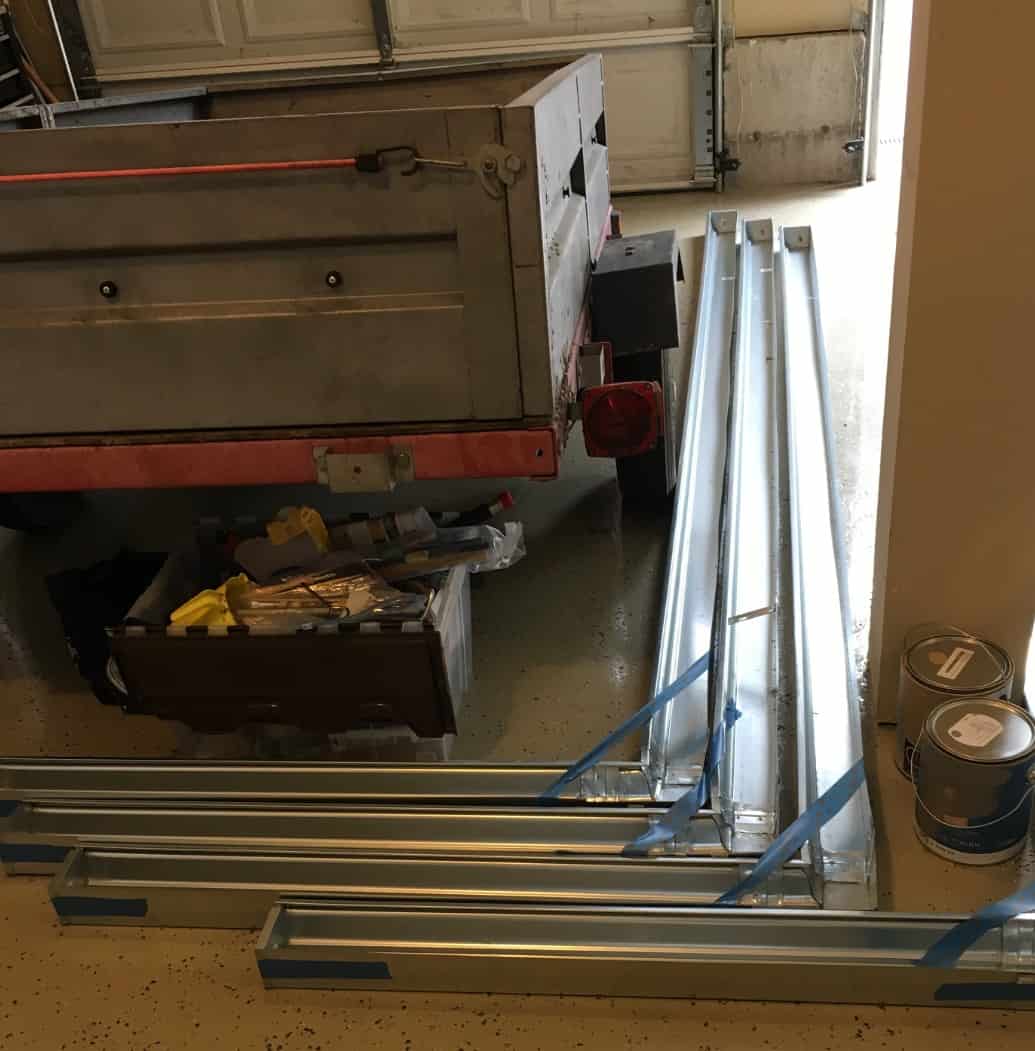
L-shaped gutters setting up overnight.
Once Alan was home, we attached the gutters to the horizontal boards. I used the gutter hangers that slip inside the gutter and screwed them into the 2×4’s. In between, I used sheet metal screws to attach the gutter to the fence board, about every 16-inches, as the dirt, plants, and water would be heavy and I wanted a more secure connection.
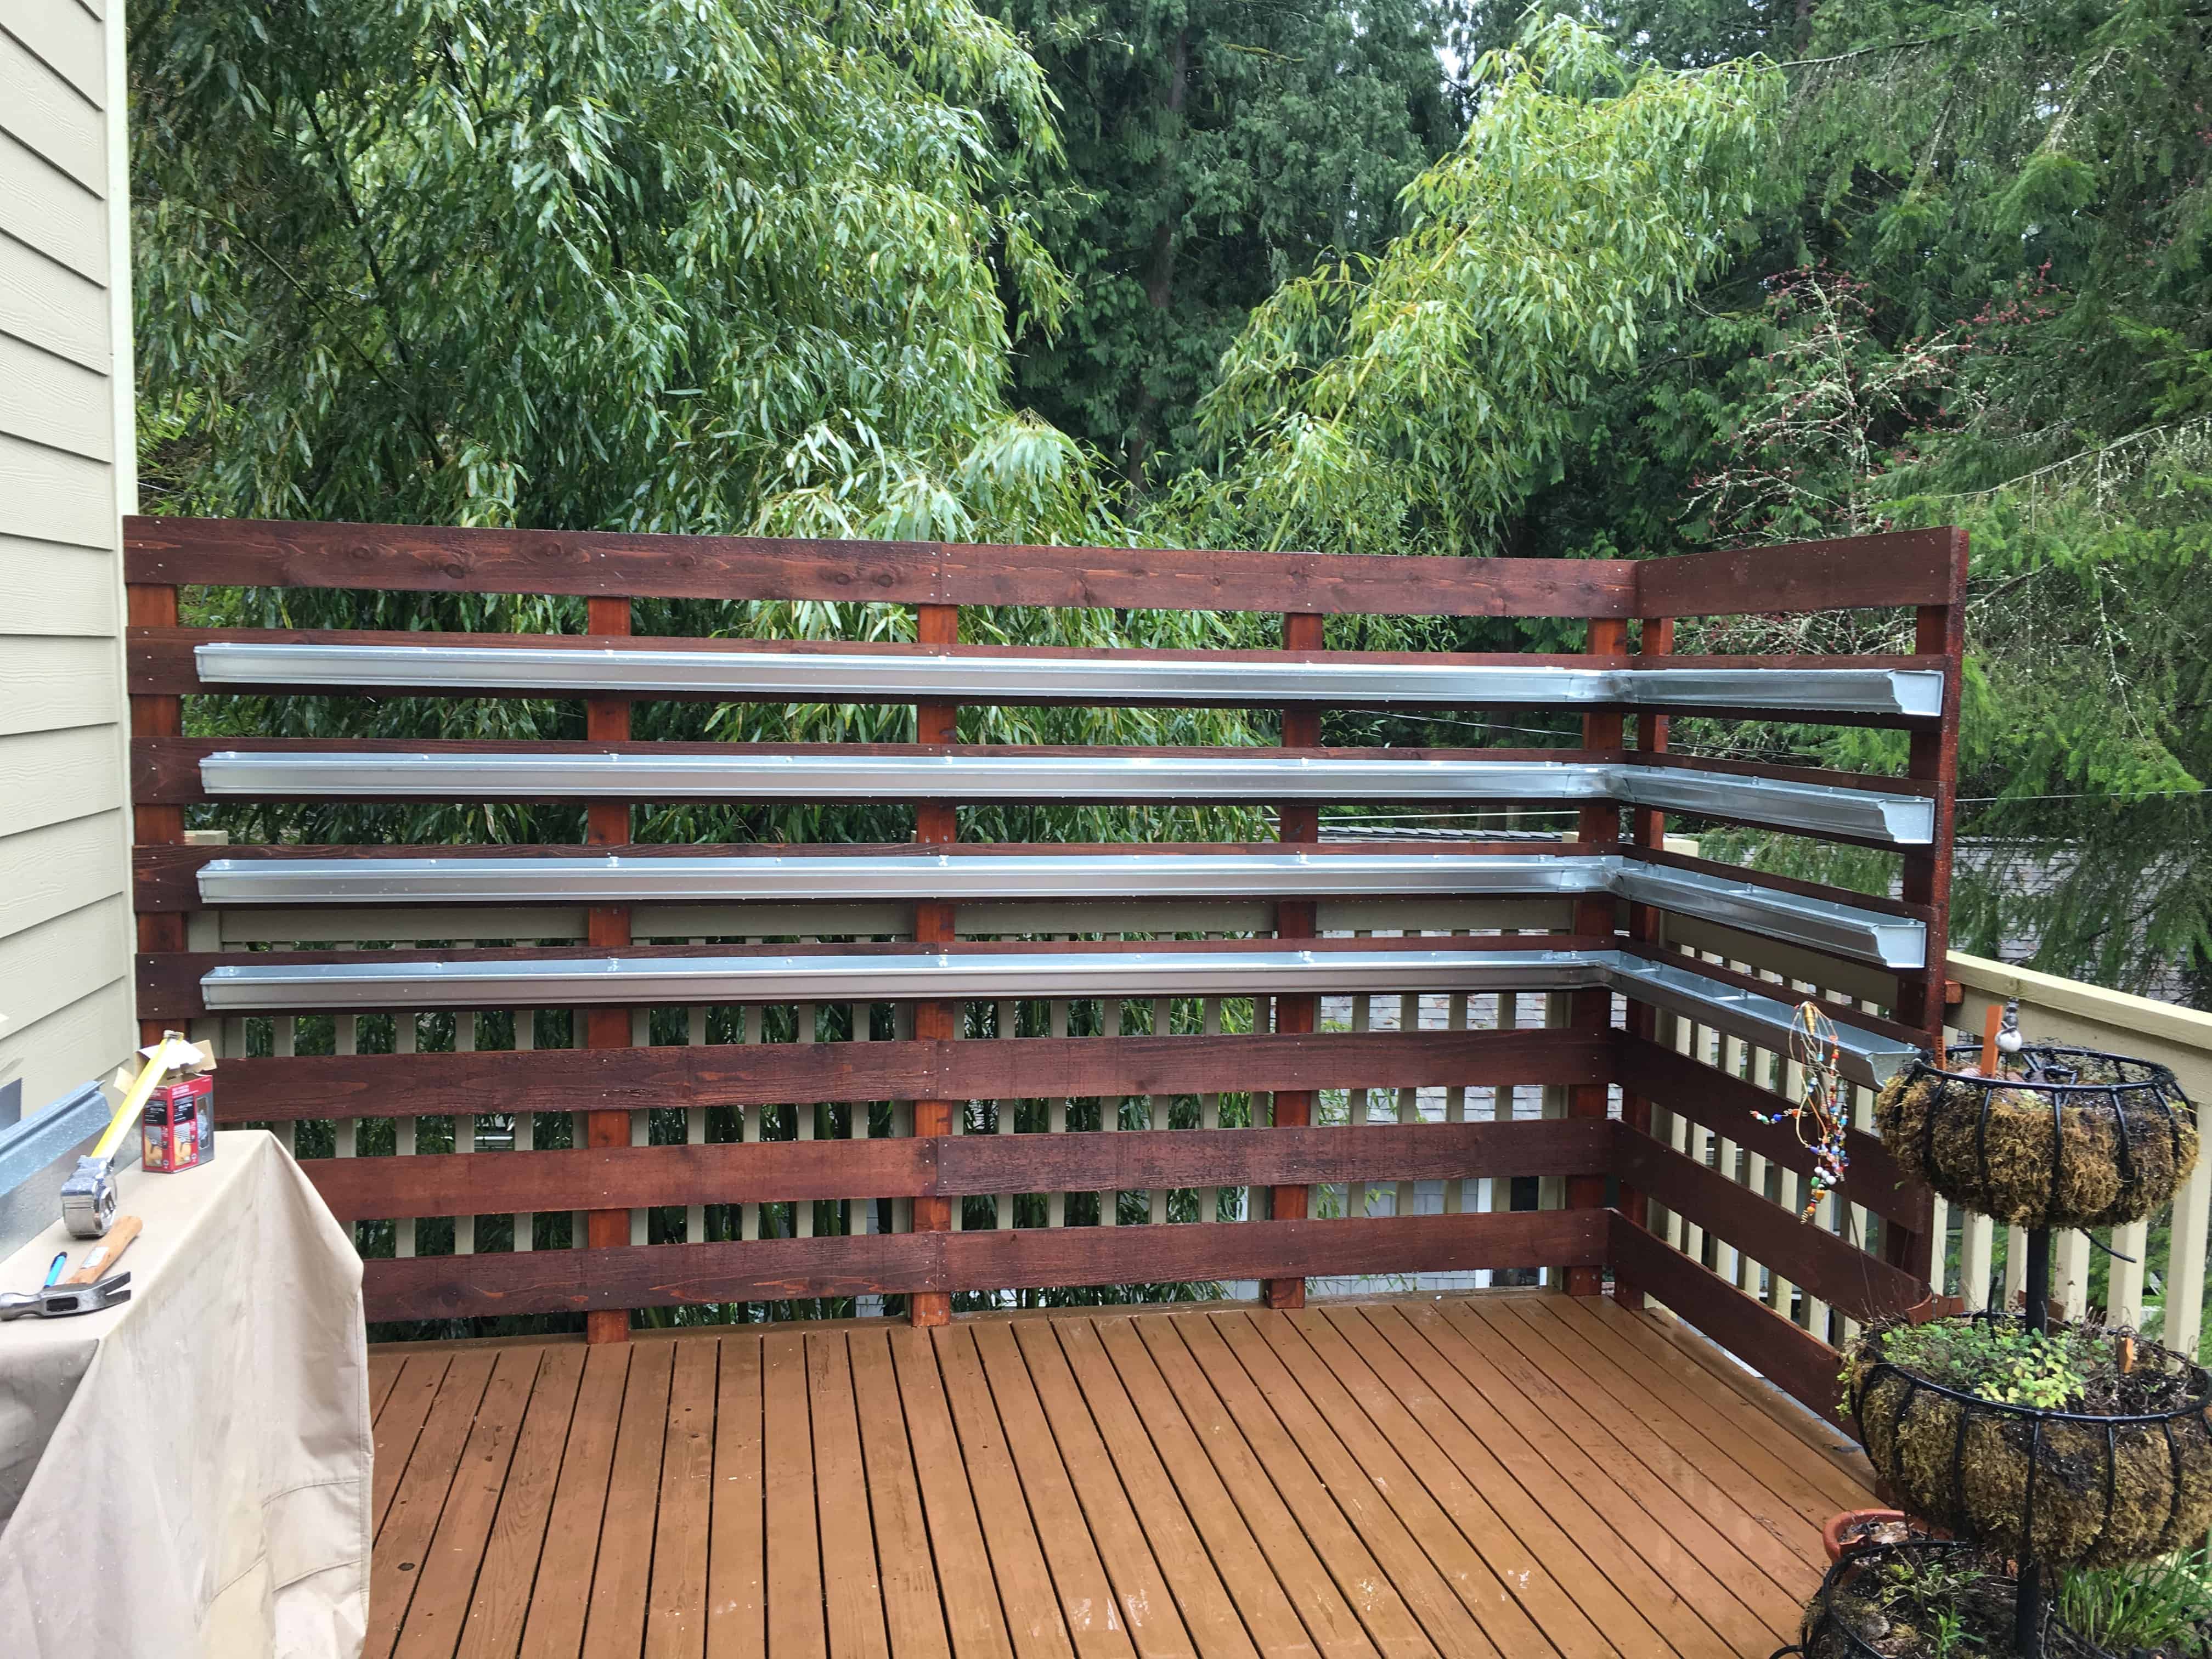
Attaching gutters to frame.
After all the gutters were installed, I drilled holes in the bottom of each gutter for drainage, about every 16-inches or so.
Then I added potting soil and plants!
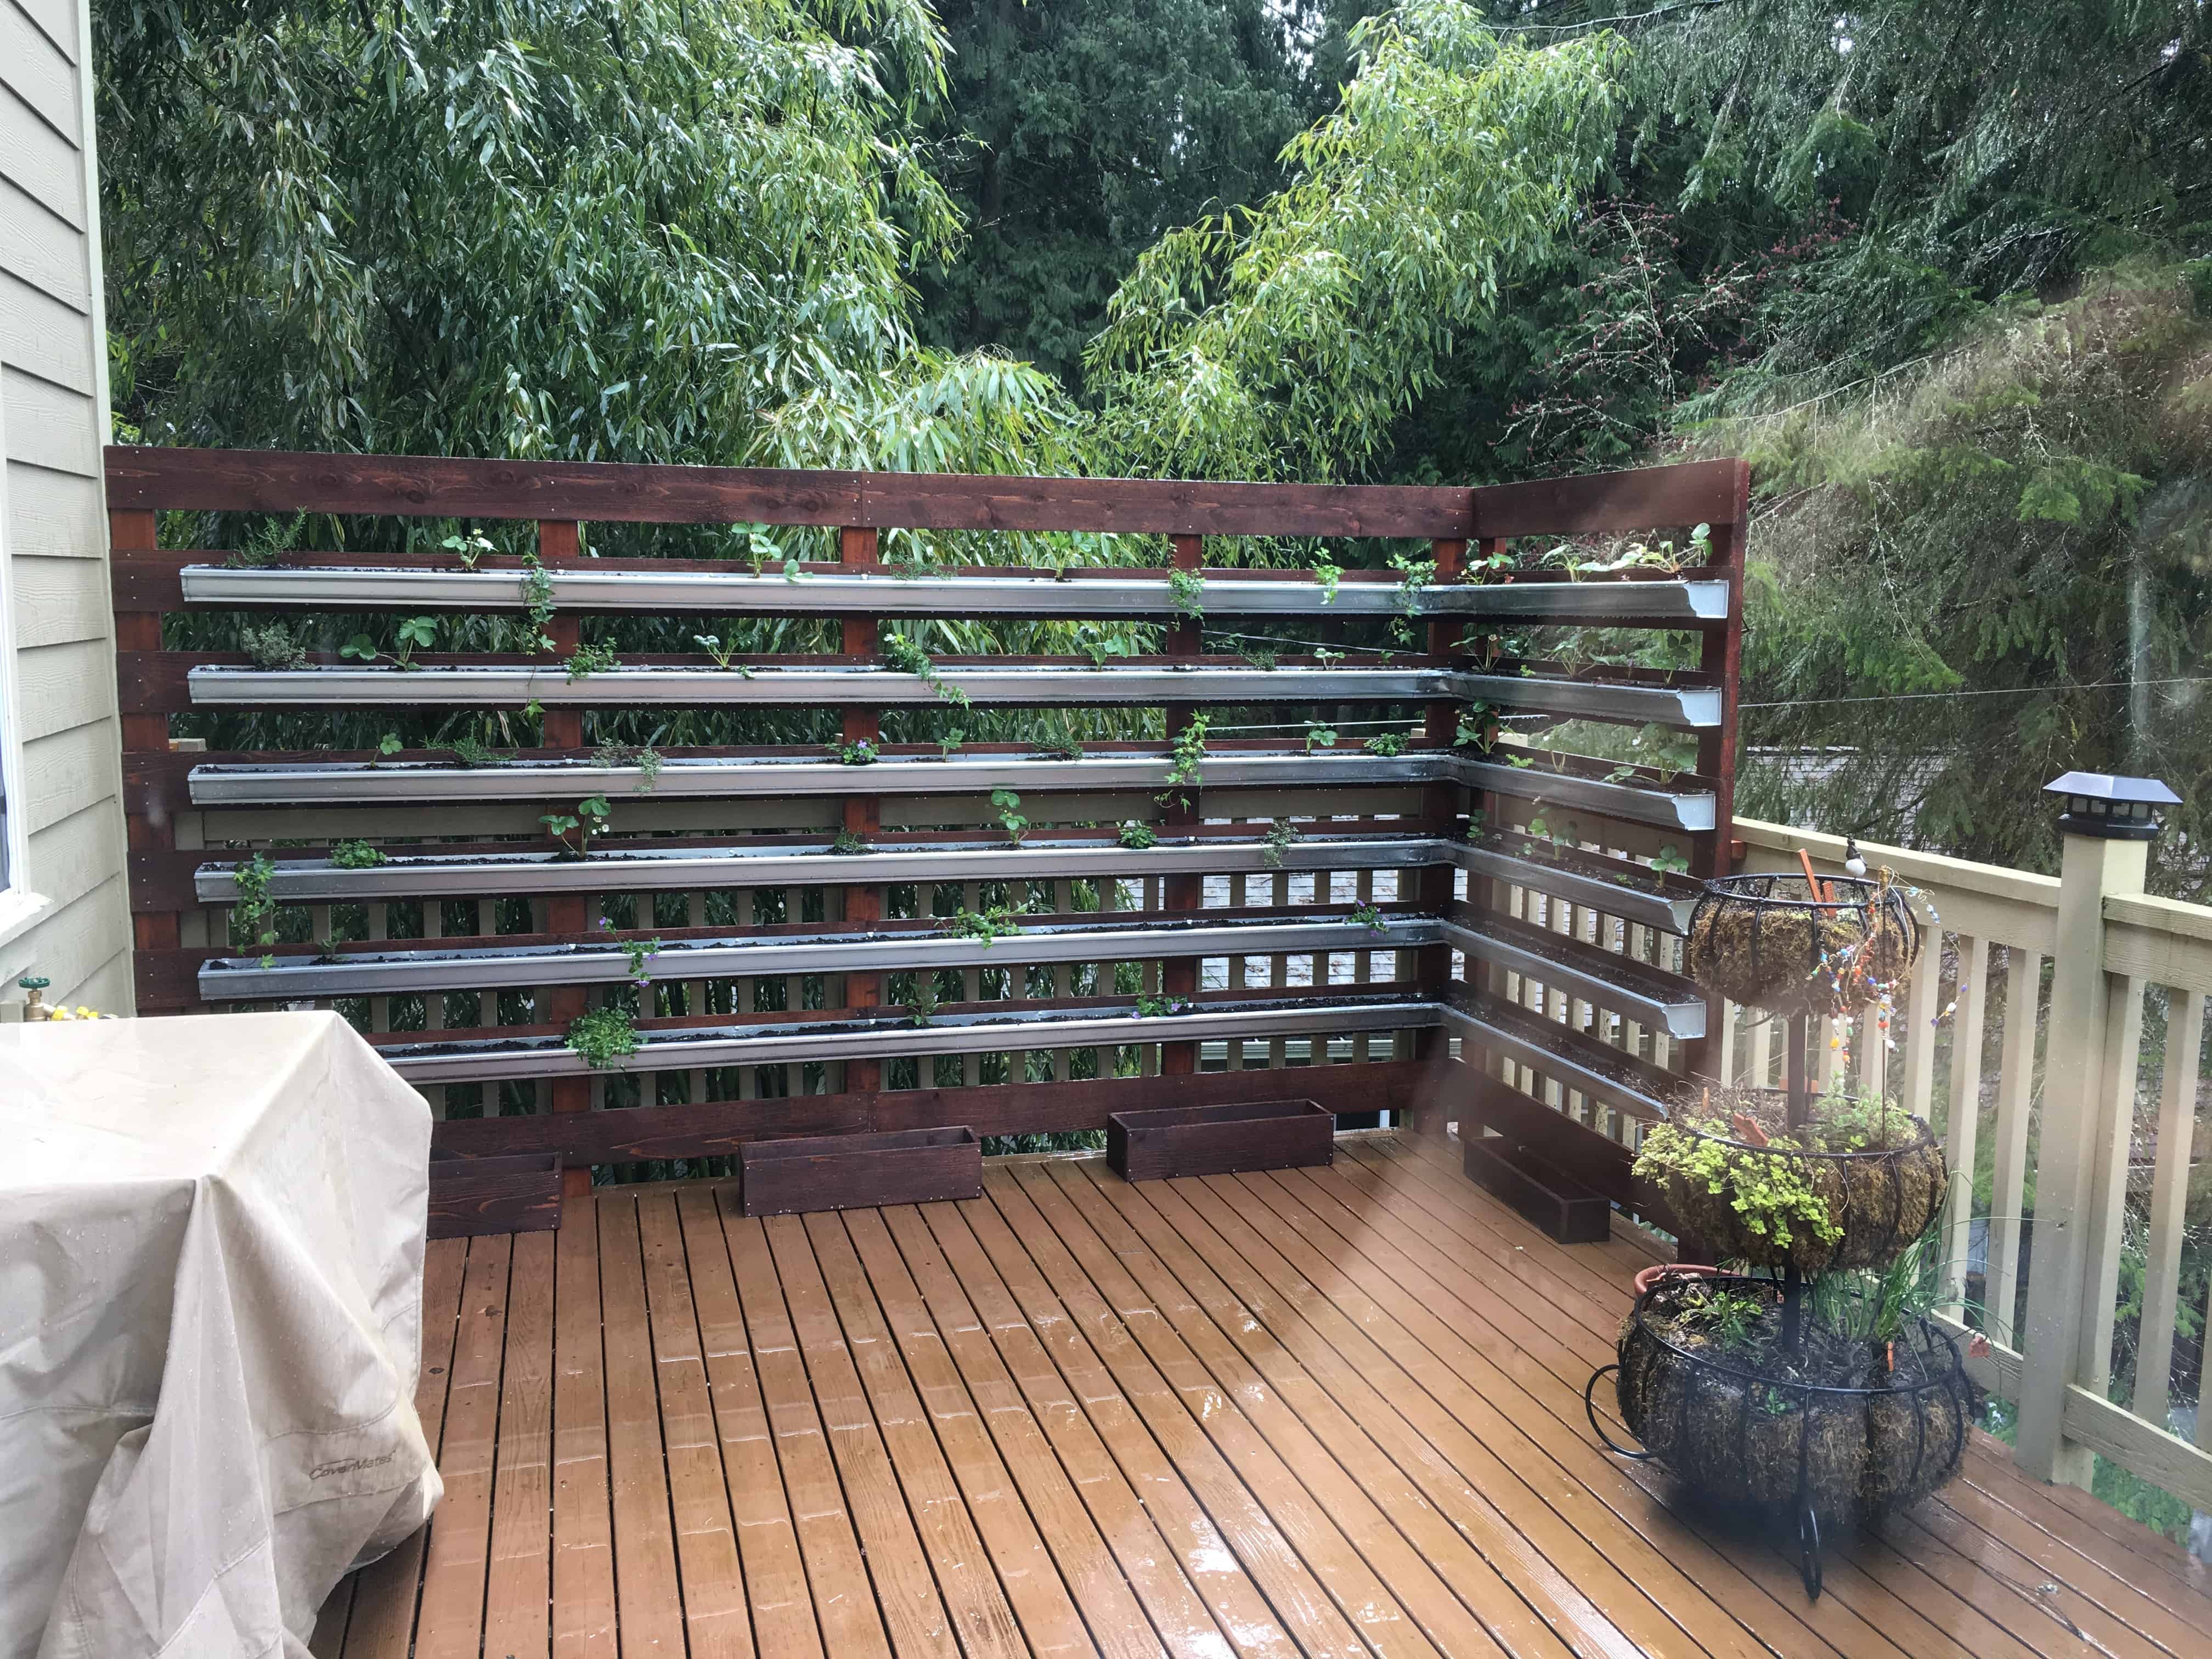
Planted gutter garden! Note the cute planter boxes I made with scraps of leftover fence board.
The key to a successful gutter garden is water. I’ve talked to a lot of people who have had trouble growing gutter or pallet gardens because they dry out so fast. The gutters are shallow, so they need daily watering, especially in hot temperatures. I added 1/4-inch drip irrigation soaker hoses to each gutter, attached to a battery-operated watering timer. This is a plant-saver and worth every penny! I can set it and forget it, go on vacation, etc. and my plants get watered.
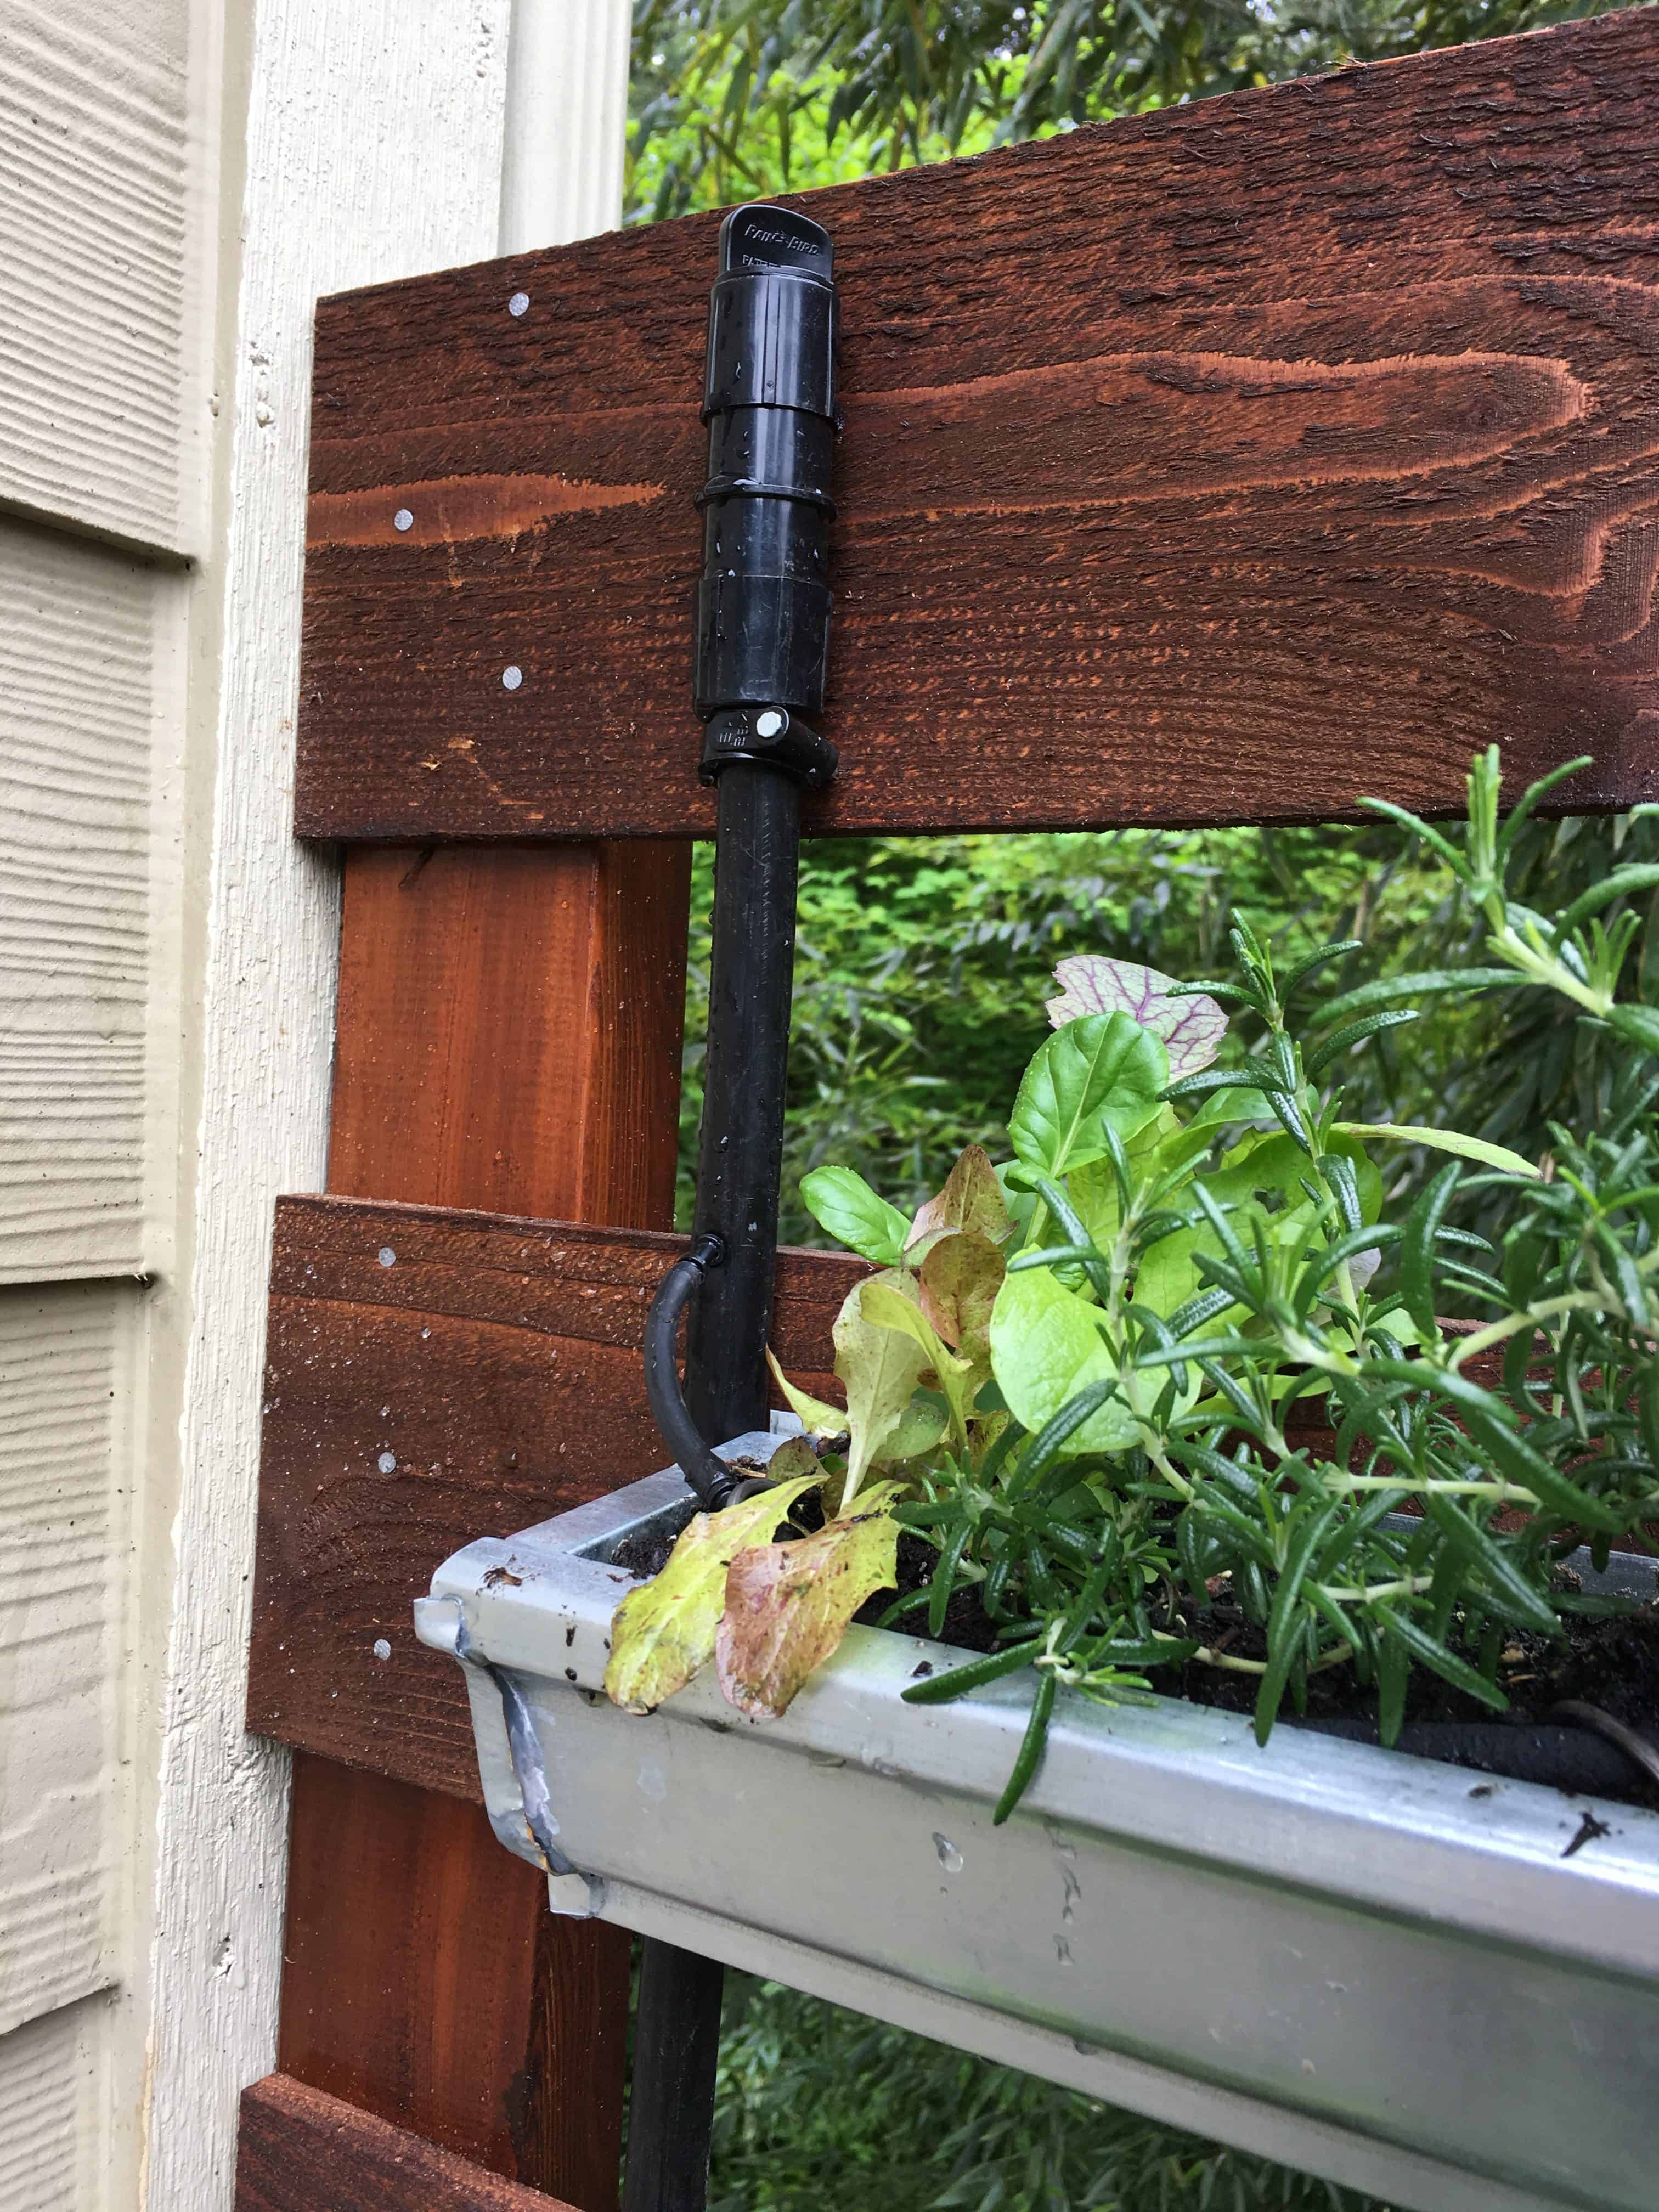
Simply attach your timer to the faucet. Use 1/2-inch drip irrigation supply line with a hose/faucet adapter (you may need to install a pressure reducer and/or backflow preventer, depending upon your water pressure and if your supply faucet is coming off of a backflow preventer or not) and run vertically at the end of your gutter garden, making sure to go to the top. Cap it off with an end cap and secure the tubing to the horizontal fence board with tubing straps with nails.
1/2-inch irrigation supply tubing from my faucet to the gutter garden.
Then you simply add a barb to the end of the 1/4-inch soaker tubing, puncture the 1/2-inch supply line at the level of the gutter you want to irrigate, insert the barb, and run your tubing. At the end of the soaker tubing, add a plug or simply fold it over onto itself and secure a zip tie around it to hold it closed. I snipped the legs off of landscape stakes to shorten them so they’d work in the shallow gutter to hold the soaker tubing in place.
Close up of the 1/4-inch soaker tubing coming out of the 1/2-inch supply tubing with a barb.
Set your timer and you’re all set! Sit back and watch it grow!

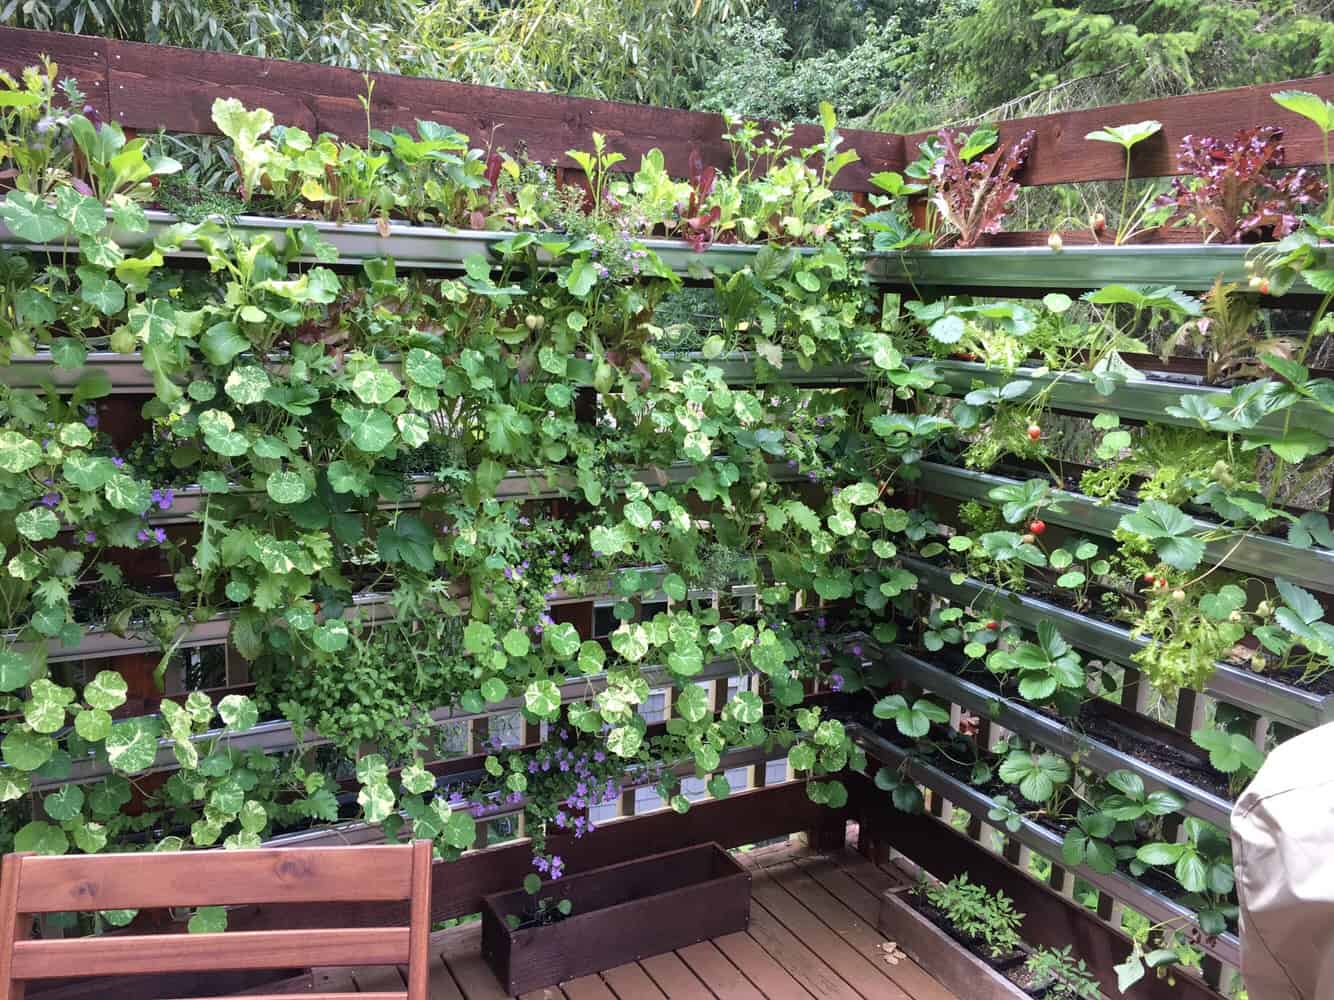
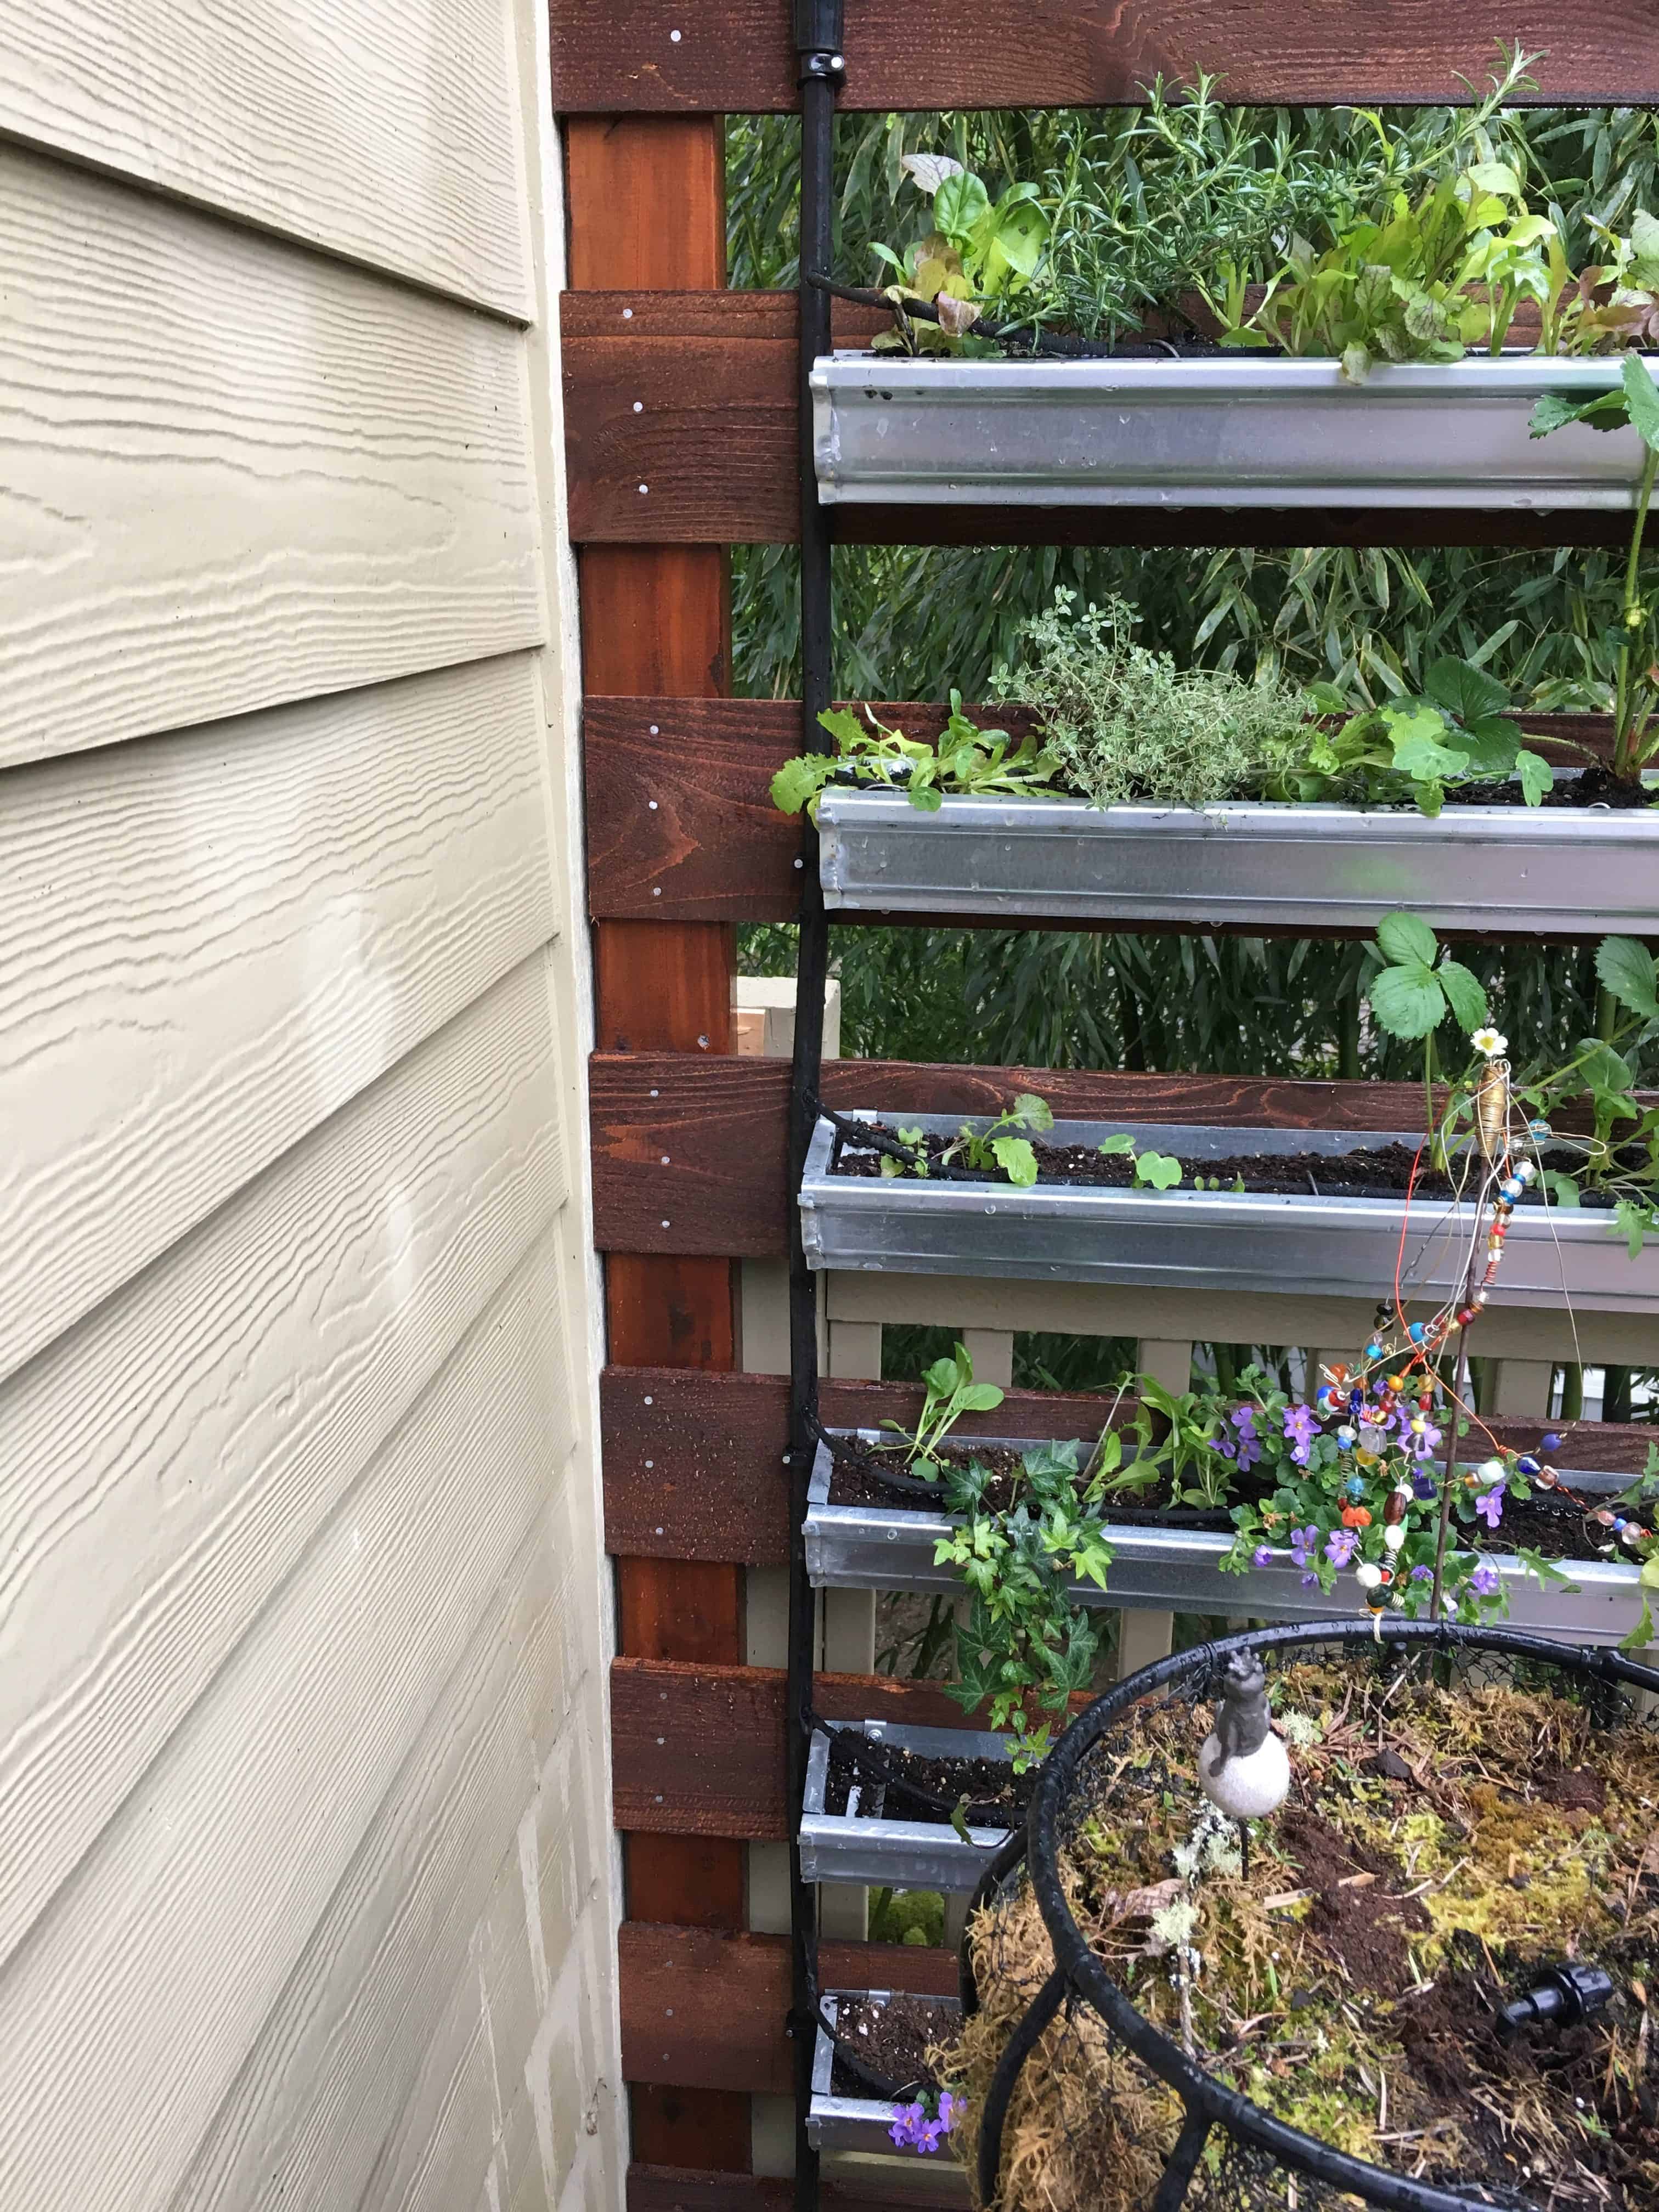
My gutter garden of herbs, nasturtiums, strawberries, edible greens, and flowers.

Gorgeous strawberries, kale, nasturtiums, and spinach.

Delicious gutter strawberries on the awesome little galvanized steel garden cafe table I found to match my gutter garden at Falling Water Gardens in Monroe, WA.
Vertical gardens are fantastic for privacy screening and for gardening in limited spaces. You can grow all kinds of plants, edible or not, in them. I grow:
- Strawberries: Albion (everbearing), Shuskan and Earliglow (June-bearing)
- Herbs: Trailing rosemary, thyme, oregano, cilantro
- Edible flowers: Hanging basket nasturtiums
- Greens: Mesclun salad greens, mixed variety of kale, bok choy, spinach
- Decorative items: Needlepoint ivy, Bacopa
Being right off my kitchen, there’s nothing better than walking out in the morning for a bowl of berries or in the evening for a fresh green salad!
Noémie Vialard, author of Gardening Vertically: 24 Ideas for Creating Your Own Green Walls (one of my favorite vertical gardening resources), has all kinds of suggestions, including foliage walls with grasses and coral bells; a mosquito-repelling wall with herbs and plants mosquitoes hate; other kitchen and herb walls; mosses; fragrant flowers; and even ferns (I get wild ferns in mine every year, which I transplant out).
Hardy plants have done just fine in my gutter garden, even the strawberries. We’ve had some super harsh winters the past two years, with weeks of subfreezing temperatures, rare for the mild Pacific Northwest, but things have held on. The ferns, ivy, thyme, and strawberries survive just fine. I just replant the more tender herbs, greens, and flowers in spring. The trailing rosemary didn’t last the first winter, it really needs more protected roots.
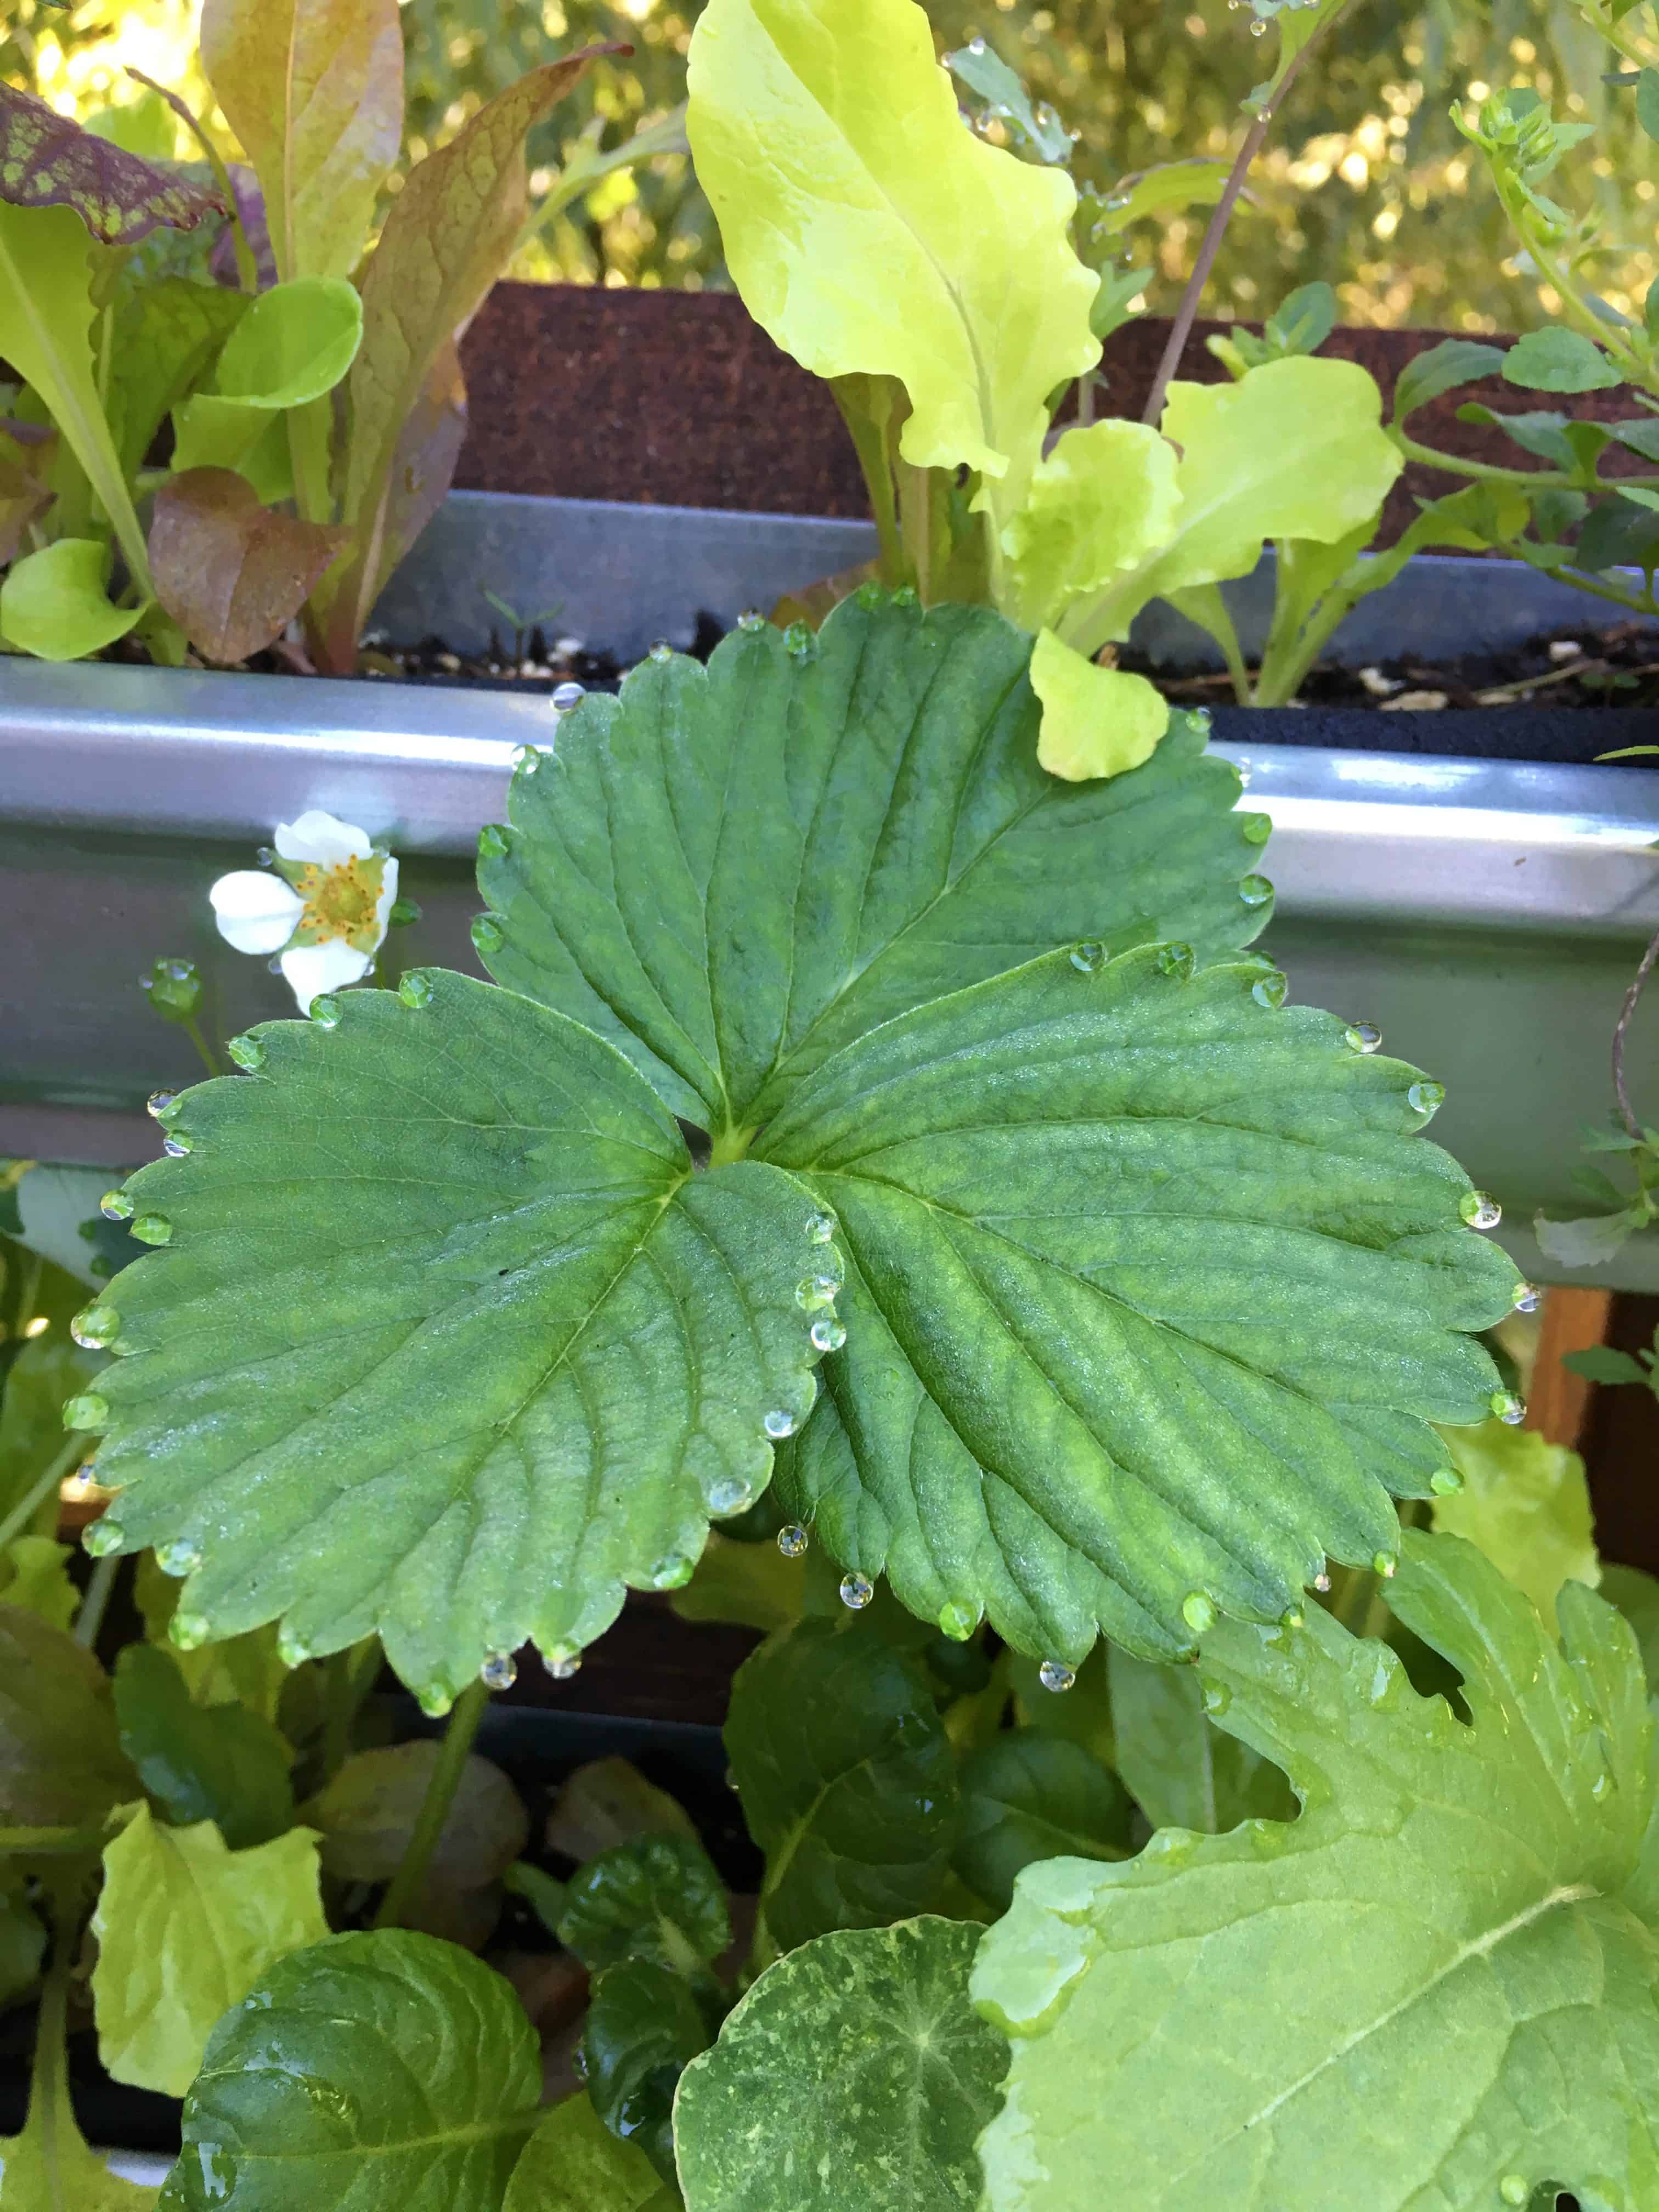
A strawberry plant bejeweled with droplets of morning dew, like a necklace of crystal beads.
I’m a little behind in planting my gutter garden this year due to the nesting robins! But now that they’d flown the nest, I’ve gotten right to work and cleaned out the beds and planted my seeds. Soon I’ll be enjoying my fresh greens and herbs. And the strawberries are just about ripe, perfect with my morning coffee on the summertime patio.
So that is my gutter garden! It’s one of my favorite things. I hope it inspires you to try a gutter or vertical garden, even if you just attach a single straight piece of gutter on a fence! I see gutters come up in Buy Nothing and used home improvement shops, like Habitat for Humanity ReStores, so it can easily be a Zero Waste gardening project if you don’t need a specific configuration, like I had.
Have you made a vertical or gutter garden? Share your pictures on my Facebook page, I’d love to see them, as would my readers!
And if the drip irrigation stuff seemed a bit overwhelming, don’t worry, I’ll have a post soon on drip irrigation basics to take the intimidation right out of that project! Stay tuned!
Do you like this post? Please share....
If you liked this post, you might like one of these:


")


")

Categories:
Tags:

[Trī-māz-ing]
Cindy wants you to be Trimazing—three times better than amazing! After improving her health and fitness through plant-based nutrition, losing 60 pounds and becoming an adult-onset athlete, she retired from her 20-year firefighting career to help people just like you. She works with people and organizations so they can reach their health and wellness goals.
Cindy Thompson is a national board-certified Health and Wellness Coach, Lifestyle Medicine Coach, Master Vegan Lifestyle Coach and Educator, Fitness Nutrition Specialist, Behavior Change Specialist, and Fit2Thrive Firefighter Peer Fitness Trainer. She is a Food for Life Instructor with the Physicians Committee for Responsible Medicine, Rouxbe Plant-Based Professional, and Harvard Medical School Culinary Coach, teaching people how to prepare delicious, satisfying, and health-promoting meals.
She provides health and lifestyle coaching at Trimazing! Health & Lifestyle Coaching. Cindy can be reached at info@trimazing.com.
Subscribe to the Trimazing Blog
Receive occasional blog posts in your email inbox.
Subscribe to the Trimazing Blog
Receive occasional blog posts in your email inbox.