Growing Garlic

Garlic is a great vegetable to grow, especially if you’re a beginning gardener, and now is the time to plant it.
Garlic is an allium, part of the onion family, along with leeks, chives, shallots, scallions, etc. They’ve been an important part of our diets for millennia, as stamina boosters during Egyptian times, performance enhancers for athletes in the first Olympic games, a way to ward off the plague during the Middle Ages, and in antibiotic poultices during the Civil War and World War I. Garlic’s antibiotic qualities were just not imaginary. According to Jo Robinson of Eating on the Wild Side, three cloves of garlic contain 21-39 grams of allicin, the main active antibiotic ingredient in garlic, which is the same amount of antibiotic activity as a single dose of penicillin! So garlic is more than just a flavor enhancer—it is good and good for you. Garlic has also been shown to have chemopreventative (cancer preventative) properties, reported to have great effects preventing breast, brain, lunch, pancreatic, prostate, stomach, and kidney cancers (leeks edge out garlic in the case of kidney cancer), according to Michael Greger, MD (check out his great book, How Not to Die).
Interestingly enough, however, how you prepare and use your garlic, and any other allium, for that matter, has a great impact on how much allicin you get from it. Allicin is only produced when two substances in alliums come together: a protein, alliin, and an enzyme, alliinase. Alliin and alliinase don’t connect until the barriers between them are broken, which occurs when alliums are cut, smashed, pressed, or chewed. But it takes more than an instantaneous connection for allicin to form, so a good rule of thumb when using garlic, onions, and any member of the allium family, is to cut or press your alliums first and let them rest for 10 minutes before using. Cooking before alliin and alliinase fully connect wipes out the ability for allicin to form. So simply chop your onions and garlic first, prepare your other ingredients, and then start cooking. If you’re using your garlic or onions raw, no worries, allicin will form just fine, no need to wait—it’s the early cooking process that can interrupt the allicin from forming.
There are two types of garlic, hardneck and softneck.
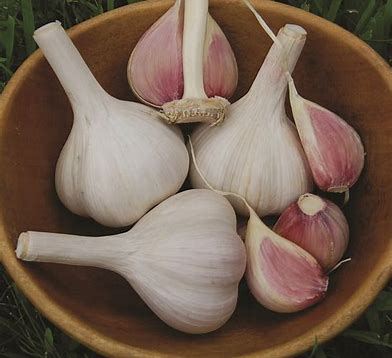
Hardneck Garlic
Hardneck garlic grows its cloves in a single row around a center stalk that gets hard as it grows, thus the name hardneck. It is most akin to wild garlic. They are best for growing in colder climates, produce less numbers of cloves per bulb, and are often milder (not as hot) than softneck types. This type of garlic has a shorter shelf life.
What’s great about hardneck garlic is that it produces edible scapes in the summer, a flowering body that should be removed to allow more energy to go into the growth of the bulb. Don’t throw the removed scapes out, they are a delicacy! You’ll often see garlic scapes at summertime farmers markets and farm stands when farmers have removed them to enhance the growth of the garlic bulbs. Pick these up when you see them! Or, simply grow some hardneck garlic for yourself and enjoy your own fresh scapes, pinching them off at the leaf tips just when they begin to curl. I’ll have more information at the end about making Garlic Scape Pesto!

Curled Garlic Scapes
While I love the scapes, I prefer to grow softneck garlic. Softneck garlic does not produce scapes. It grows with the cloves bunched together and is the type of garlic you typically find at grocery stores. Softneck has more cloves, about 16 per bulb, with large cloves on the outside and smaller ones as you move in toward the center. This type of garlic has the typical papery skin we are all familiar with and long, flexible stems that can be braided. Softneck garlic stores longer, which is why I prefer to grow this variety. There are two types of softneck garlic, silverskin and artichoke, the difference being that artichoke varieties are larger than silverskin.

Softneck Garlic with Rows of Cloves and Hardneck with Cloves in a Single Row Around a Solid Center
Planting Garlic
Either use garlic you have grown or buy seed garlic from a nursery or supplier to grow garlic in your garden. Garlic you buy at your grocery store may have been treated with growth inhibiting chemicals or have diseases that interfere with good growth. Seed garlic comes in familiar looking bulbs, like you would buy at the grocer.

Bag of Seed Garlic for Garden Planting
Prepare your soil so that it is loose and amended with compost for good drainage and nutrients. You can grow a spring/summer cover crop in your bed to help boost the nutrient content of your soil and then chop that into the soil before planting. Choose a location that is sunny, with about 6 hours of direct sunlight a day.
Break up your garlic bulbs into individual cloves the same day you are going to plant. Gently pull the cloves apart, leaving the papery skin intact as much as possible–don’t peel the cloves!

Breaking up Garlic Bulbs into Cloves for Planting
Select the biggest cloves for planting for bigger bulb growth. Use the small cloves for cooking!

Orientation of Garlic Clove for Planting

Planting Clove, Depth 2-inches Above Top of Clove
Apparently, I missed a few cloves when harvesting the bulbs earlier this fall! I do recall having sliced a few with my hand spade when digging them up. There were bunches of garlic sprouts popping up when I was cleaning up my beds, so I dug them, divided the cloves, and replanted them in the new location.

Garlic Sprouts Showing Spacing of Clove Planting
I plant my cloves 6-inches apart on all sides. You’ll see varying guidelines on this, but my bulbs grow beautifully with this spacing and I get a lot of garlic, nice big bulbs, out of my raised bed with this spacing. I’ve never had issues with small bulbs this way.
After sowing the cloves, I cover the bed with a mulch of fallen leaves to help keep weeds down and to keep nutrients from leeching away from the soil during our winter rains. It’s a great way to use autumn leaves. This can be removed in the spring to help the soil warm up.

Mulching Garlic Bed with Autumn Leaves. Pretty and Useful!
WSU Growing Garlic is a great guide for growing garlic. You can also contact the Garden Hotline for more specific questions you might have about growing garlic in the Pacific Northwest.
I hope you give it a try—it really is an easy thing to grow!
Garlic Scape Pesto
Ingredients
- 10 garlic scapes
- 1/4 cup pine nuts or other nut you like
- 2 Tablespoons nutritional yeast
- 1/4 teaspoon salt or more to taste
- pepper to taste
- 1/3 cup vegetable stock or aquafaba (liquid from a can of white beans)
Instructions
- Cut the scapes into 1-2 inch pieces, including the stem and flower pod, and place in a food processor along with the nuts, nutritional yeast, salt and pepper. Start the processor, stop and scrape down sides as needed, until finely chopped.
- While running, start pouring in the vegetable stock or aquafaba in a slow stream until the pesto is your desired consistency. Adjust salt and pepper as desired.
Notes
Nutrition
Do you like this post? Please share....
[mashshare]
If you liked this post, you might like one of these:
Categories:
Tags:

[Trī-māz-ing]
Cindy wants you to be Trimazing—three times better than amazing! After improving her health and fitness through plant-based nutrition, losing 60 pounds and becoming an adult-onset athlete, she retired from her 20-year firefighting career to help people just like you. She works with people and organizations so they can reach their health and wellness goals.
Cindy Thompson is a national board-certified Health and Wellness Coach, Lifestyle Medicine Coach, Master Vegan Lifestyle Coach and Educator, Fitness Nutrition Specialist, Behavior Change Specialist, and Fit2Thrive Firefighter Peer Fitness Trainer. She is a Food for Life Instructor with the Physicians Committee for Responsible Medicine, Rouxbe Plant-Based Professional, and Harvard Medical School Culinary Coach, teaching people how to prepare delicious, satisfying, and health-promoting meals.
She provides health and lifestyle coaching at Trimazing! Health & Lifestyle Coaching. Cindy can be reached at info@trimazing.com.
Subscribe to the Trimazing Blog
Receive occasional blog posts in your email inbox.
Subscribe to the Trimazing Blog
Receive occasional blog posts in your email inbox.


