Making Tofu

#VeganMoFo18 Day 26 – Making Tofu

Bulk Tofu in CA Co-op
I never even imagined making my own tofu, but now that we’re working toward being a zero waste household, the plastic tofu tubs have been starting to irritate me! We don’t eat a ton of tofu, but it’s enough that the tofu tubs were noticeable to me. Unfortunately, I’ve not found a source for package-free tofu near me, although admittedly, I’ve not searched all that hard for it. I’m sure there is a source out there, as I did run across it in a co-op in Sacramento during our recent trip to Napa, but I’m not sure it’ll be closer than downtown Seattle, which is quite a journey for me.
Tofu is basically pressed curds from soy milk, similar to pressing curds from animal-based milks into cheese. When you make tofu, you add a curdling agent to cause the solids in the soy milk to clump together and separate from the liquid (whey). There are several curdling agents available: nigari, which comes from sea salt, lemon or lime juice, vinegar, calcium sulfate (commonly known as gypsum), and magnesium sulfate (commonly known as Epsom salts). Nigari, gypsum, and Epsom salts make sweet and light tofu, although tofu made with gypsum is more velvety, so used predominantly in making silken tofu. Tofu made with vinegar or citrus will have the taste of those acids in the finished product. The authors of The Tofu Book: The New American Cuisine suggests using Epsom salts because it is inexpensive and easy to find.
Update, I found nigari solution at a local Asian market (Uwajimaya) and from a local purveyor, San Juan Island Sea Salt, and have used it to make tofu as well. It makes a firmer block, which I like. You can also purchase nigari online.
To make the tofu, start with soy milk. You can use commercially made soy milk, or, use homemade soy milk. I’m using the soy milk I made in yesterday’s blog post. It takes 8 cups of soy milk to make a conventional-sized block of tofu you find at the store.
Heat your soy milk over medium heat to 180˚F. I used my thermometer from my canning supplies. Make sure to stir occasionally so it doesn’t stick or burn on the bottom.
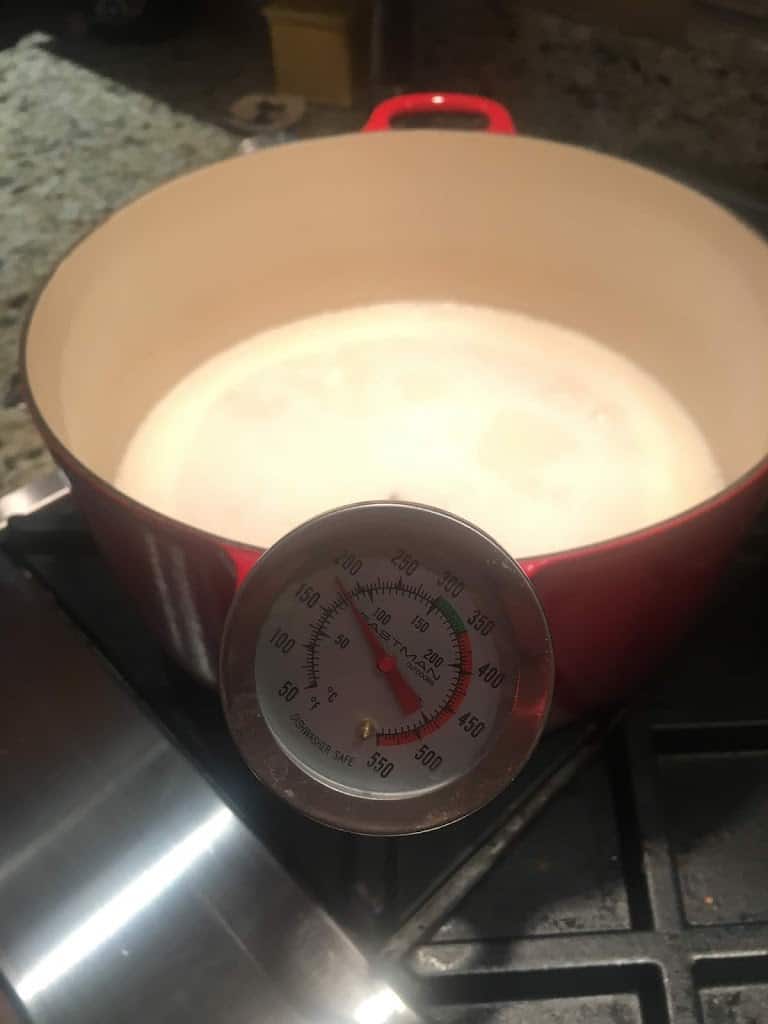
Thermometer Measuring Soy Milk Temp
If using Epsom salts to coagulate your tofu, make a solution of 2 cups water and 5 teaspoons Epsom salts while the milk is heating. It takes less nigari, 1-1/2 teaspoons is all that is required if using nigari solution.
When the soy milk hits 180˚F, turn off the heat and add 1/2 of the Epsom salt or nigari solution and stir gently. Put the lid on your pot and let this sit about 8 minutes. Then remove the lid and add the last 1/2 of the Epsom salt or nigari solution to the top, cover, and let sit another 4 minutes. As you do this, you’ll see the soy milk start to curdle and separate from a yellowish liquid—this is the whey. If the whey is cloudy, not yellowy-clear, add a little more coagulant (Epsom salts or nigari solution) and let set a few minutes more.

Progression of Curdling Soy Milk, from Adding First Epsom Salts Solution to Ladling into Form
Now you’ll simply gently ladle the curds and whey into a cheesecloth-lined form you want to use. You can use a colander, a tofu press, or a metal loaf pan with holes drilled in it. Take care not to break up the curds as you transfer it to your form.
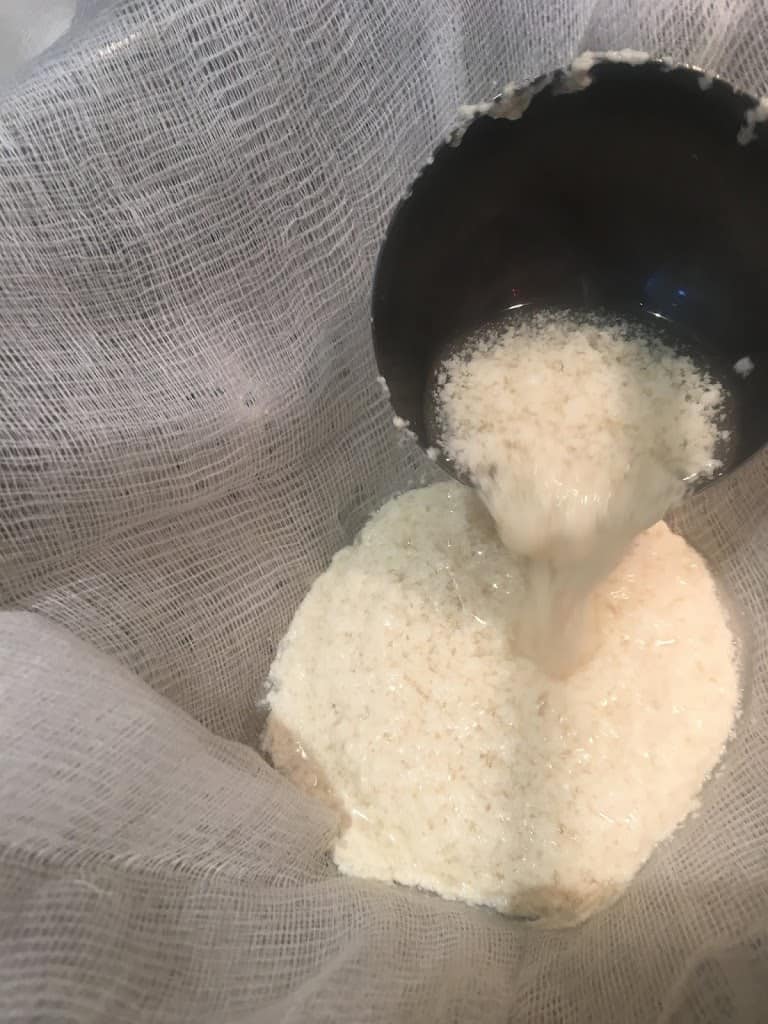
Ladling into Form
Put a container under your colander or press to catch the whey that presses out of the curds.

Pressing out the Whey
Fold the edges of the cheesecloth on top of the curds. Then put a solid, weighted object on top to help press the whey out of the curds and form your block of tofu.
Let this sit out on the counter for at least 2 hours. The longer you press, the more whey that comes out, and the firmer your tofu will be.

Pressed Tofu (left), Collected Whey (right)
I got a lot of whey out of my tofu during the press!
Paino and Messinger, authors of The Tofu Book, suggest using the whey as an additive when making yeast breads to extend the effect of the yeast. They say you can add to soups and vegetable dishes, or even just drink it. I dumped it into my compost bin, which was too much liquid for it and caused the bin to start to smell. We added a bunch of shredded paper to it to make up for the big nitrogen hit I gave it, and things settled back down.
I ended up transferring my curds into a cheesecloth-lined tofu press so I’d have a rectangular block of tofu instead of a disc. Update, you can add your curds and whey solution to a tofu press initially without transferring after the first pressing—that is what I do now.

Curds in a Tofu Press

Tofu Press in Action

Pressed Tofu Still in Press
And it turned out great!

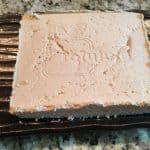
Block of Finished Tofu
Tofu
Ingredients
- 8 cups soy milk
- 5 tsp Epsom Salts dissolved in 2 cup of water, or
- 1½ tsp Nigari solution divided two ¾ tsp amounts. Use either Epsom salts or nigari solution, NOT both
Instructions
- Heat your soy milk over medium heat, stirring occasionally so it doesn't stick or burn on the bottom.
- If using Epsom salts, dissolve them in water while the milk is heating.
- When the soy milk hits 180˚F, turn off the heat and add half of the Epsom salt or nigari solution and stir gently.
- Put the lid on your pot and let this sit about 8 minutes. Then remove the lid and add the last half of the Epsom salt or nigari solution to the top, cover, and let sit another 4 minutes. As you do this, you’ll see the soy milk start to curdle and separate from a yellowish liquid–this is the whey. If the whey is cloudy, not yellowy-clear, add a little more coagulant (Epsom salts or nigari solution) and let set a few minutes more.
- Gently ladle the curds and whey into a cheesecloth-lined form you want to use. You can use a colander, a tofu press, or a metal loaf pan with holes drilled in it. Take care not to break up the curds as you transfer it to your form.
- Fold the edges of the cheesecloth on top of the curds. Put a solid, weighted object on top to help press the whey out of the curds and form your block of tofu.
- Let this sit out on the counter for at least 2 hours. The longer you press, the more whey that comes out, and the firmer your tofu will be.
- Once your tofu is cooled and at the firmness you want, remove it from the cheesecloth and either use or store in fresh water. This fresh tofu should store well in the refrigerator for a week in this water.
Notes
Do you like this post? Please share....
[mashshare]
If you liked this post, you might like one of these:
Categories:
Tags:

[Trī-māz-ing]
Cindy wants you to be Trimazing—three times better than amazing! After improving her health and fitness through plant-based nutrition, losing 60 pounds and becoming an adult-onset athlete, she retired from her 20-year firefighting career to help people just like you. She works with people and organizations so they can reach their health and wellness goals.
Cindy Thompson is a national board-certified Health and Wellness Coach, Lifestyle Medicine Coach, Master Vegan Lifestyle Coach and Educator, Fitness Nutrition Specialist, Behavior Change Specialist, and Fit2Thrive Firefighter Peer Fitness Trainer. She is a Food for Life Instructor with the Physicians Committee for Responsible Medicine, Rouxbe Plant-Based Professional, and Harvard Medical School Culinary Coach, teaching people how to prepare delicious, satisfying, and health-promoting meals.
She provides health and lifestyle coaching at Trimazing! Health & Lifestyle Coaching. Cindy can be reached at info@trimazing.com.
Subscribe to the Trimazing Blog
Receive occasional blog posts in your email inbox.
Subscribe to the Trimazing Blog
Receive occasional blog posts in your email inbox.

