Trimazing!
Zoom Cooking Classes
Layout
Setting Up Zoom Classes in Your Kitchen
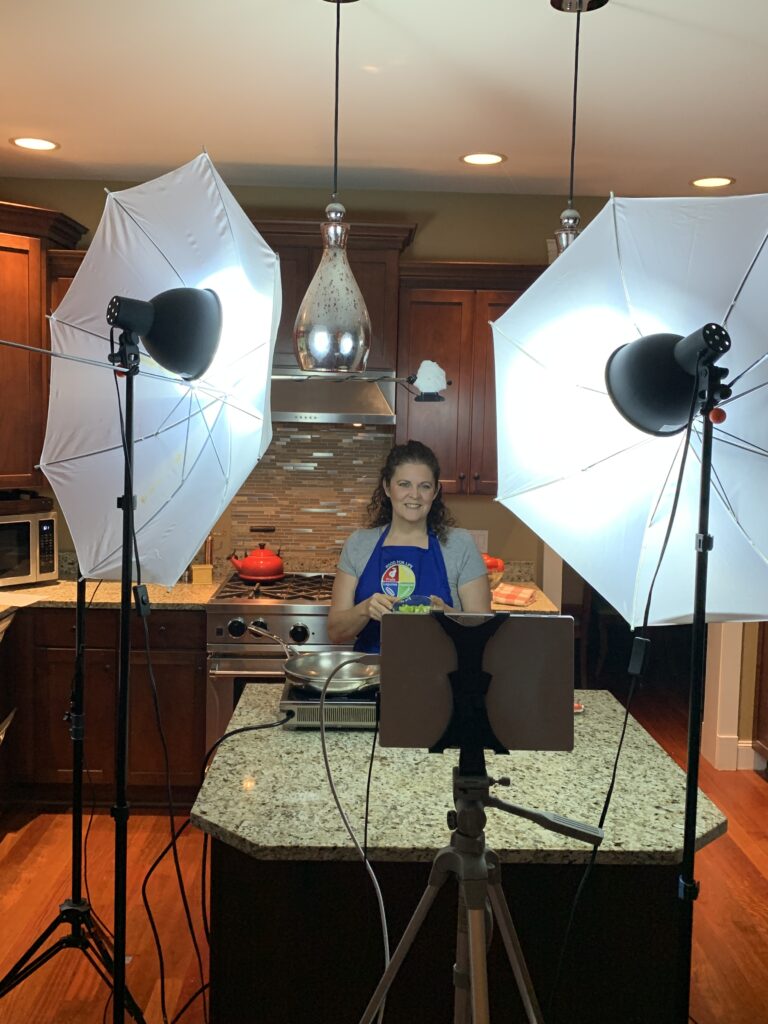
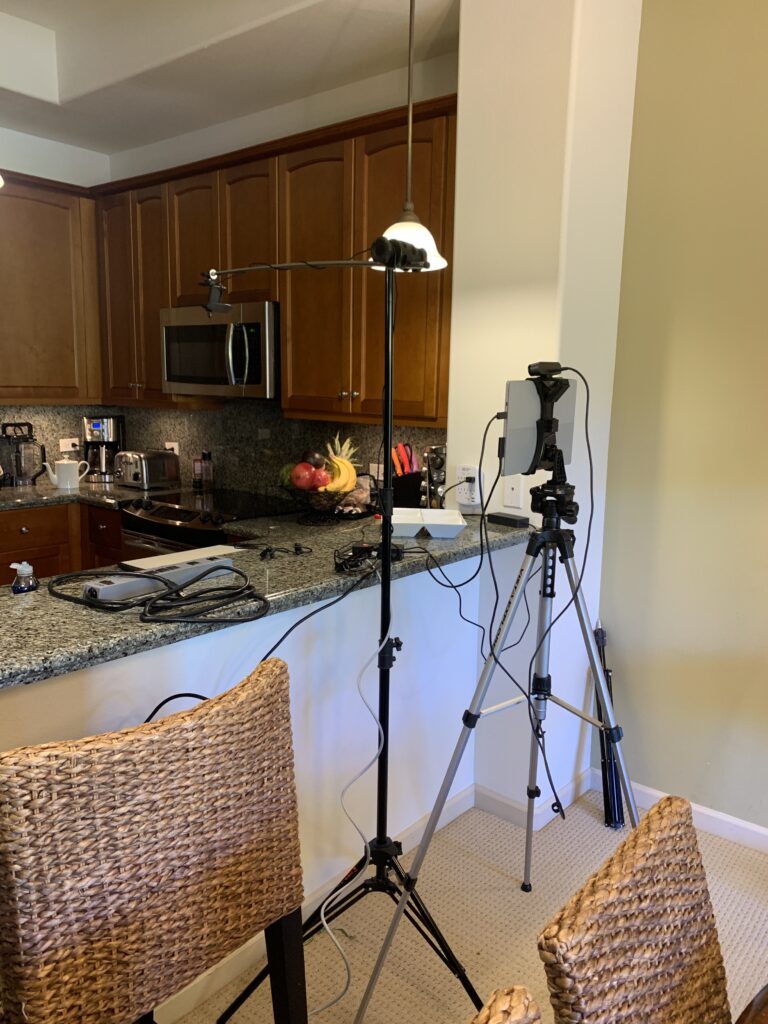
This is probably the most common set up.
Setting Up Zoom Classes in Another Location in Your Home
You can set up a studio kitchen anywhere in your home! My video studio kitchen is in a supply room in our unfinished basement, but you wouldn't know from watching it as a guest on Zoom!
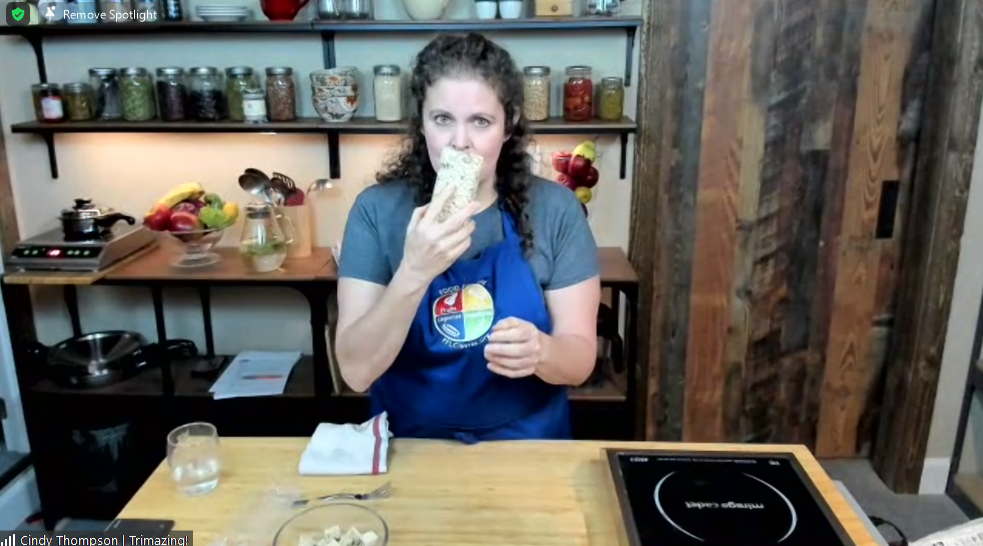
We put up some sheetrock on the walls; painted the plywood floor; added a sliding barn door from Home Depot; and picked up a kitchen island, two shelving units, six wall shelves, two battery-operated undercabinet lights, and a rolling metal kitchen cart from IKEA and moved the whole operation into the basement.
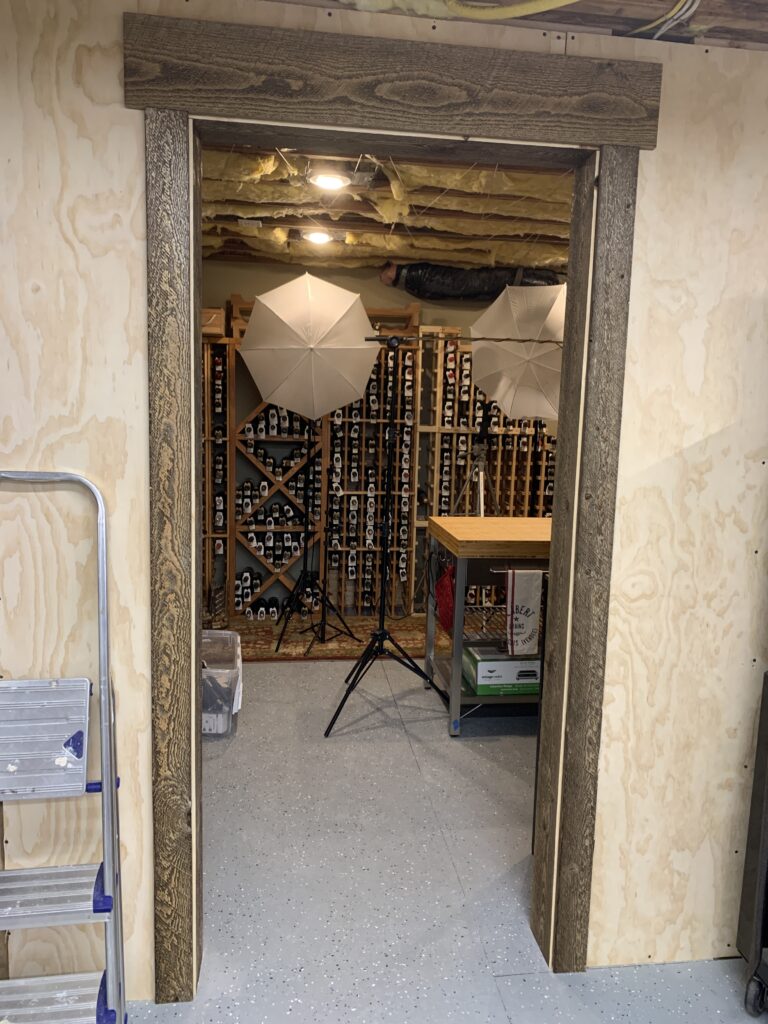
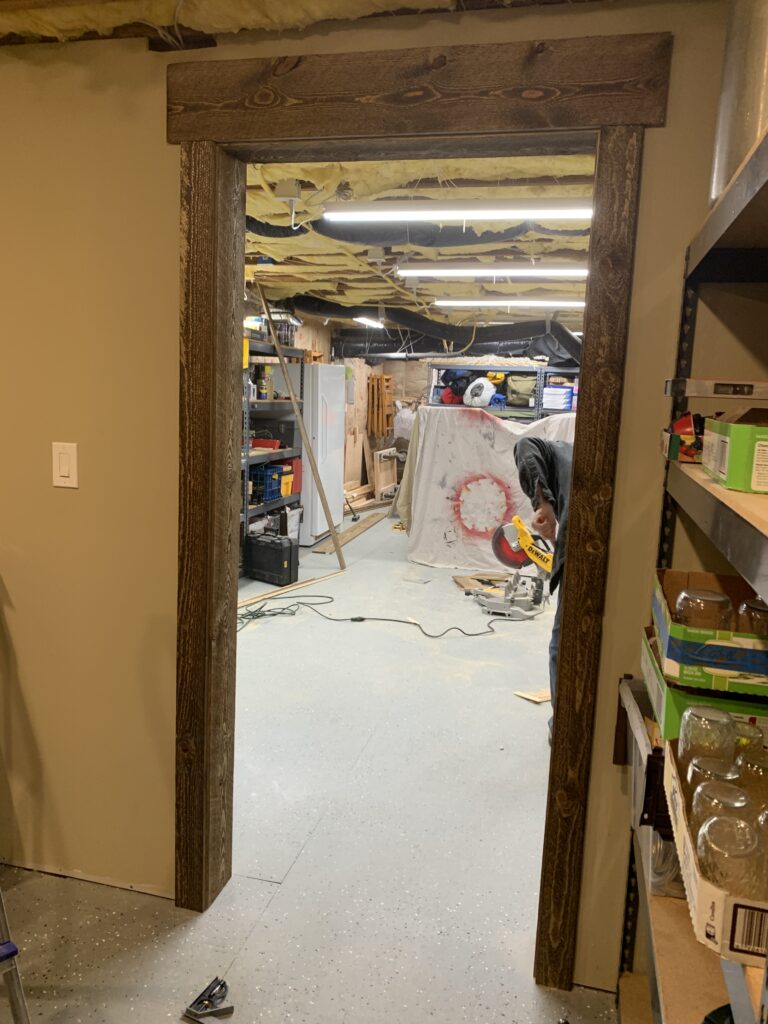
It looks like a kitchen, but it's a storage room! You could use a bedroom or other spare room. Remember, what matters to the viewer is what they see in the video—they have no idea what's in front, to the sides, or above you! Our ceiling isn't even finished...it's joists and insulation, HVAC ducts, and water pipes!
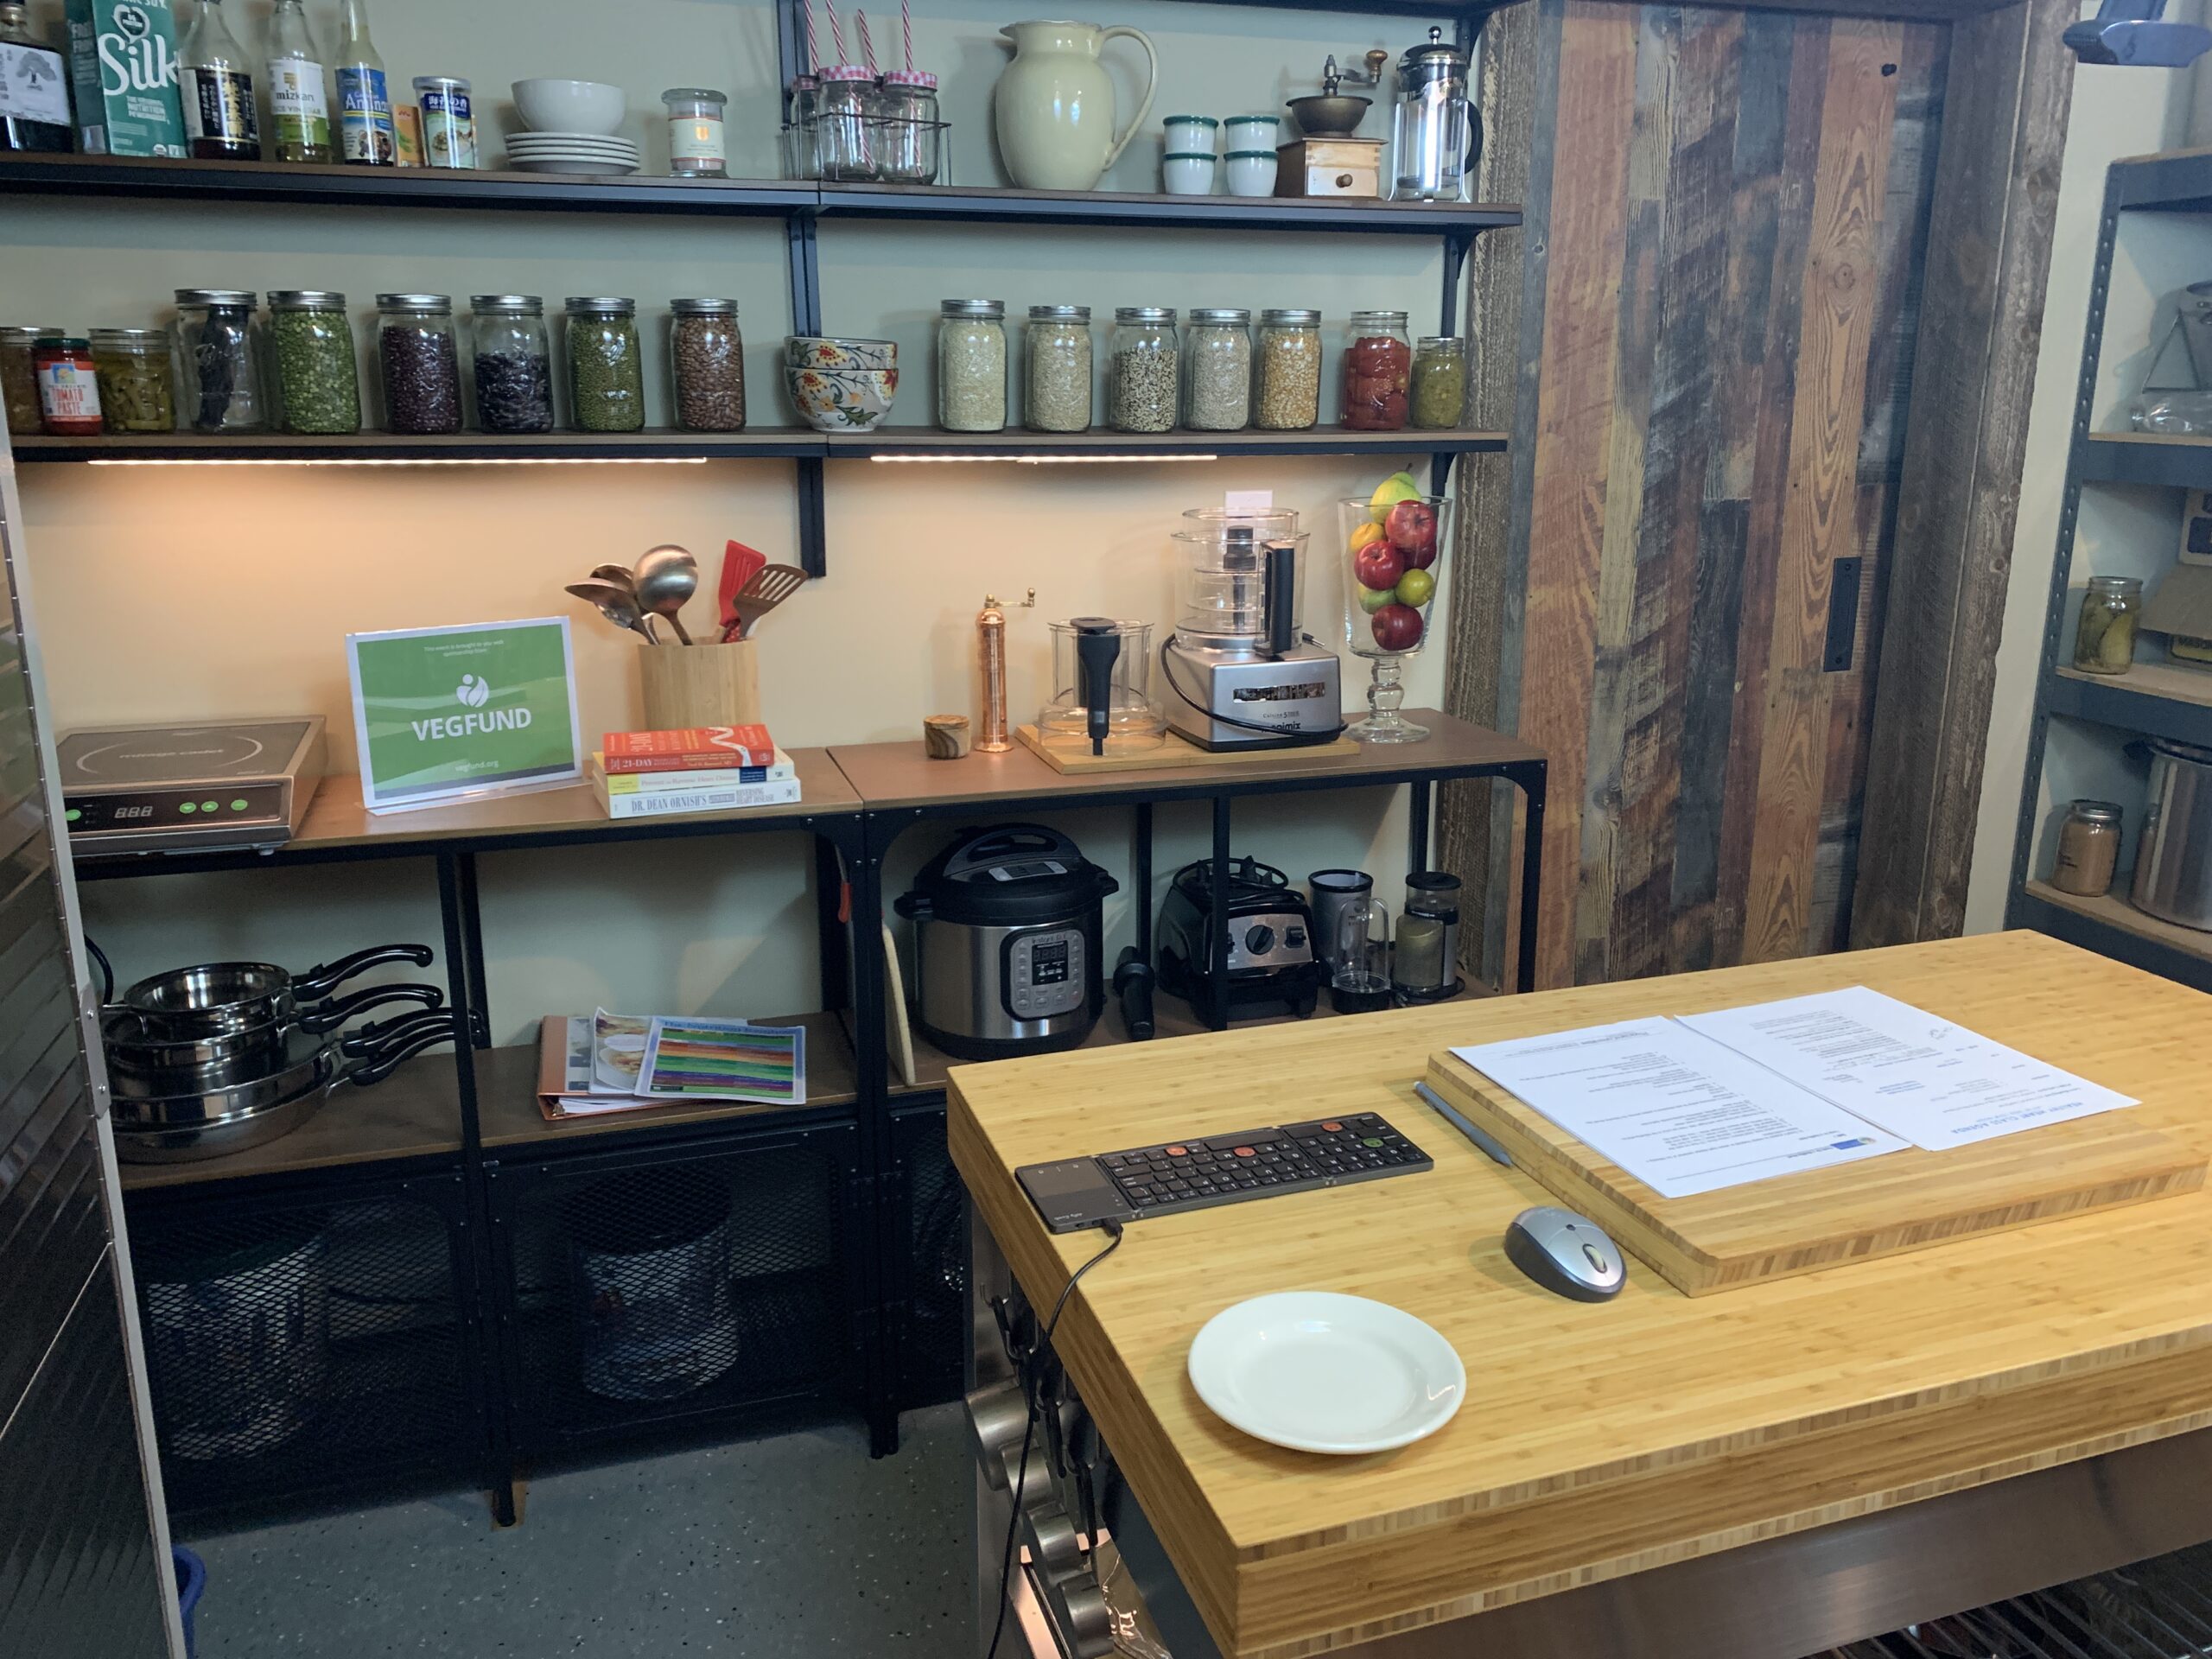
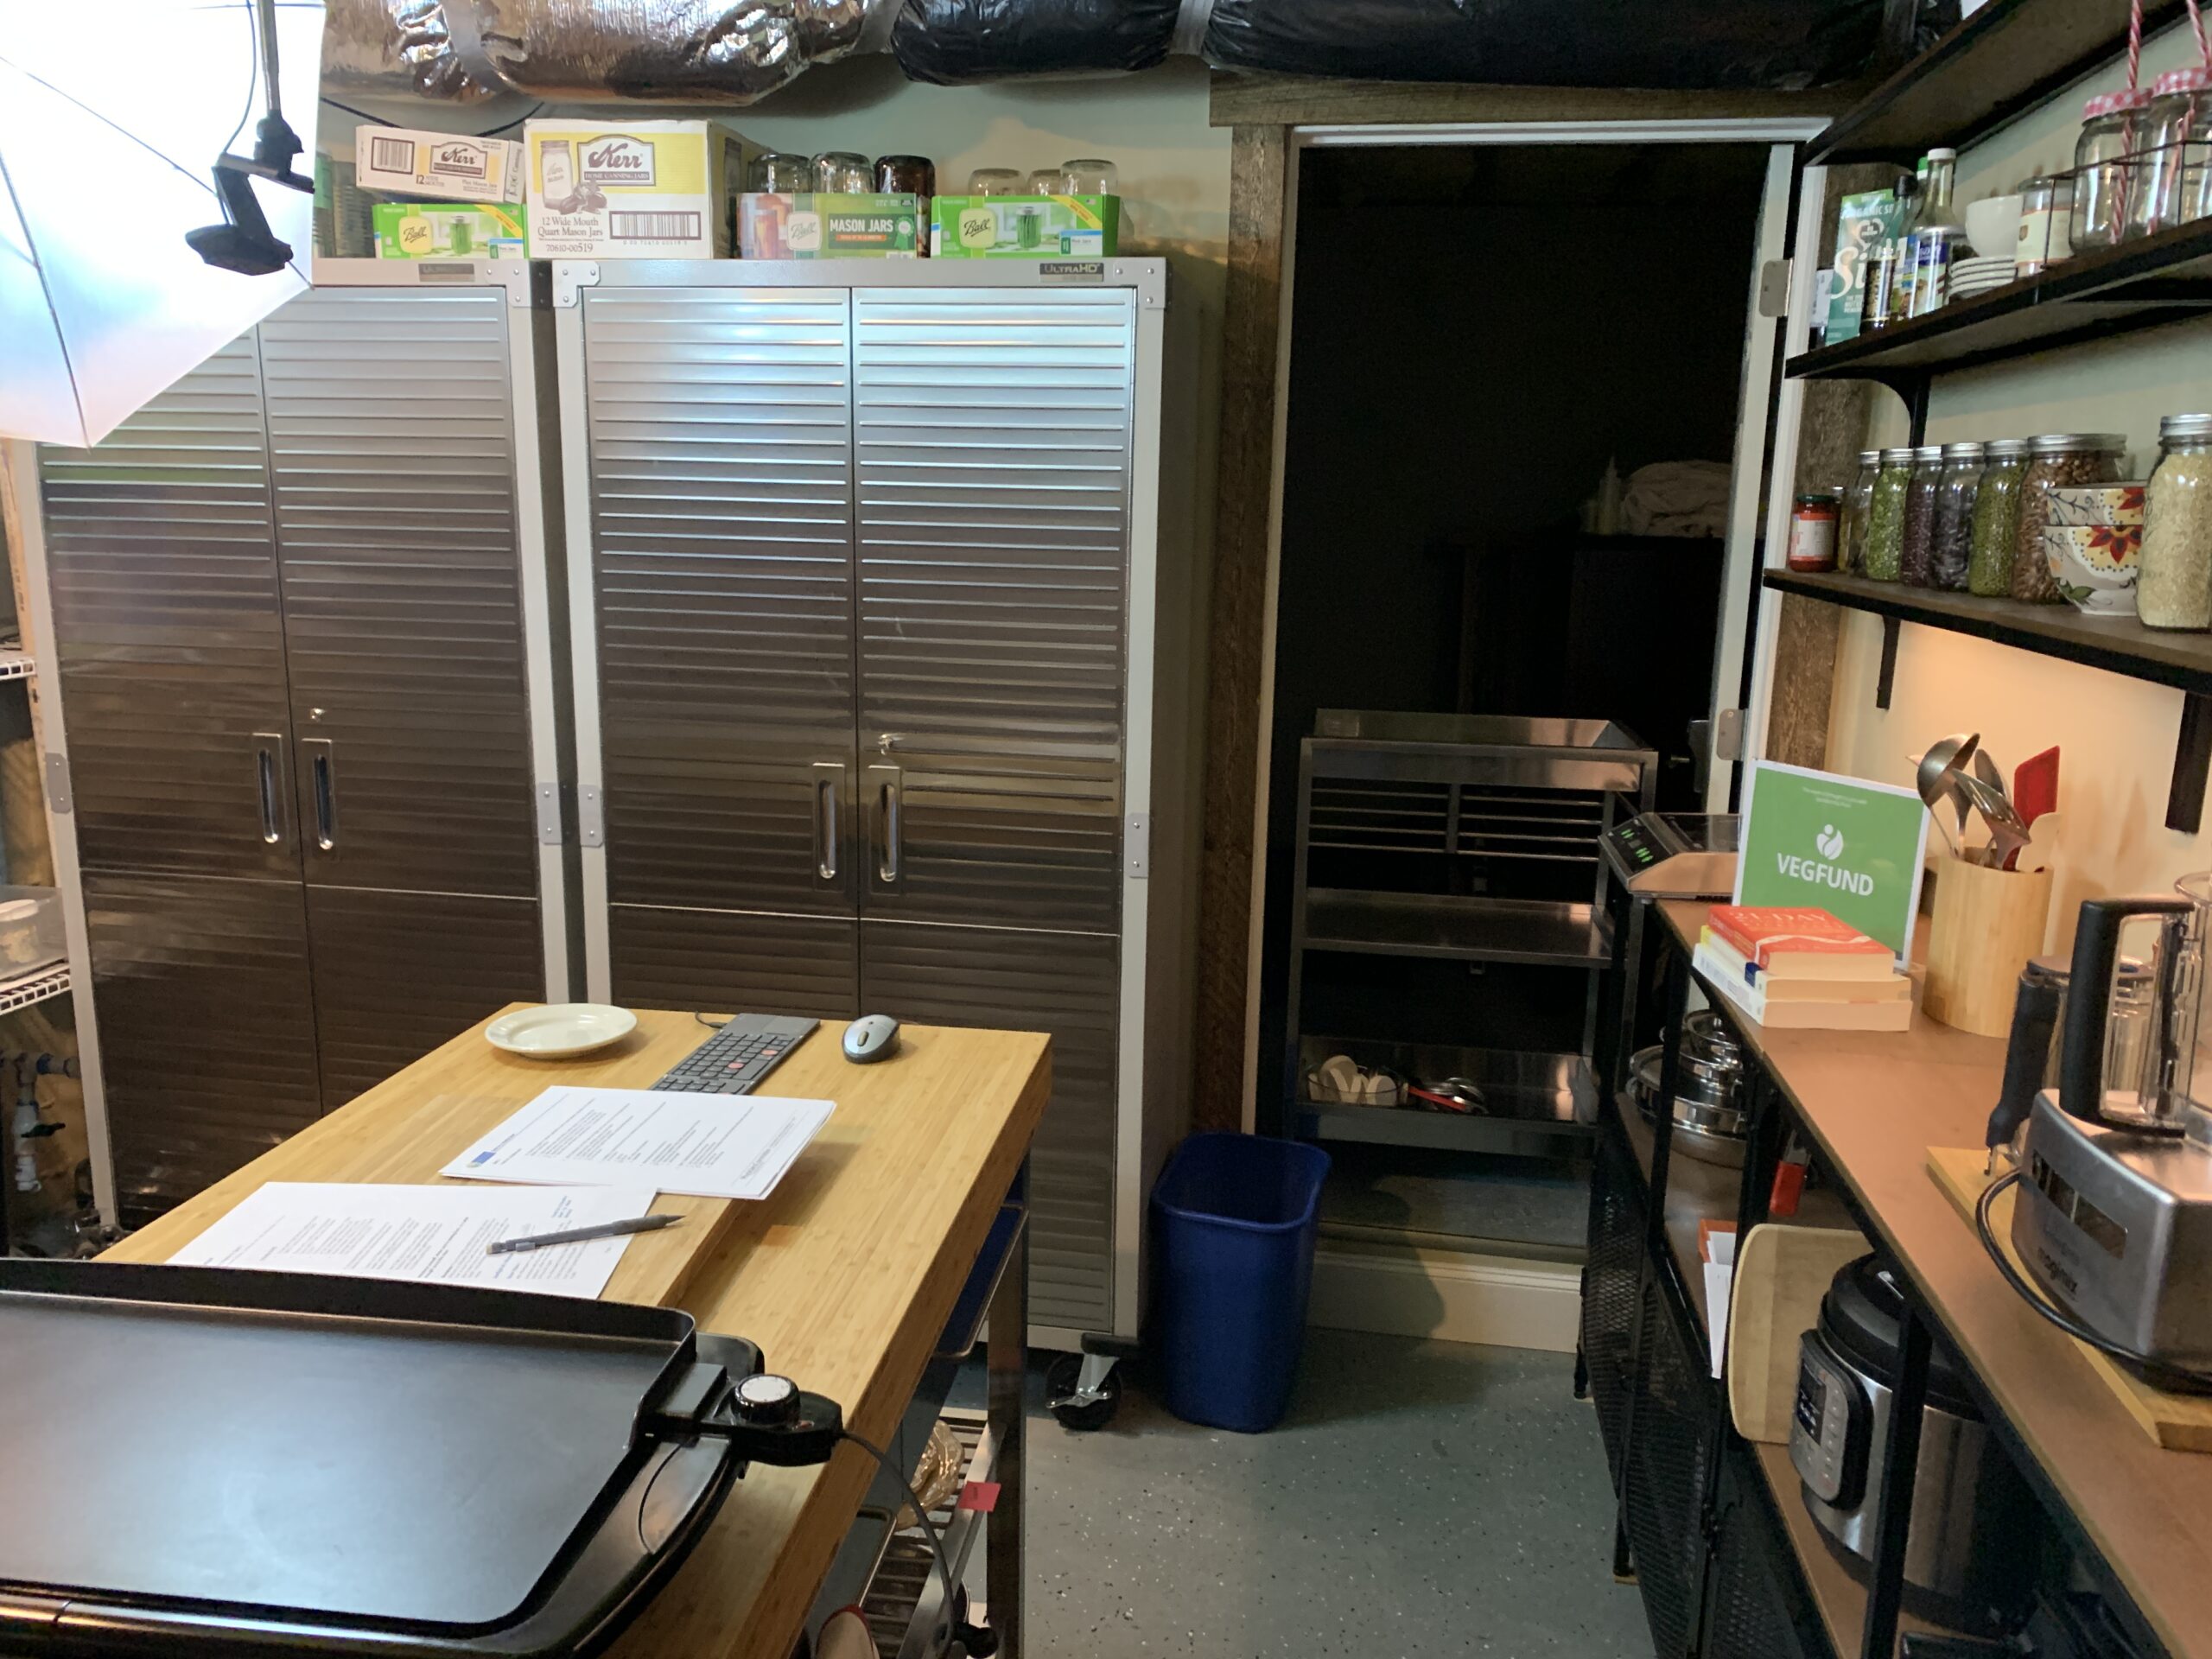
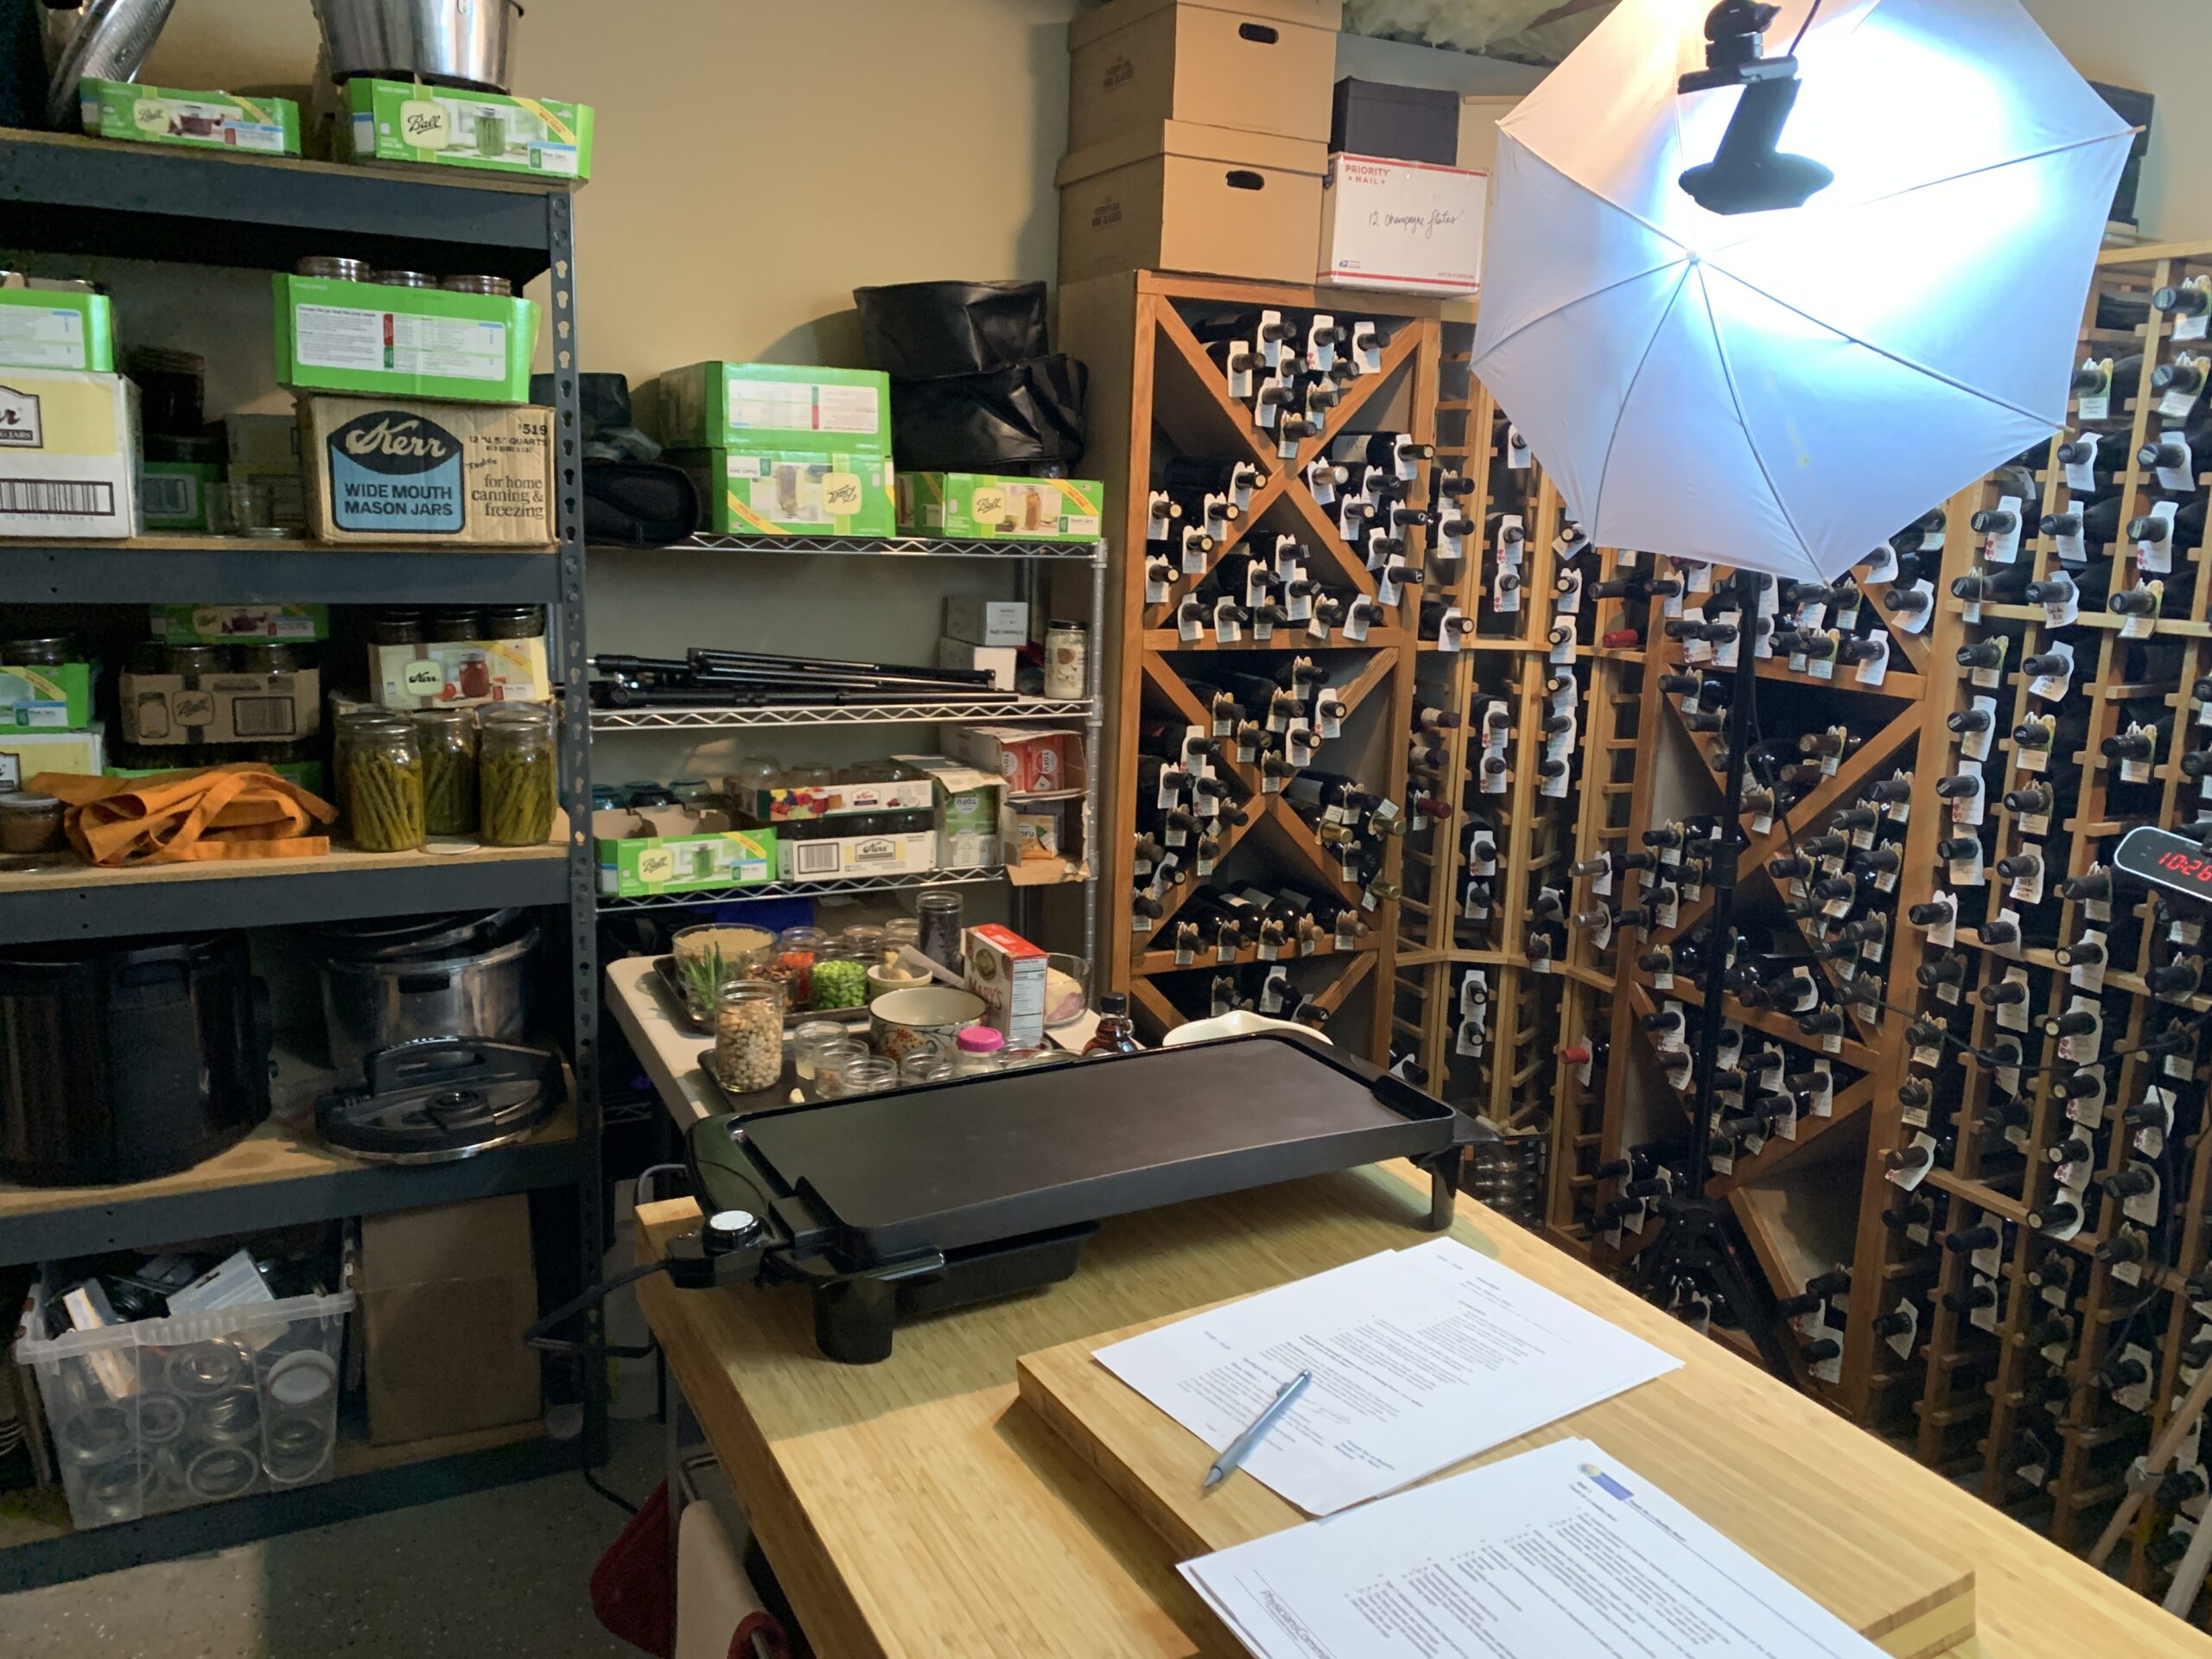
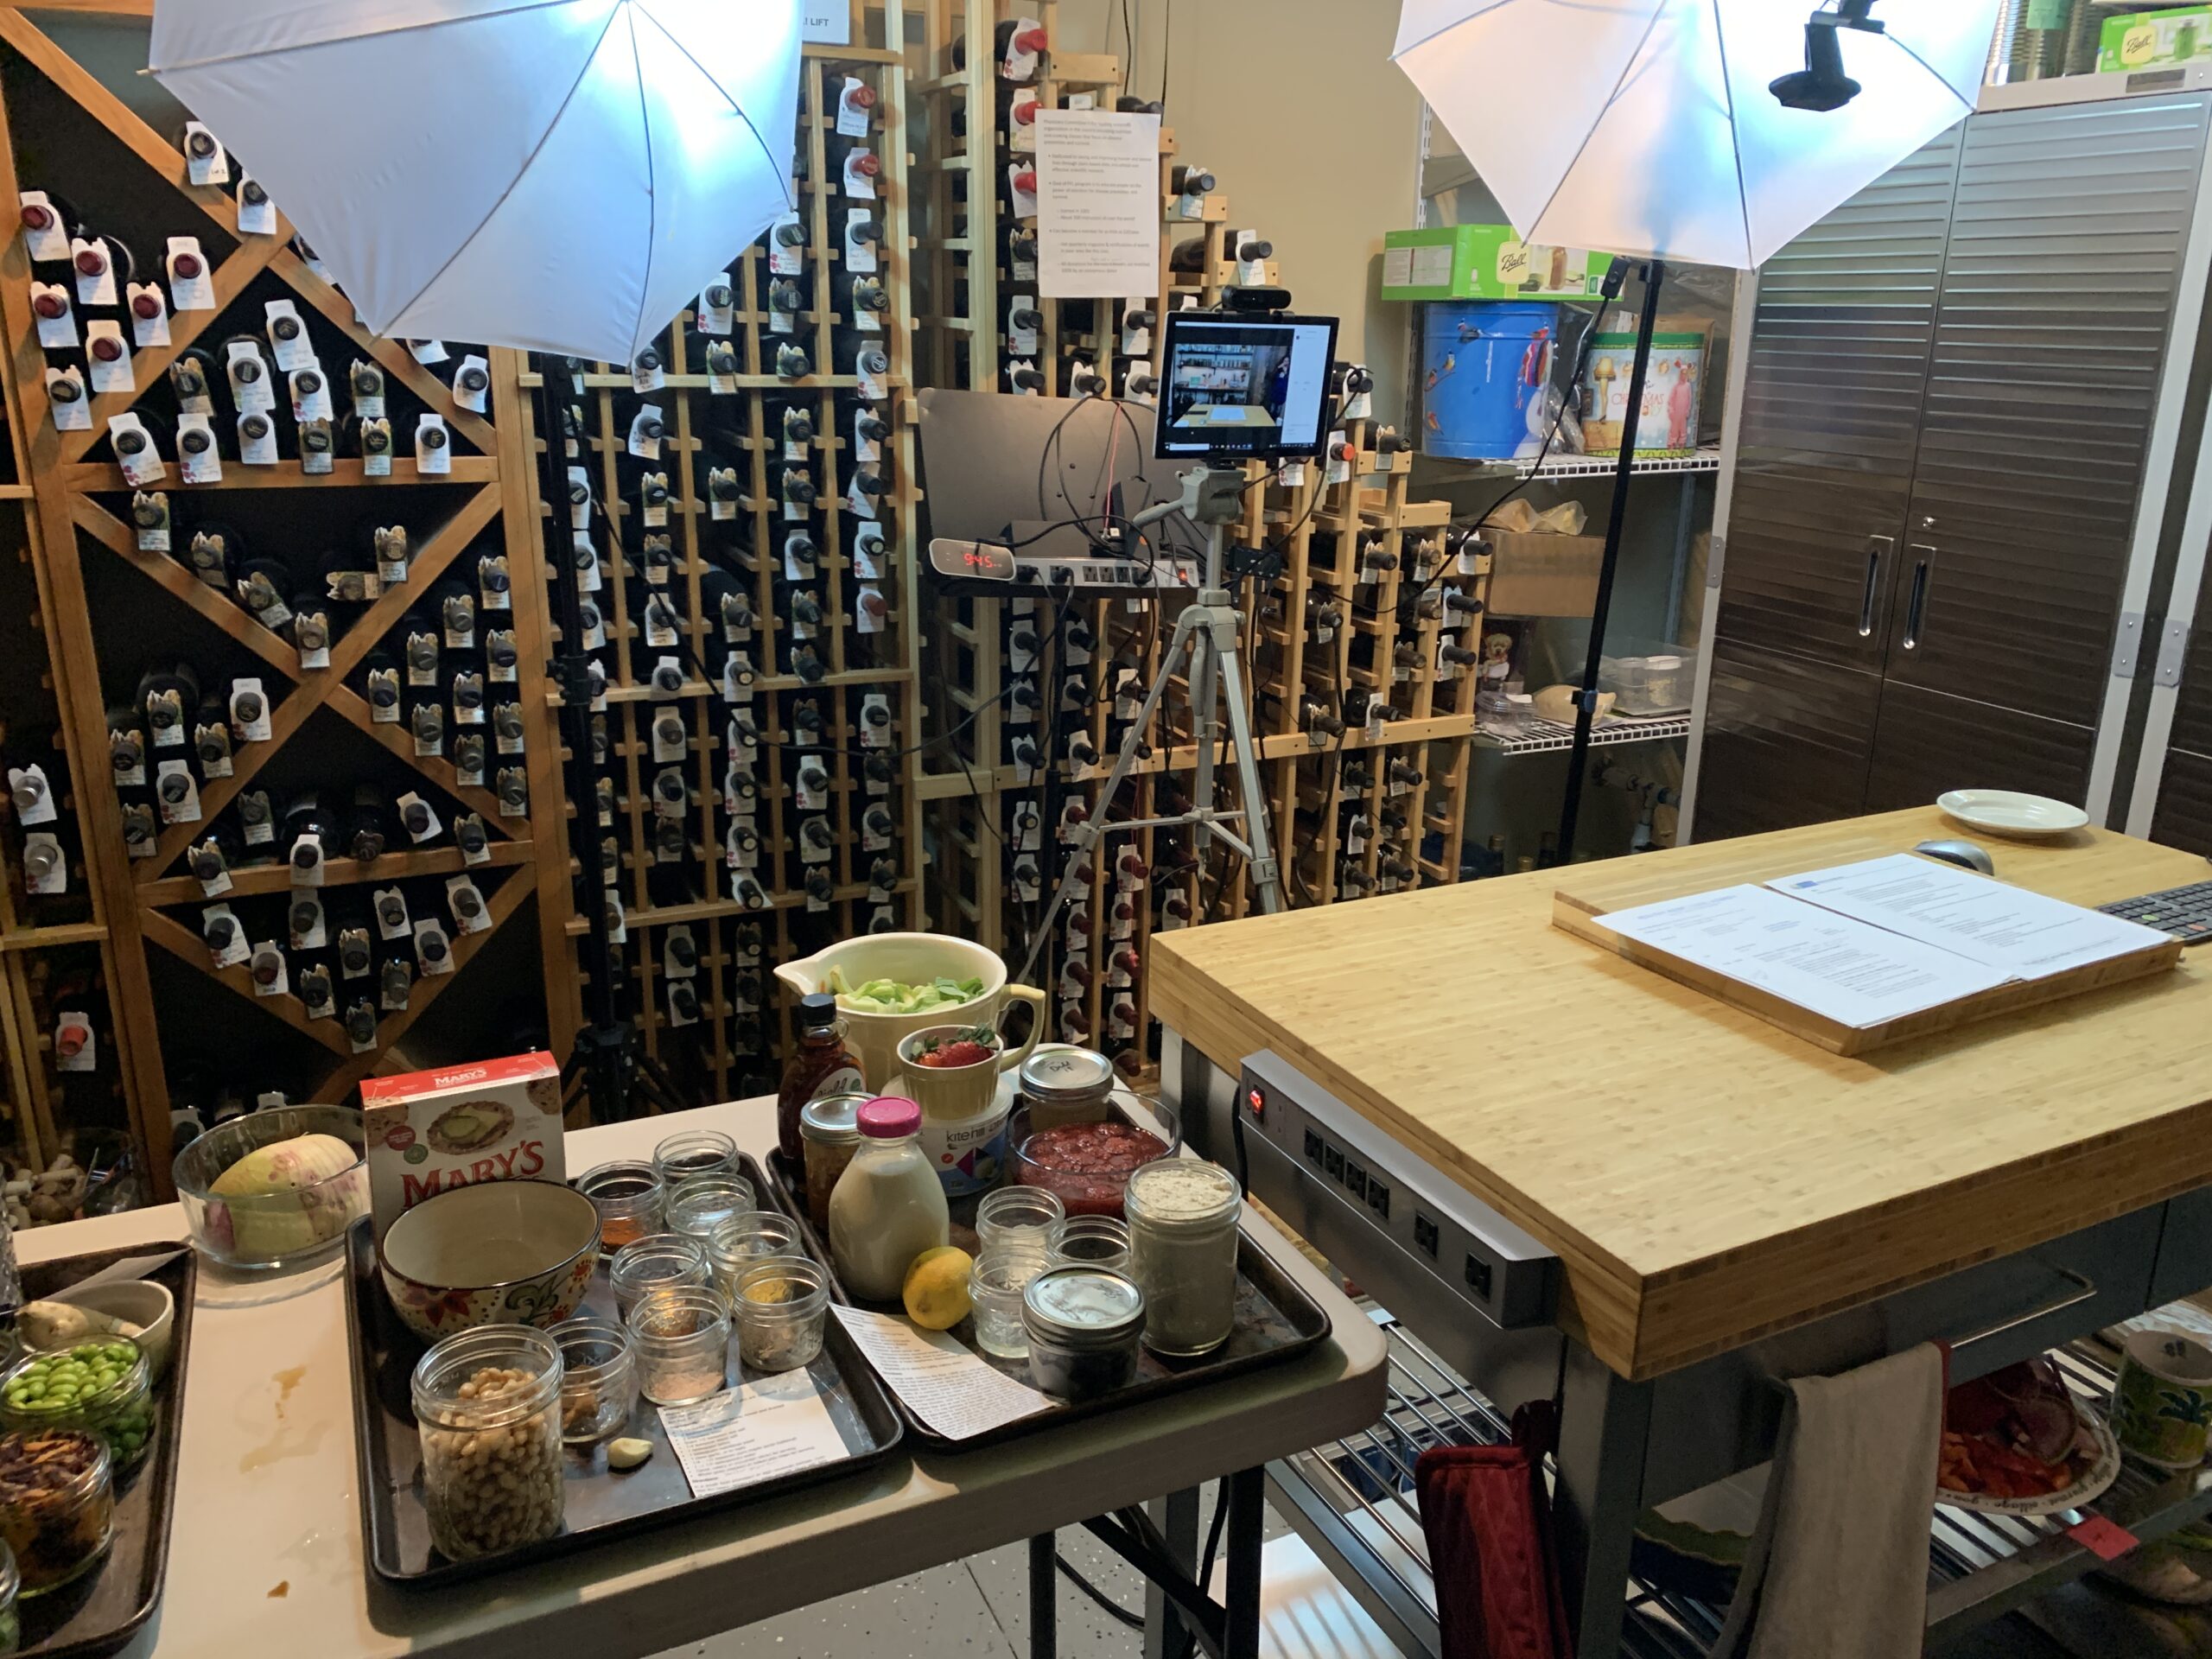
The Setup for the Zoom Classes, in a Kitchen or Elsewhere
The Logistics
Here are things you need to have (head over to my Zoom Class Resources Page for specifics on ordering things on these lists):
- Surface to work on
- Surfaces to stage your mise en place and equipment
- A nice, uncluttered, background
- Power
- Wired ethernet connection do NOT use wifi, you'll have poor image quality and connectivity. NOTE: When I started...I stretched a 75-foot-long ethernet cable from my kitchen to our router when I did my Zoom classes—you can do this even if your router is in another part of the house!
- Cooktop, whether it's your kitchen or a portable device
- Adequate lighting
- Device to run Zoom
- Camera (either in your device running Zoom or external cameras)
Here are things I highly recommend:
- External keyboard and mouse
- Wired lapel mic
- Headphones or headset
- High-quality power strip(s)
- Clock
- Lipstick, or turn on lip color option on Zoom, so people can better see your mouth—it really does make a difference for viewers.
My Setup
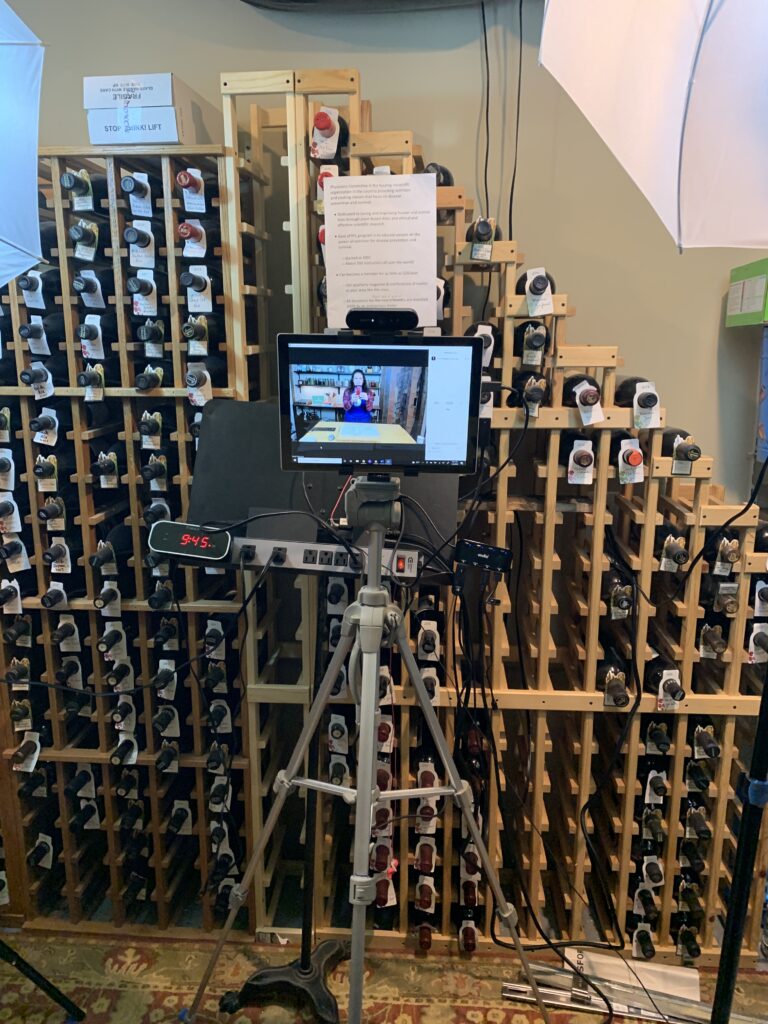
See my Zoom Class Resources page for details on all these devices and accessories.
Zoom Device and Things to Run Zoom: Computer vs. Tablet vs. iPhone
I use a Microsoft Surface Pro 4 tablet to do my Zoom Cooking Classes. But any laptop or computer tablet will work.
- It’s what I had
- I only have to log into Zoom with one device (logging in with two devices can disable some Zoom features, like Polls, which are great for doing Food for Life class quizzes).
- I can attach as many USB cameras I want for multiple views (front, overhead, etc.), which I cannot do with an iPhone or iPad
- It’s a BIG screen so I can still see people on Zoom from where I’m standing in the kitchen or studio (computer is 8-10 feet in front of me)
- Easier for me to do share screens for videos and other things I want to share
- I can connect a USB keyboard with a mousepad for keyboard shortcuts, running Zoom, typing in chat
- I can use my phone for texts or phone calls if someone’s having trouble logging into the class
The Surface Pro turns into a tablet as the screen detaches from the keyboard. Makes it really easy to mount in a tripod.
I use a docking station to power my tablet when disconnected from the computer keyboard and it has multiple USB outlets for my external keyboard/mouse, speaker/mic splitter, overhead camera. It also has CAT5 outlet for hardwiring to network.
It is important to use hard-wired devices as much as possible. Blue-Ray devices will slow down your video feed, decrease image quality, etc. as your computer has to crunch all that wireless data simultaneously. Hardwire these things:
- Network connection (don’t use wifi). Use ethernet cable to home network or directly into router.
- Microphone
- Headphones/Headset
- Keyboard/mouse
- External camera(s)
I detach the screen of my Surface Pro 4 and mount it on a tripod to run my Zoom. If you only have a laptop, you can use a laptop on a stand. I recommend a laptop over iPhone or iPad because you get better functionality with Zoom, can add cameras, keyboards, mice, and can use your iPhone as a phone if you need to contact students during the class.
I switched out my power cord for a docking station—this gives me extra ports I need for all the accessories and ethernet connection. I also added a USB splitter to this for more USB ports. What's connected to my docking station?
- Ethernet cable
- 2 webcams (one front-facing and one facing down over my workstation). You can mount something from above or use a boom for the downward facing webcam.
- USB splitter
- USB adapter for mic and wired headphones (if using wired headphones)
- USB adapter for wireless mouse
- Wired external keyboard
- Charging cord for Bluetooth headphones
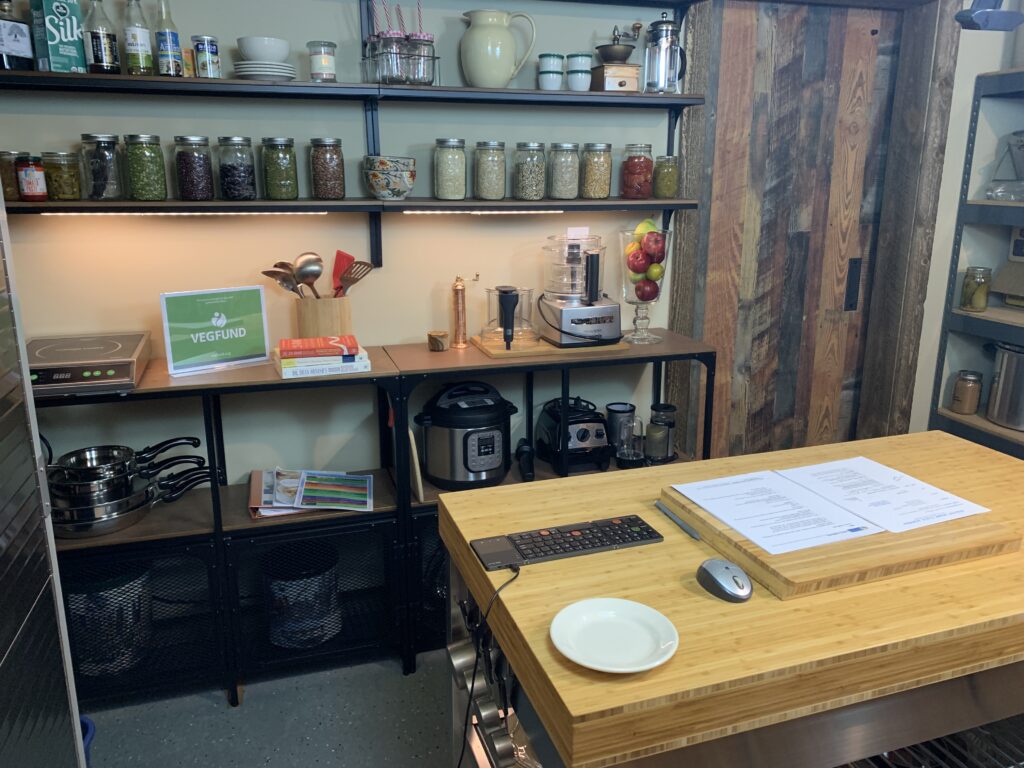
I keep my folding wired keyboard and wireless mouse on my workstation during the class so I can run Zoom and also quickly toggle between different cameras with keyboard shortcuts during the cooking demo. I move them all the way to the edge of the countertop so I can use but it's not really visible during the class.
Cameras
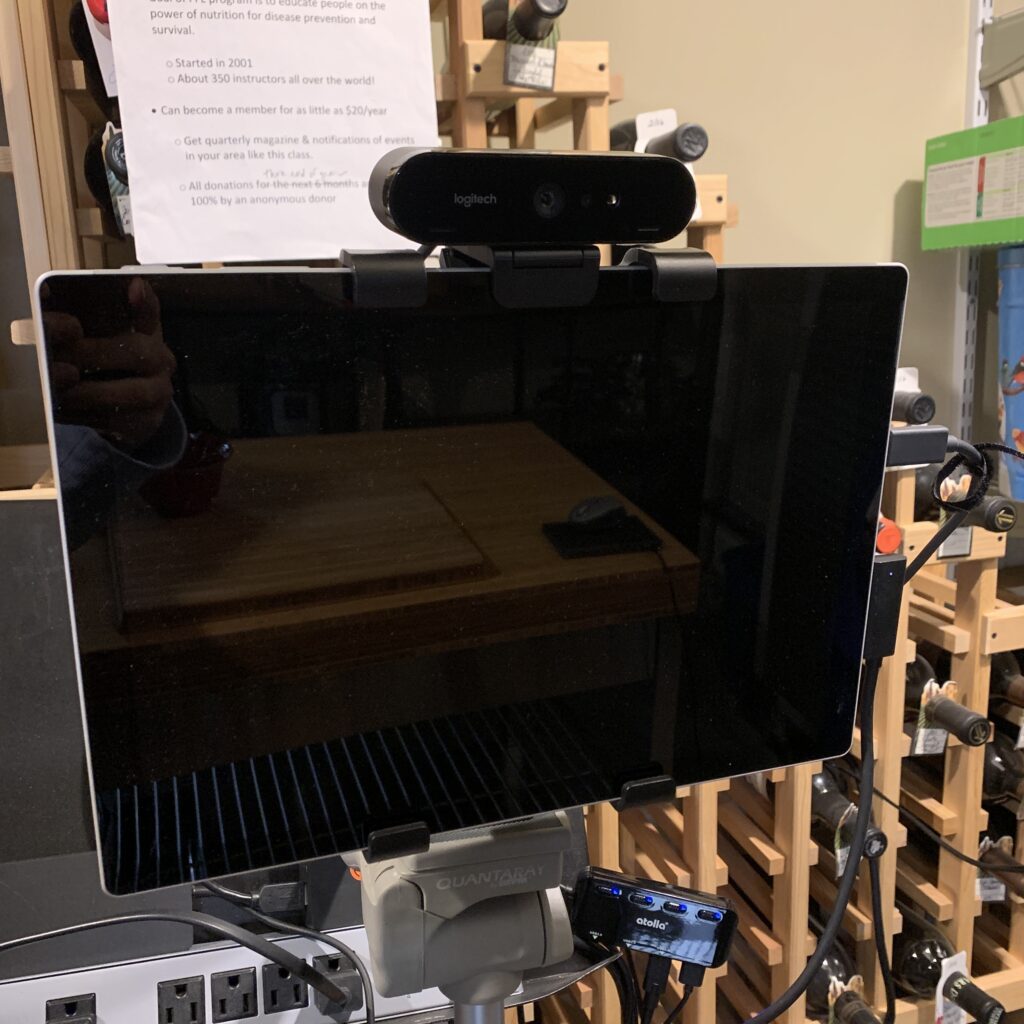
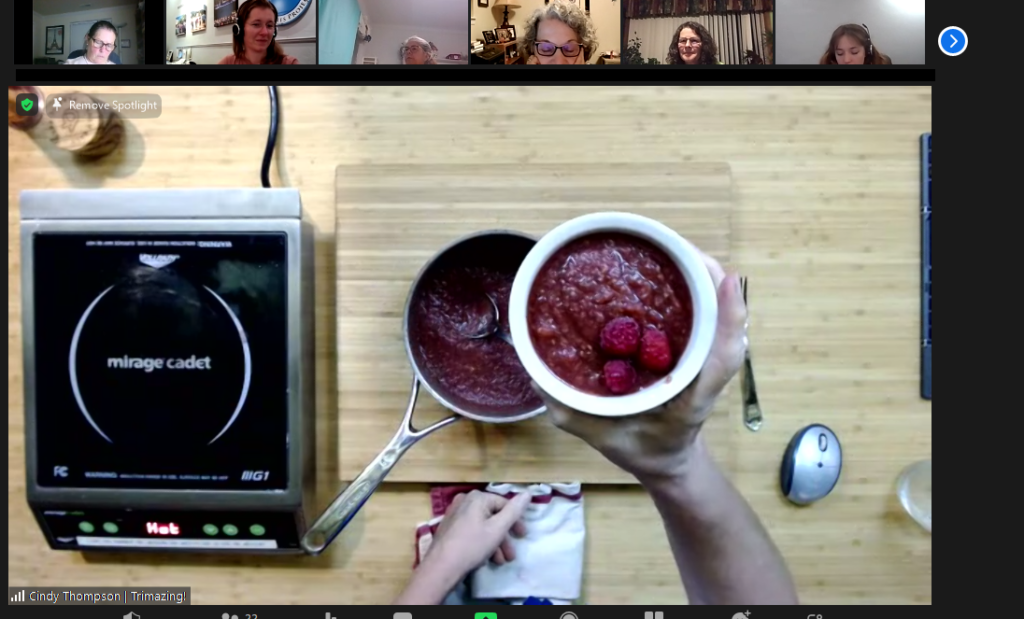
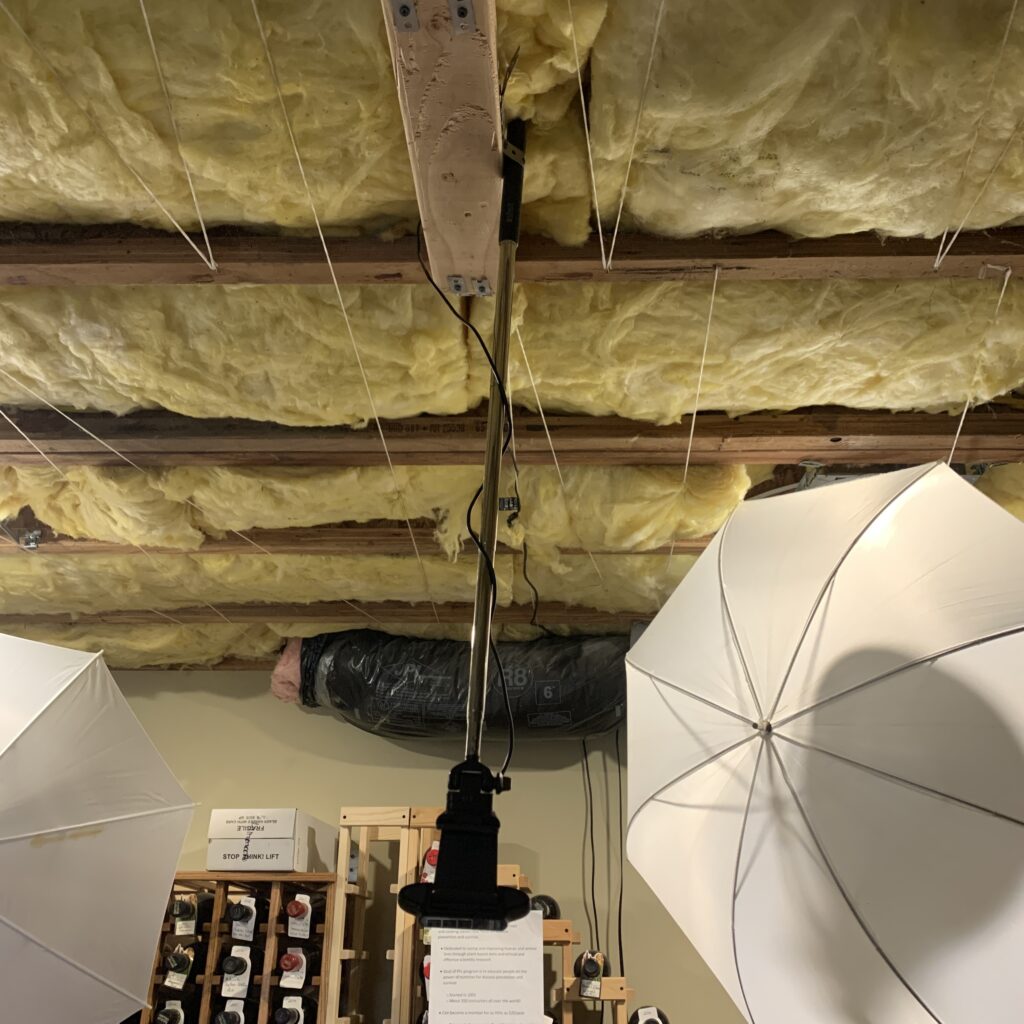
I like to use a front camera and an overhead camera while I’m teaching and I switch between them as applicable so viewers get a great view of what I'm doing when cooking.
Zoom will let you switch between different cameras on the fly! You can use your mouse to click on little up arrow next to the video icon on the bottom left OR use a keyboard shortcut. Alt+N is the keyboard shortcut to toggle between cameras with a PC computer! This is another reason to have an external keyboard, so you can quickly change cameras on the fly. NOTE: I put a little colorful smiley-face stickers on these two keys on my keyboard so I know exactly which keys to toggle without having to hunt on the keyboard during the demo!
Go to the control panel on your computer and turn OFF any built-in camera you don't want to use so that it doesn’t toggle to that.
I used to use the built-in front-facing camera on my Surface Pro 4, but when I moved from the kitchen to the basement storage room, I needed better camera focus and ability to change the Zoom level so that the camera didn't extend too far right-to-left and show areas I didn't want to show up in the picture. Now I use one USB webcam for the front AND another one for overhead.
I use the same webcam for front and overhead. I love Logitec because they have an app to load onto your computer where you can finetune the setup of each webcam with settings for brightness, contrast, color, and how wide the field of view is. You can really customize things.
UPDATE: I've now moved from webcams to actual cameras, which does add expense and equipment needs.
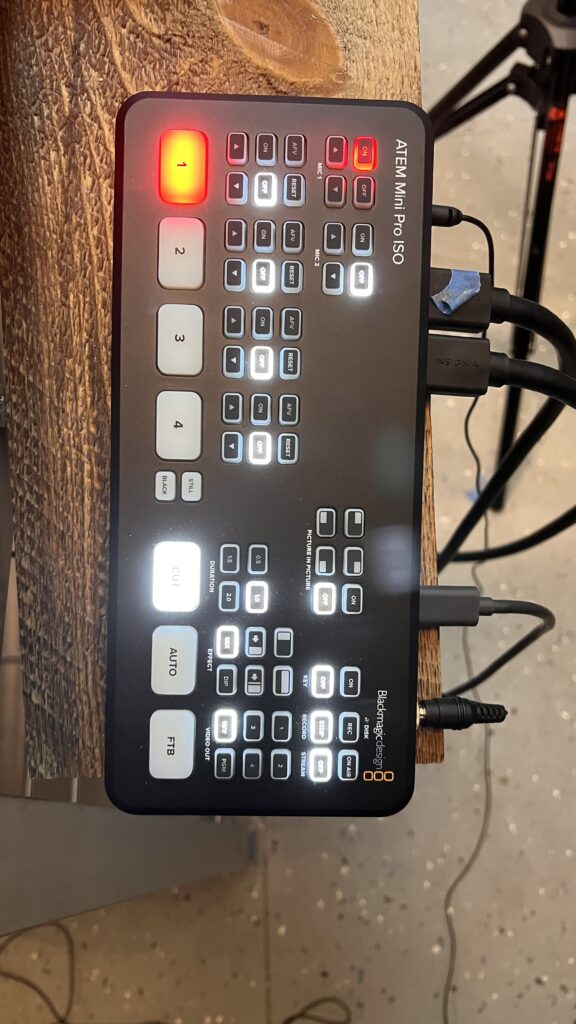
Sony ZV-E10 Mirrorless with 10-18mm Lens Vlog Cameras, one for front and one for overhead, instead of the webcams. This was recommended by my camera shop for what I'm doing. This gives better image quality and allows me to use a switch (see below) so I can use multiple cameras on platforms other than Zoom, such as Streamyard, that don't have a way to otherwise switch between cameras. This is particularly important if you are going to be a guest on someone else's show, like a podcast or Facebook Live.
IMPORTANT NOTE: When you use your camera for video, you need to change a setting on the camera to send "Clean HDMI Out." In layperson's terms, when you connect the HDMI out from your camera to the switch, you are sending what's on the viewfinder screen of your camera, which includes all of the text about your lens, shutter speed, etc. To make that text go away, go through your settings and select "Clean HDMI Out." There are great YouTube videos on how to do this for your specific camera. This will help you avoid the crying meltdown I had when I first set this all up!
Overhead Boom
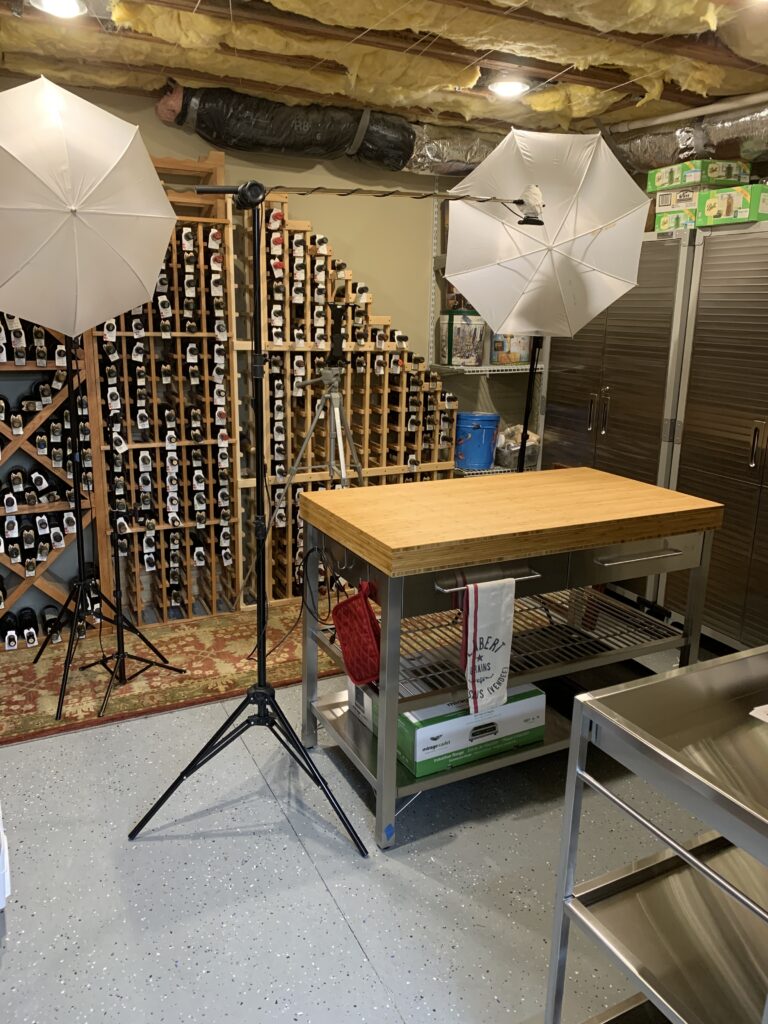
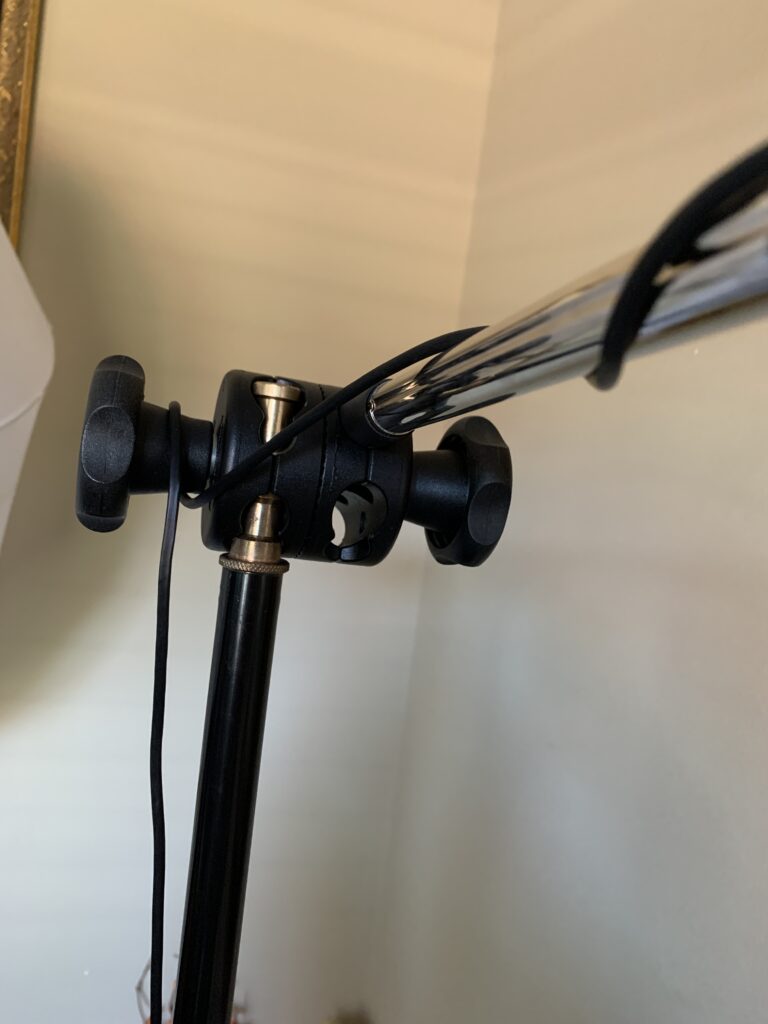
I built an overhead boom with random photography equipment I got for free from a neighbor. I attached my USB webcam to a selfie stick and stuck it through a grip head adapter on a light stand tripod. There's a lot of McGyver action here! But you can also buy overhead boom setups (see my Resources page).
Once I moved out of my kitchen and into my dedicated basement studio kitchen, I got rid of the overhead boom and attached the selfie stick to a ceiling joist.
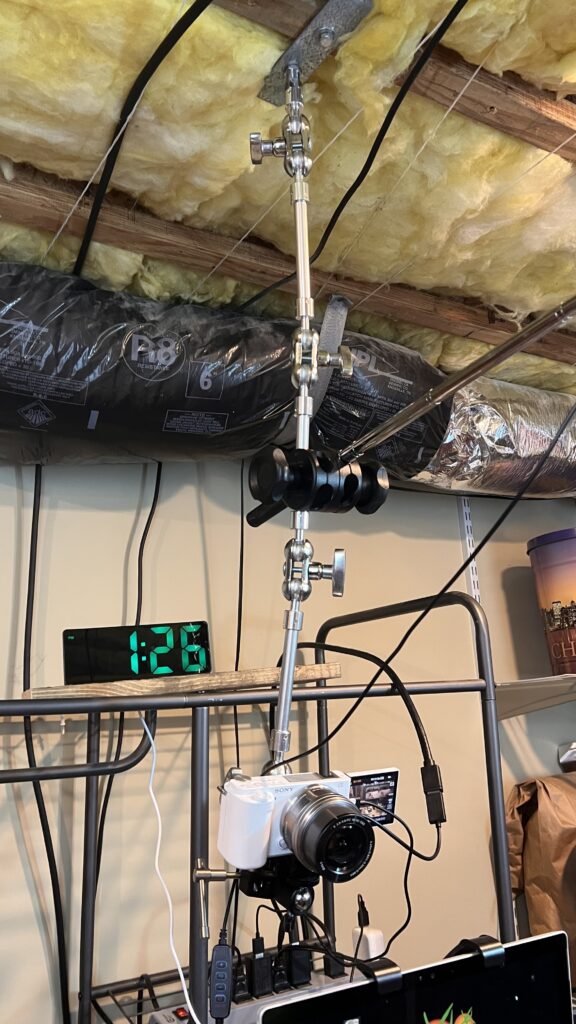
When I switched to cameras from webcams, I needed more robust ceiling mounting. See my Resources page for links for things discussed here.
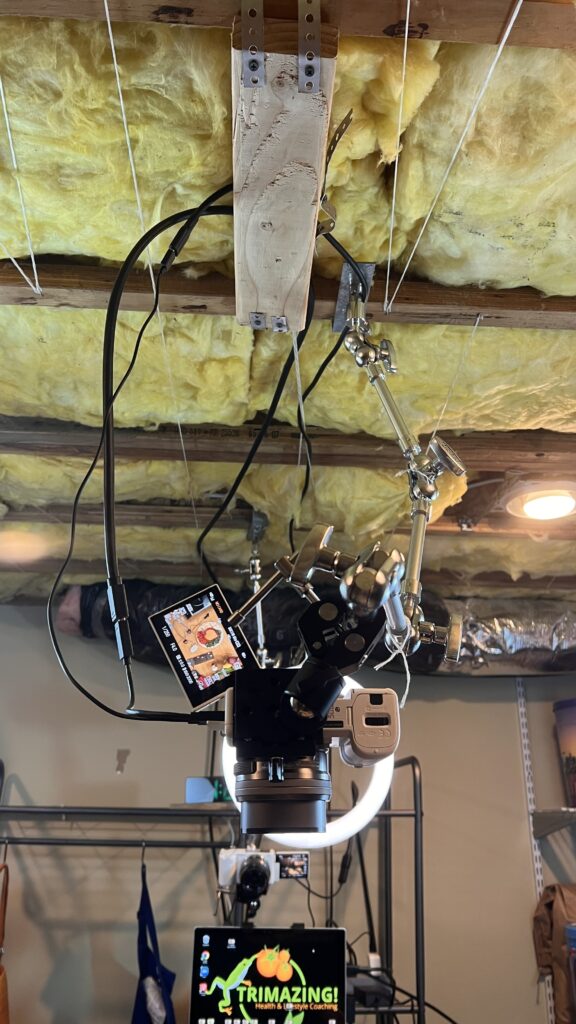

This too is McGyvered out of several parts. A Kupo Articulated Arm is attached to the ceiling by a bracket with a bolt that screws into the end (I found the right size bolt at the hardware store). I can adjust this arm at four different places to bring the camera right where I want it to be.
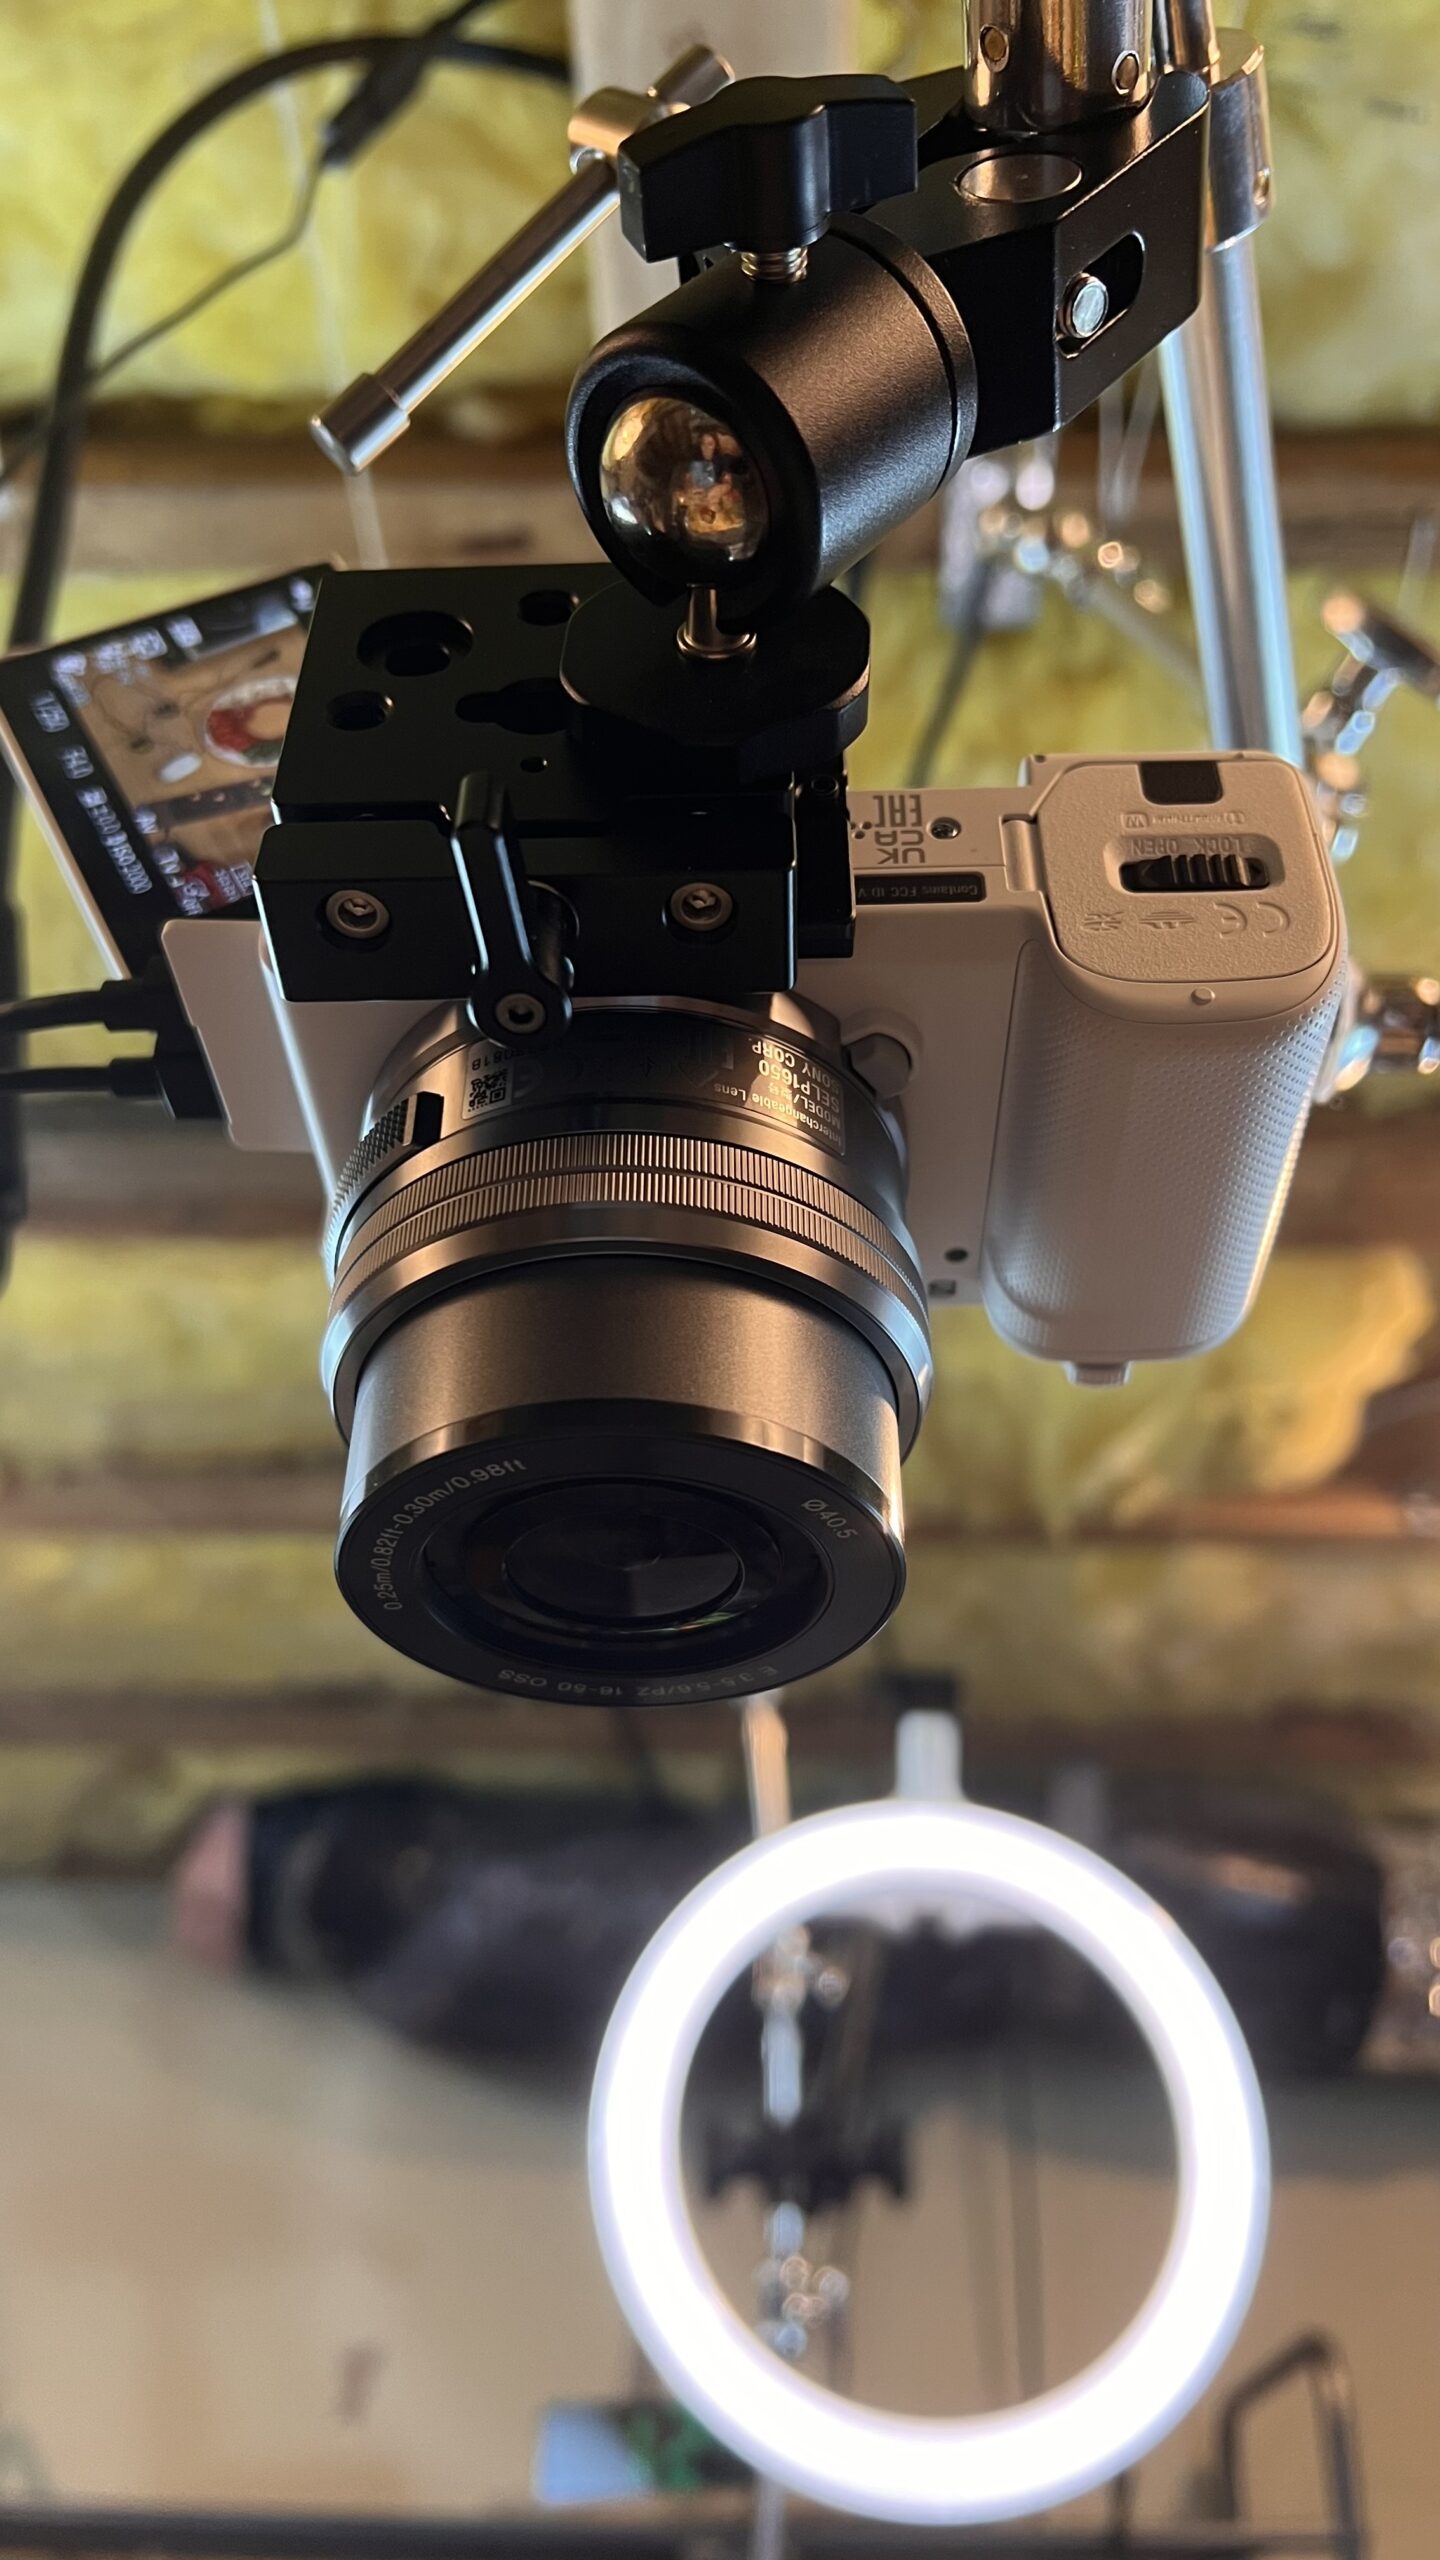
On the camera end, I have a Manfrotto Super Clamp that clips onto a Zuma Screw Clamp with Ball Head attached that my camera mounts to. The Ball Head allows the camera to swivel for finer adjustments without having to loosen the articulated arm. Note, I cannot find the Ball Head I use on Amazon, but there is a combination Super Clamp/Ball Head that would work (in fact, I may get this as a replacement!).
I wanted to be able to quickly remove the camera from this and got a SmallRig Quick Release Clamp and Plate, but it's not my favorite and I may switch to something else. The lever on the screw to tighten runs into the base of the camera and is a pain to use.
Audio (What YOU Hear)
See my Zoom Class Resources page for details on all these devices and accessories.
I know people worry about being corded during a cooking class, but your video and sound quality will be leaps and bounds ahead of those using Bluetooth sound devices. Wireless devices will degrade your Zoom video (it eats up bandwidth) for the viewer. You can get long cords, secure them to your apron/clothing, and manage them just fine. You aren't moving too far out of the camera view anyway.
A lapel (Lavalier) mic will focus on what sound you want picked up (your voice), not like the omni-directional mic in your computer which may pick up cooking sounds and amplify them, especially a spoon hitting the side of a bowl or pot.
My lapel mic comes with a 20-foot long cord which I run the cord up behind my apron and clip to my neck strap. I tuck the controller in my back pants pocket so the cord trails off behind me and out of the way.
NOTE: The lapel mic takes a little battery to work, which I didn’t realize and nearly returned it for not working! I change the battery after doing two 2-hour classes to make sure I don’t lose battery in the middle of my class (I don’t know how long the battery lasts) and keep a big sheet of these batteries on hand. I use the used batteries during Zoom calls in my office where it’s easy to change them out, vs. the middle of a cooking class.
Audio (What Your Audience Hears)
You want headphones so:
- You don't get feedback from your mic picking up your computer speakers.
- You can hear viewer questions clearly while you are cooking
The style you use is completely up to you. They can be be wired or Bluetooth (they won't mess up your bandwidth).
I started with wired headphones and used a long adapter cord. To keep the wires of the mic and headphones tidy, I used Velcro keepers to strap both cables together every few feet.
Now I use Bluetooth rechargeable wireless headphones. I like that these have loops that hook over my ears so I don't ever have to worry about them falling out during my class. I just have to make sure I have them charging between classes. These are dedicated just to my cooking classes so I don't use them and forget to charge. I put them right on the charger as soon as I'm done with a class and they stay there until I have another class.
Don't use the mic built into the headphones! Use the lapel mic. You can specify in Zoom which mic you want to use.
Binder clips are your friends! When I used wired headphones, I used small binder clips to secure the drops from the wired earpieces to my apron neck loop, which kept them from being pulled out when I walked around. I also used a binder clip on the middle back pants beltloop to hold the extension cable end so it didn’t disconnect the headphones while I moved.
Lighting
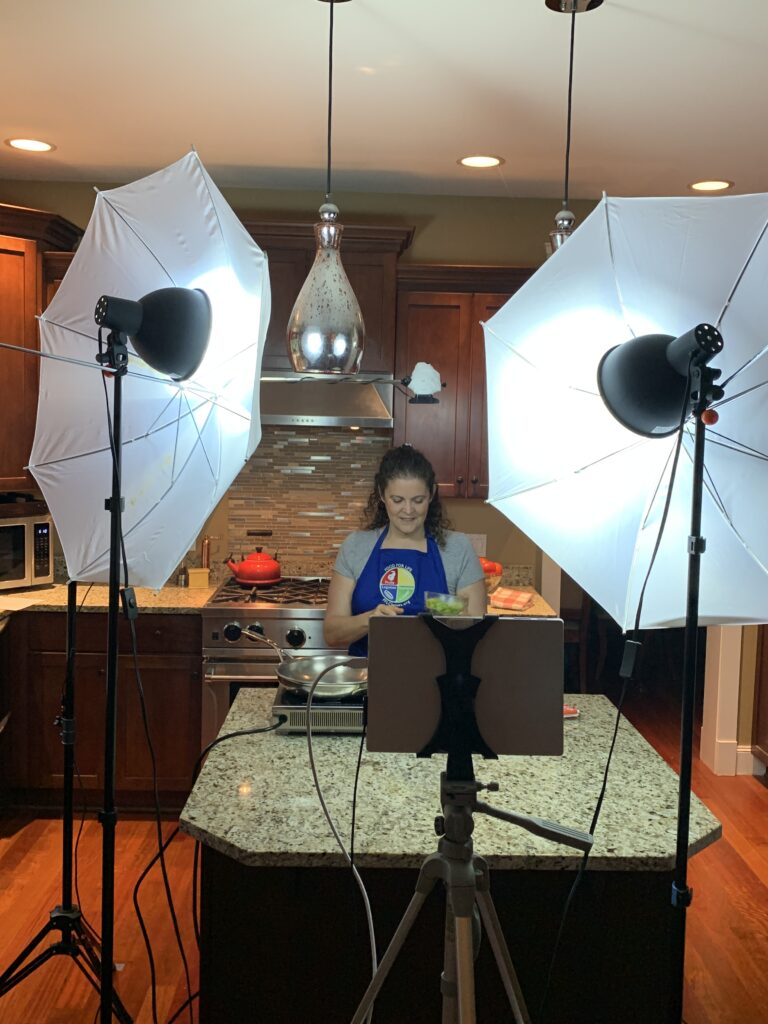
You’ll have to play with your lighting. Here are things that can come up with lighting:
- Overhead kitchen lights can put white “hot spots” on your counters or you or might not be bright enough. I had to unscrew two recessed lights in my kitchen ceiling before classes due to hot spots on my countertop
- My pendant lights over my kitchen island give everything a red tint and create horrible hot spots on my counter, so I keep them turned off during my classes.
- May have to close window blinds and it may change due to time of day (I keep shades open for morning and night classes but close in afternoon when sun shines through.
- Close blinds in windows behind you as your camera will automatically adjust to dim that down, making you and your cooking too dim to see
- Experiment on your lighting at different times of day.
- Use tripod camera lighting to illuminate your face and work area from the front, not overhead. This will prevent shadows.
I use tripod umbrella lights. The umbrellas are great for diffusing the light and preventing hot spots.
Blue Painters Tape Marks the Spot
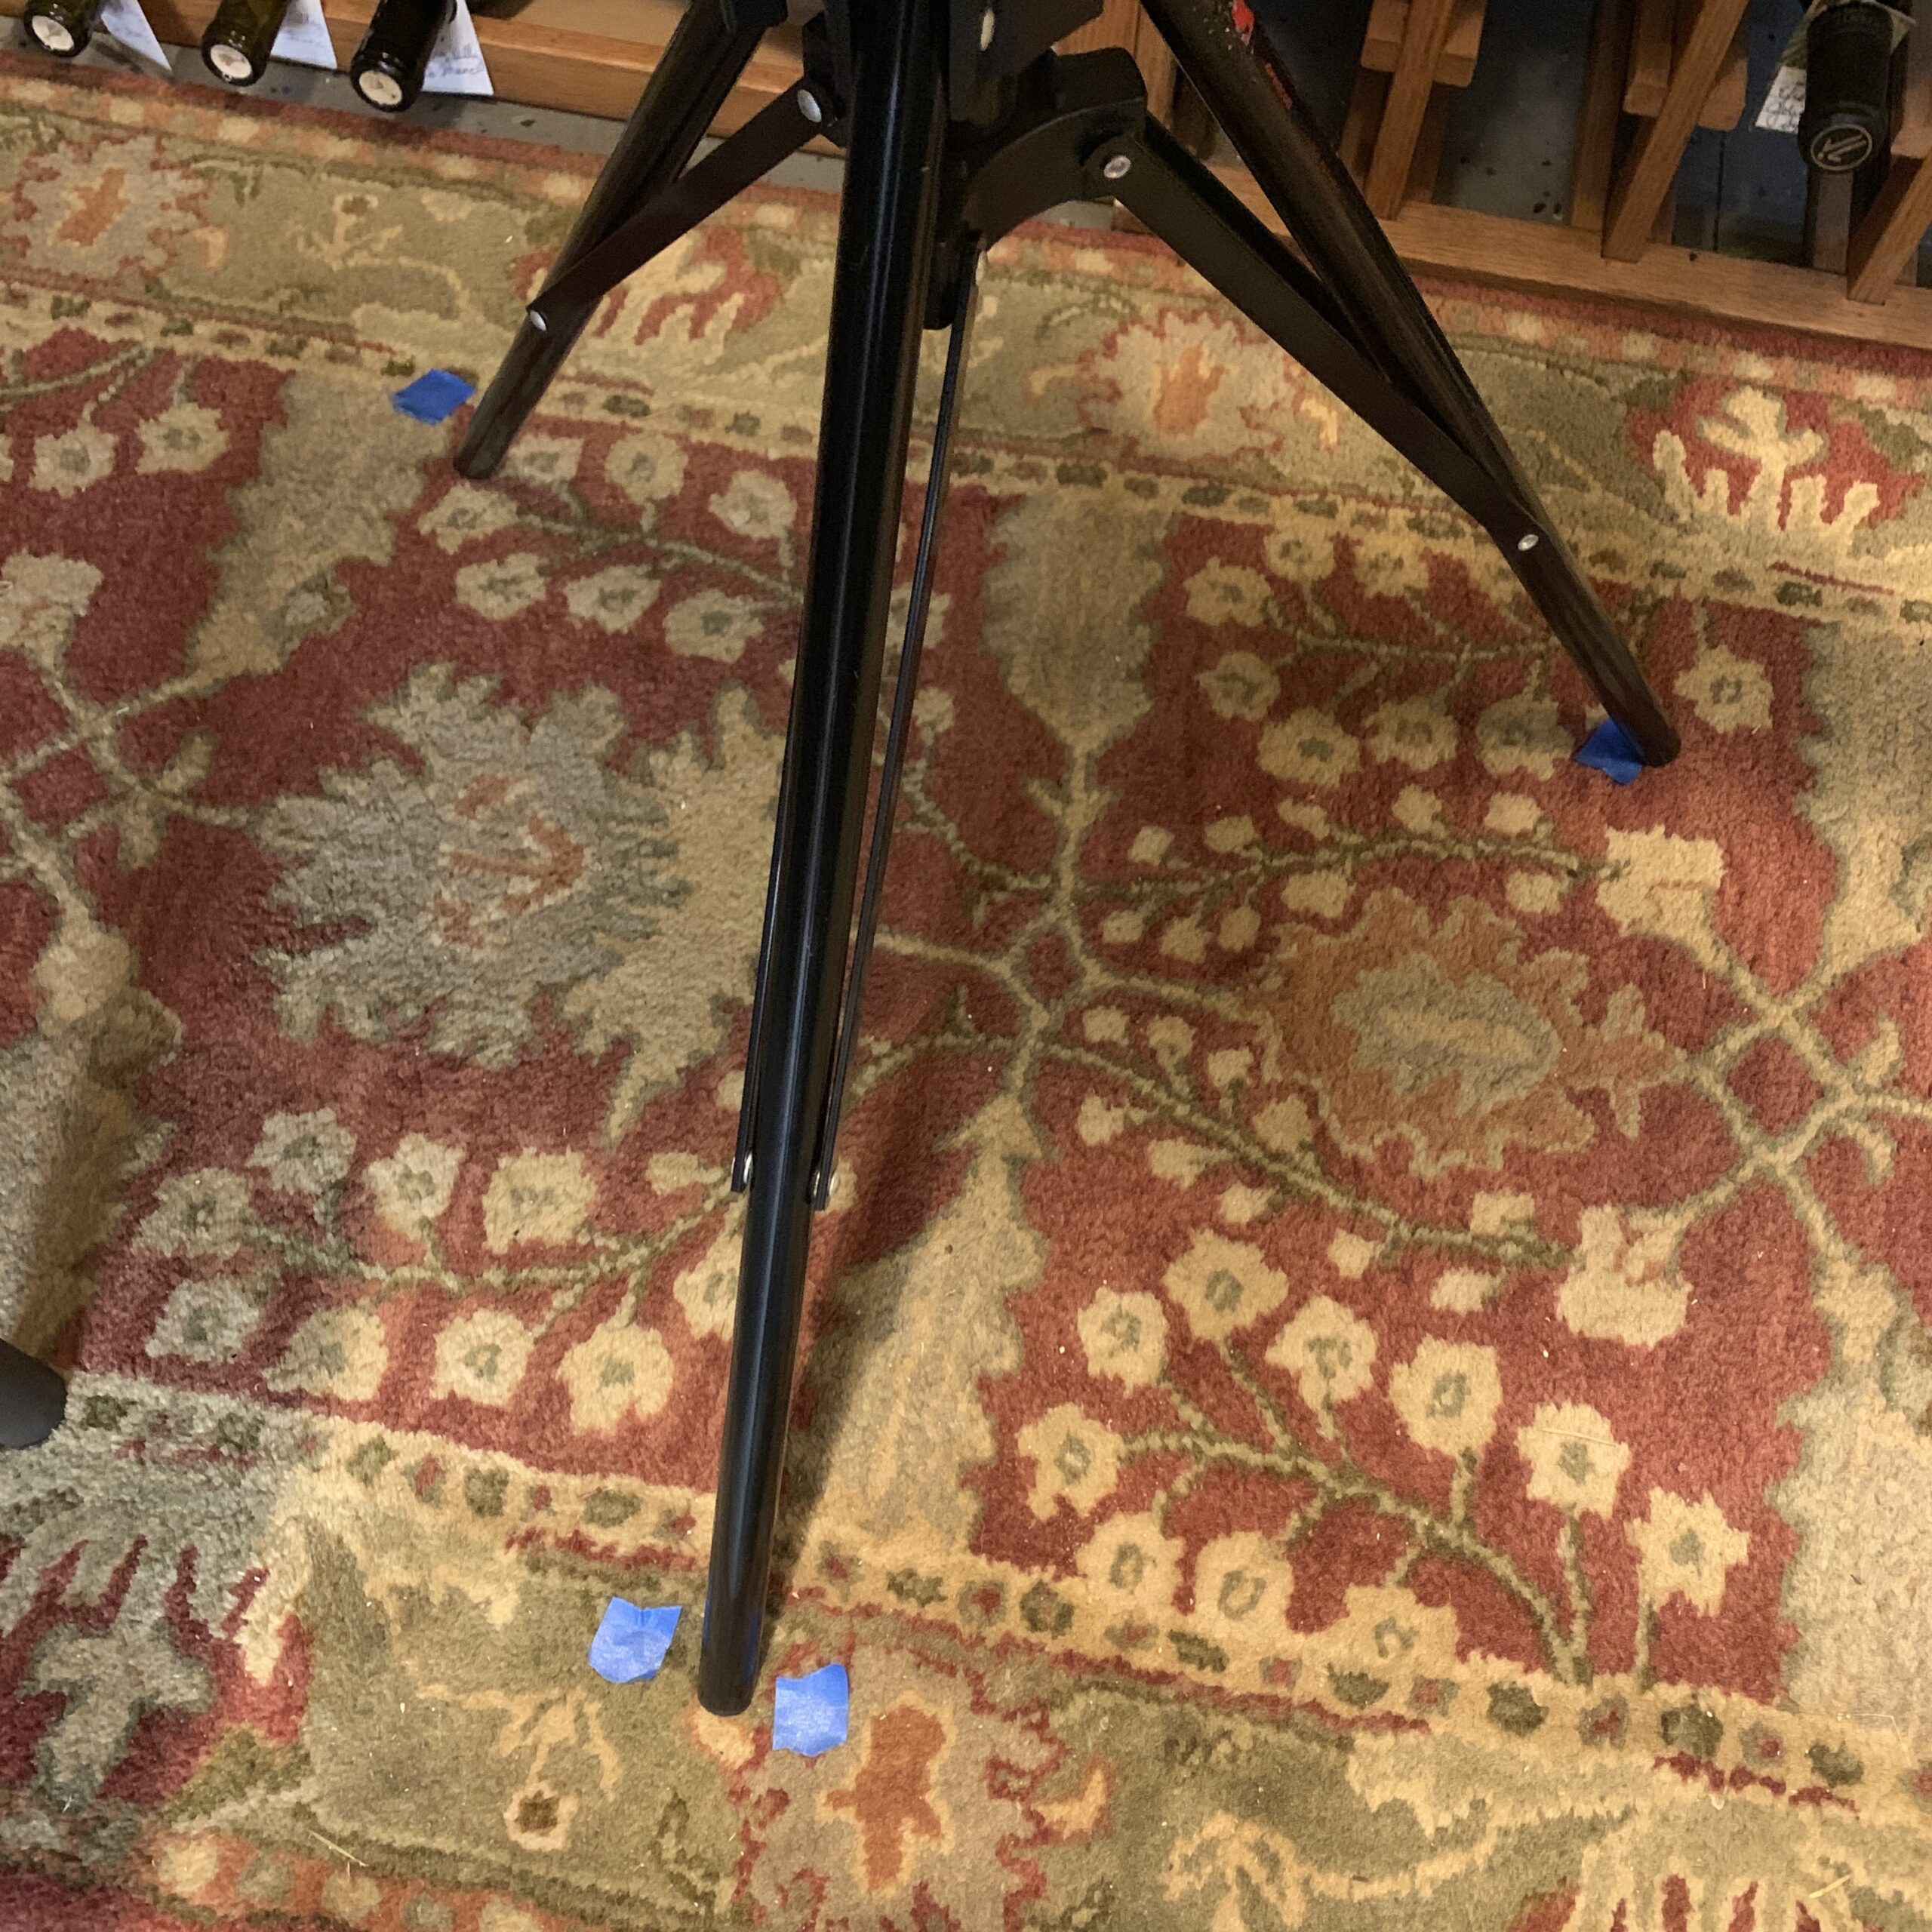
Speed up your setup time if you mark the location of your tripod feet on the floor with blue painters tape. This way you can quickly set back up without testing and testing and testing the positioning of lighting, camera distance, etc.
Layout of Supplies
Mise en Place
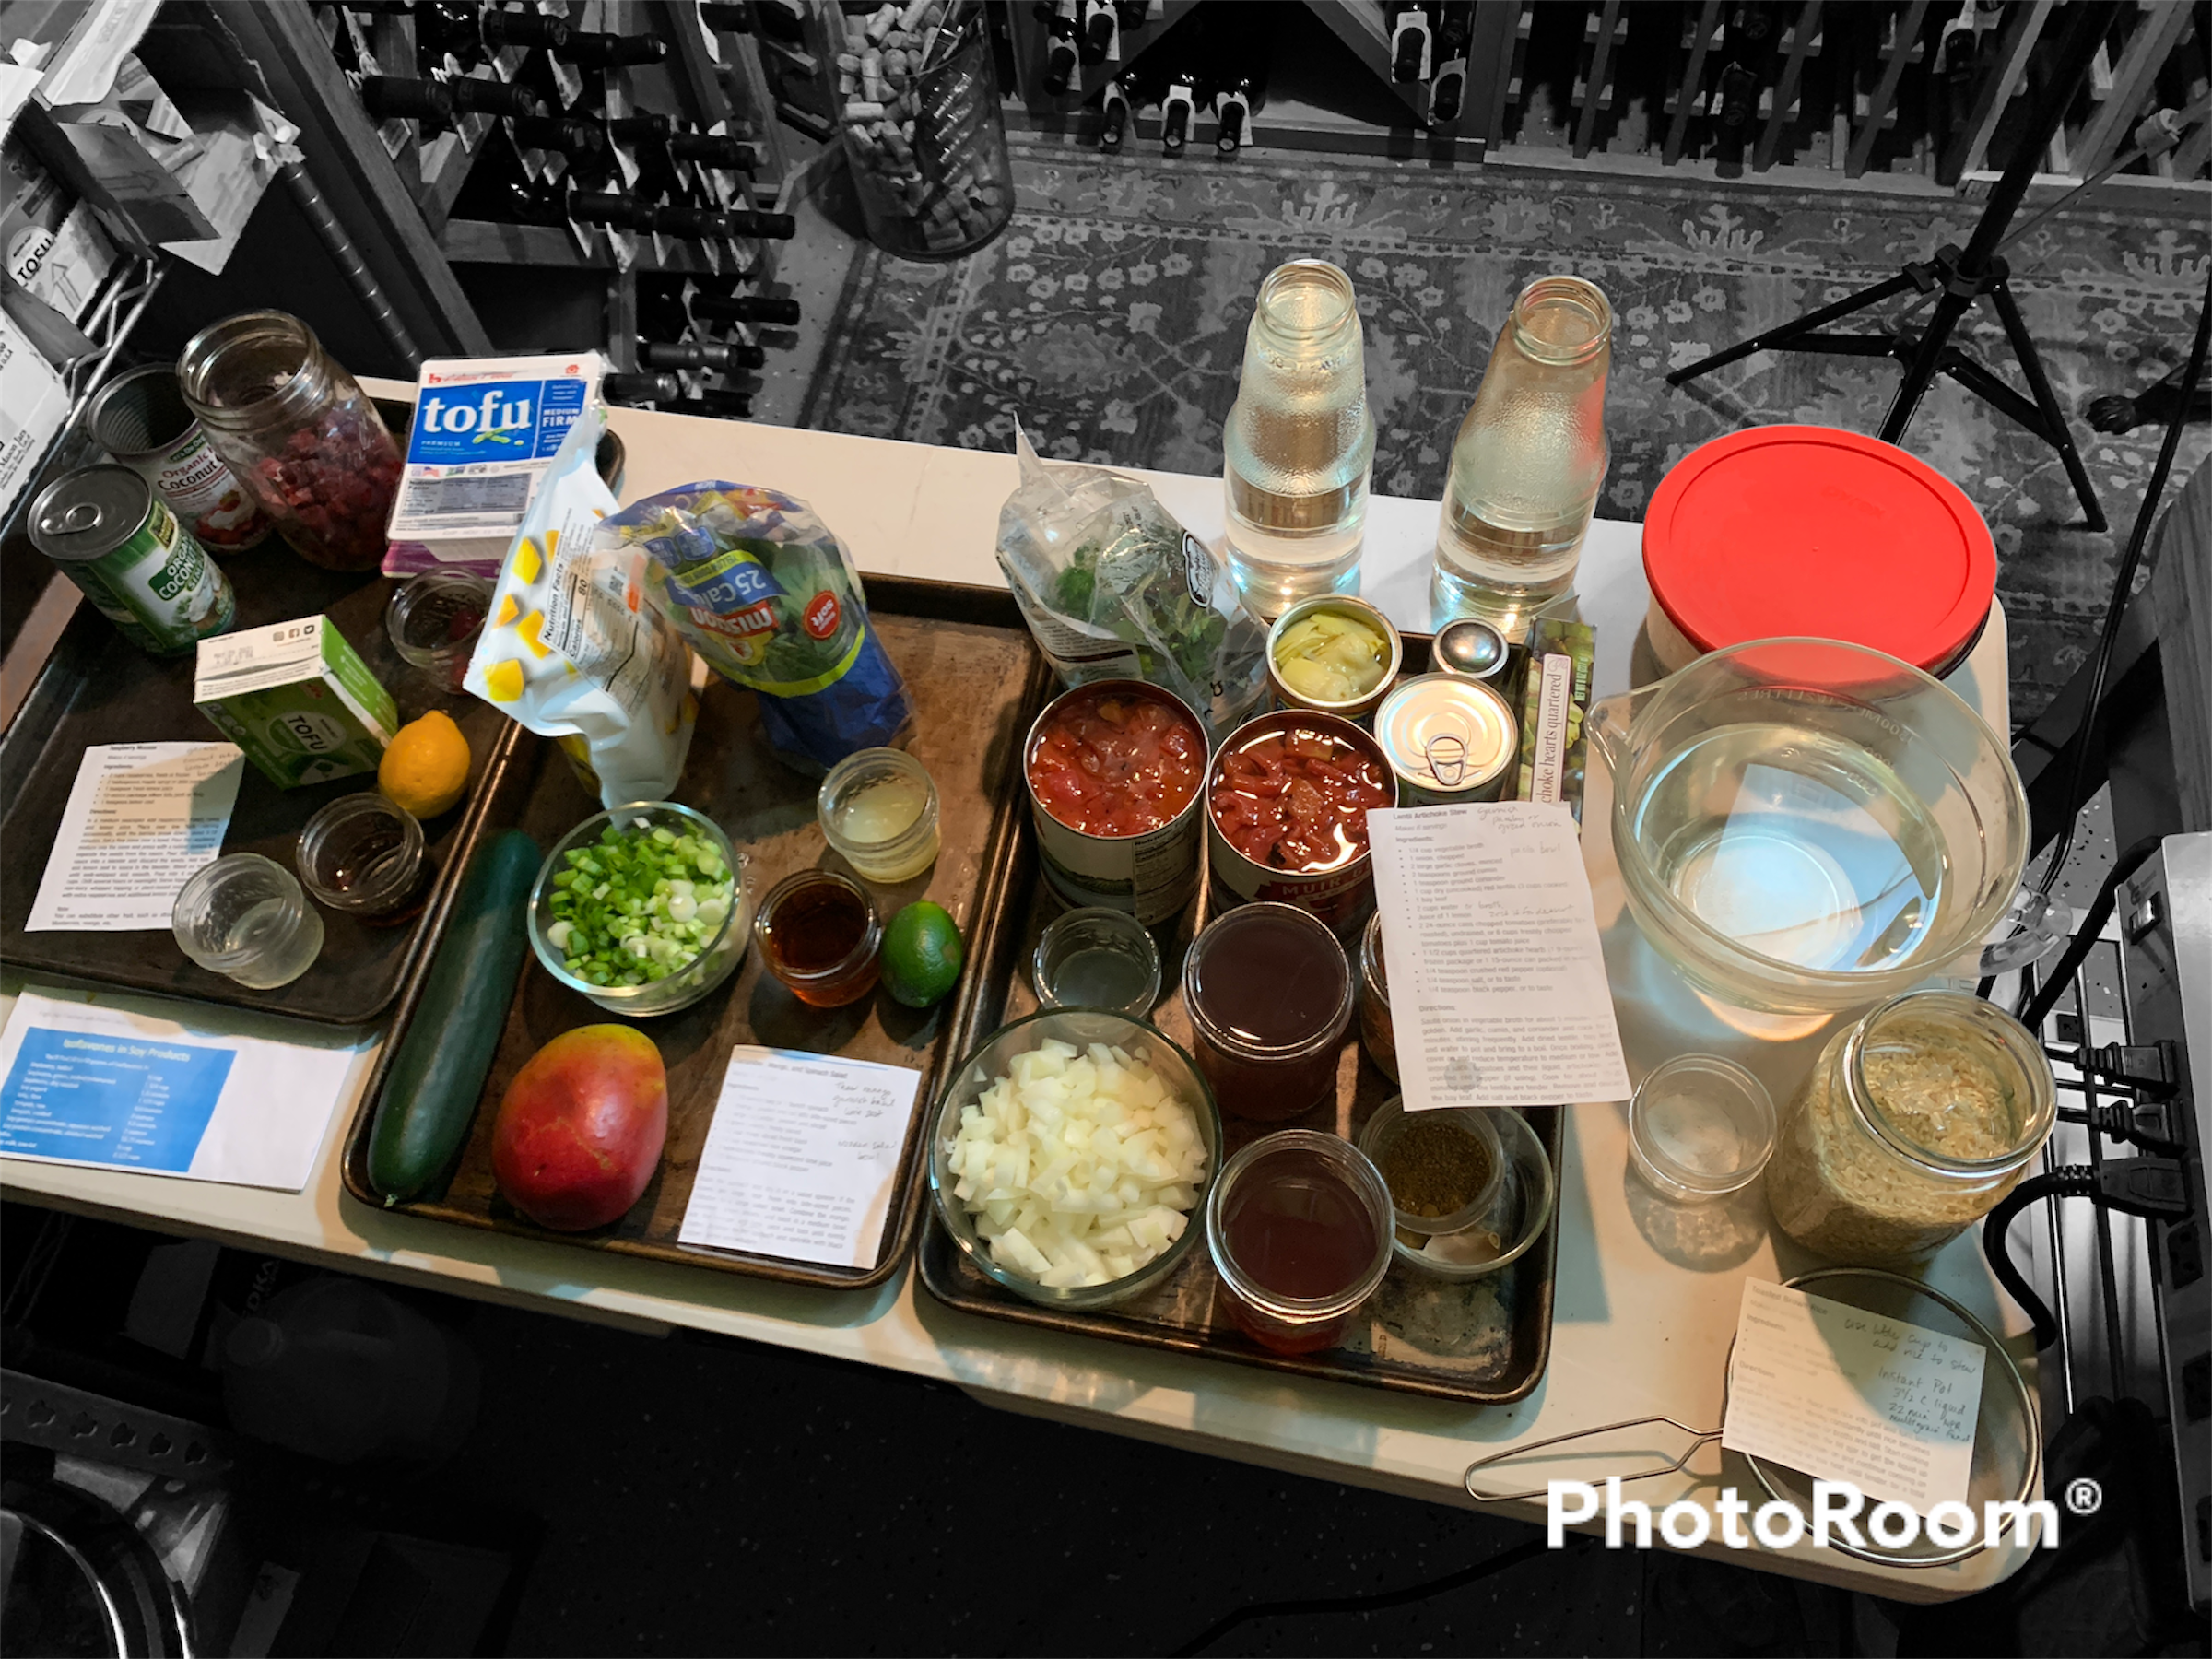
I usually measure out all ingredients and put into canning jars, various sizes, from 4-ounce to quart. Use what works for you.
Do your mise en place hours or day before and hold in the fridge or freezer as necessary.
Canning jars work for me because I had an abundance of them, you can lid them, they’re inexpensive, little ones can stack, you can see through them, and keeps everything uniform looking. I write the contents with a Sharpie pin on the jar and it comes right off when washing with a sprinkle of baking soda, dish soap, and a scrubbie.
Measuring out beforehand saves time during the class, prevents mistakes or shaking hands when you’re nervous or in a hurry, you don’t have to search for measuring devices or wash/dry them during class, and you can make sure you have all of your ingredients ready to go. If you’re teaching how to measure, then measuring during the class may be important, but otherwise, do it prior to class.
I often combine things that go in together as well, such as several wet ingredients for a salad dressing or a mix of herbs and spices that go in at once—I simply explain what’s in the jar and how much when I pick it up and go to use it during the demo.
Demo Recipe Organization
I use baking sheets to put supplies for each particular recipe on—one recipe per baking sheet. You can use trays too. This way I can set things up before class and have them arranged out of camera view to quickly grab and transition from one recipe to the next.
It’s also a great quality assurance tool, as I go through each recipe and double check my baking sheet to make sure everything is there. I also add the serving dish to this sheet/tray and any implements I may need during the demo too—this saves searching during class for just the right thing. I put a printed copy of the recipe on the sheet too.
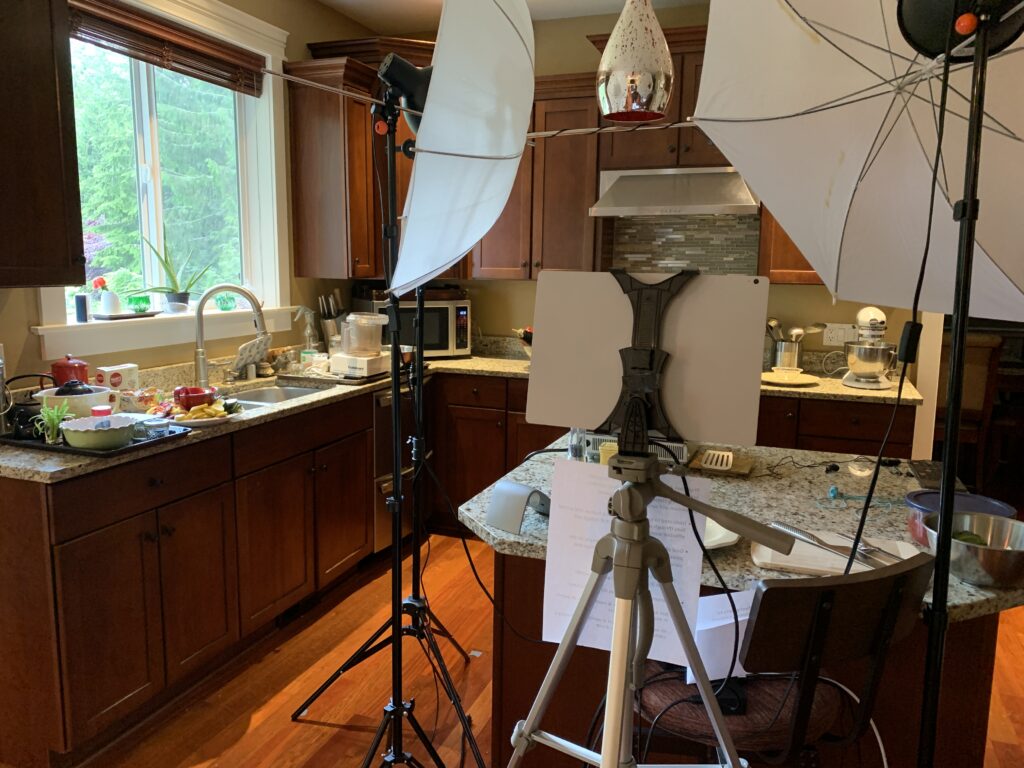
Put these baking sheets outside camera view, either on your counters or consider a folding table. You can keep appliances or serving dishes here too.
Dirty Dishes
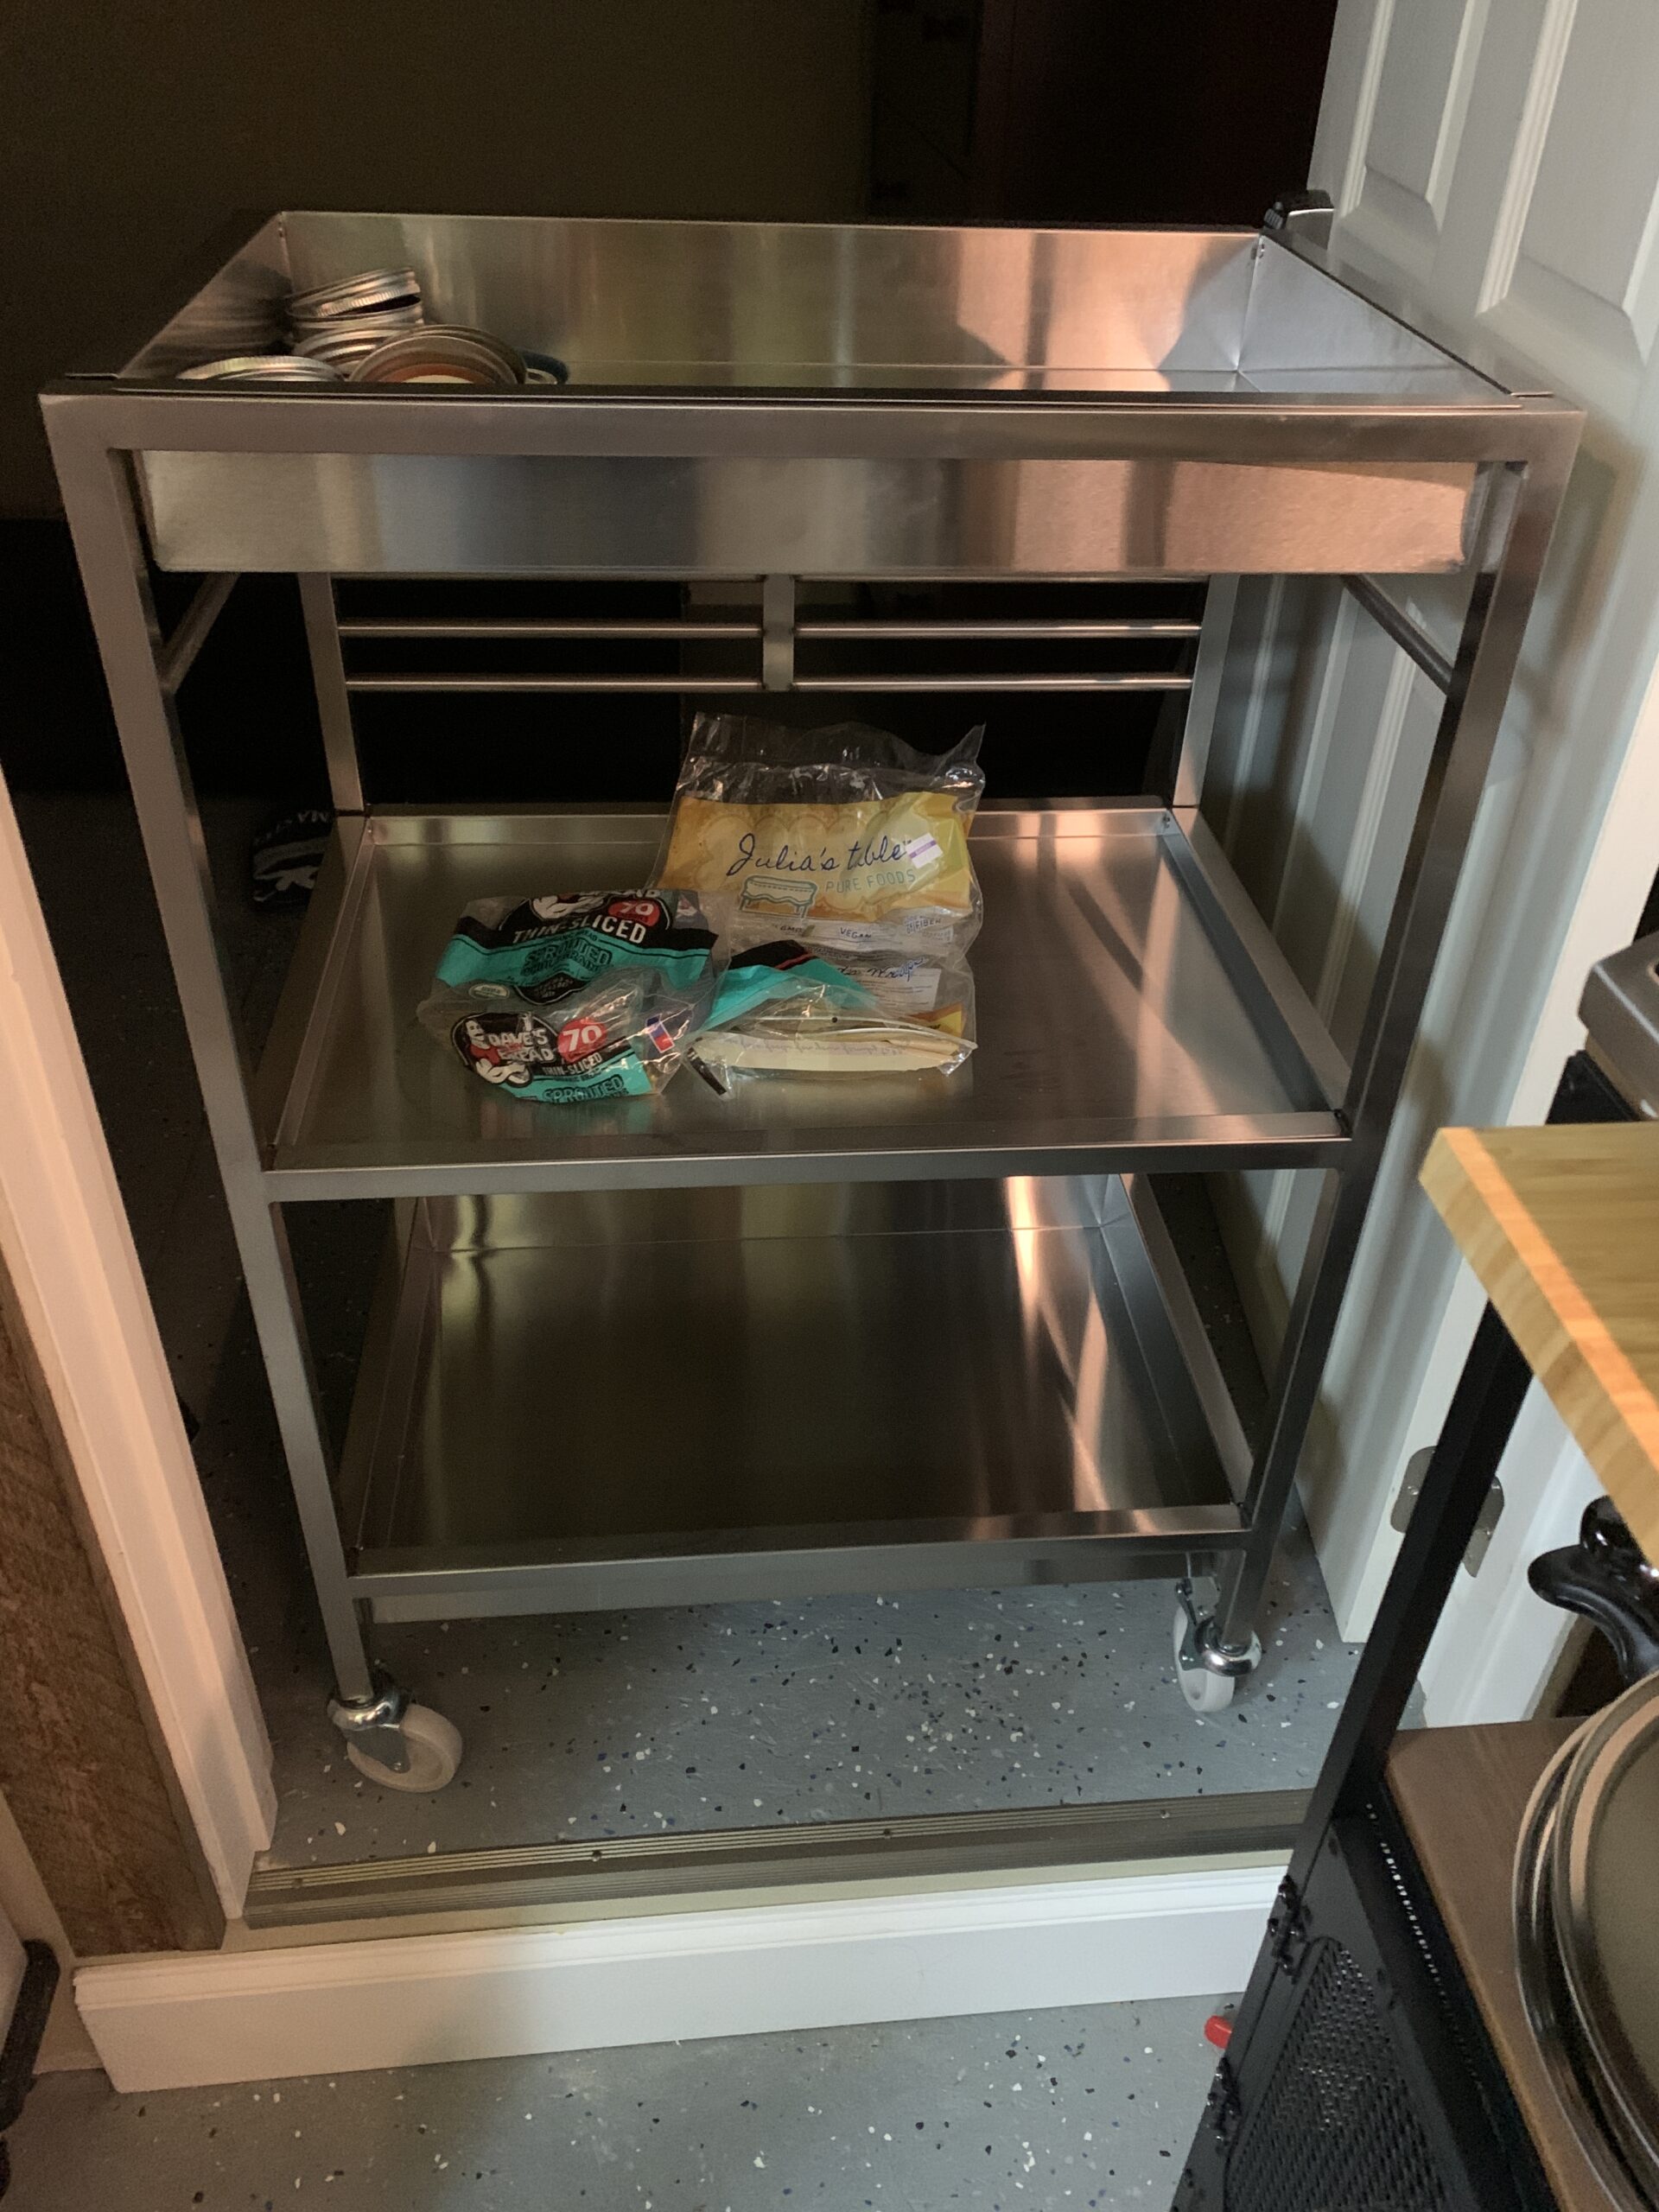
If using the kitchen, I put dirty dishes in the sink, outside of camera view. In my studio kitchen, I have a metal rolling cart with removable trays from IKEA that's off camera to put dirty dishes in.
I also use cart this as an off-camera sink. The top tray is deep and I can drain pasta water into it. I keep a pitcher of water in a lower tray to use if I need water or to rinse something off.
Have at Easy Access
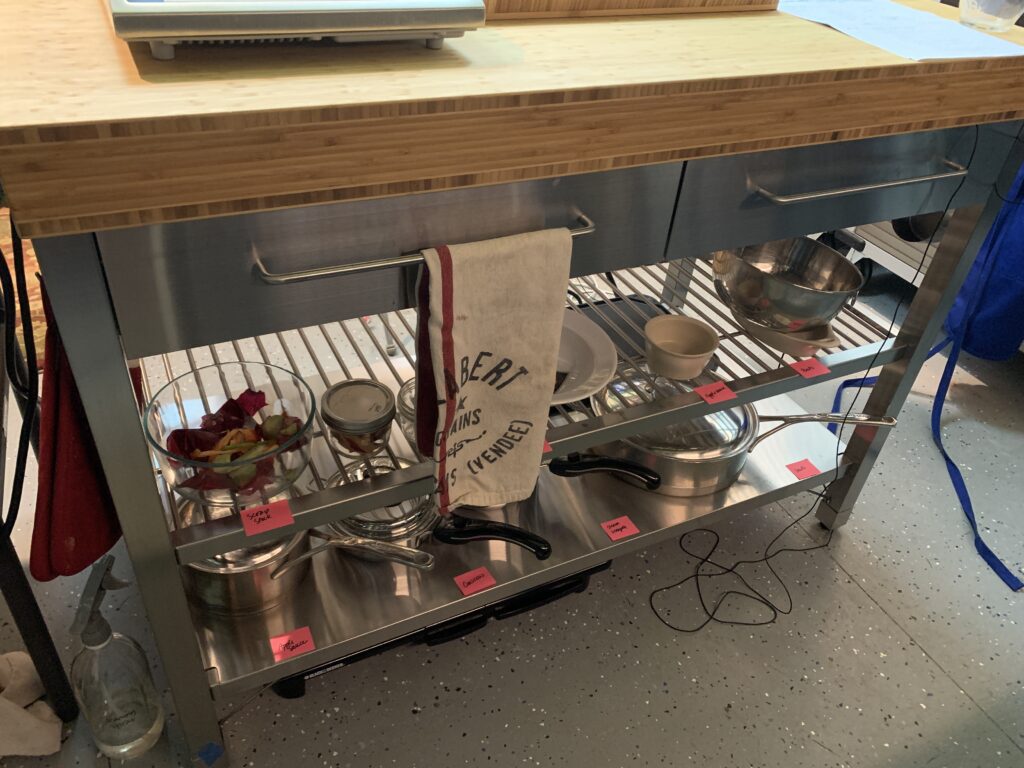
Have some important things at easy reach or in a drawer in front of you:
- Spare batteries for wireless mouse, lapel mic, and anything that needs a battery!
- Extra spoons, scrapers, and other implements in case you drop something or forget something in your prep.
- Pen or pencil and note pad to make notes of student questions or note what you promised you'd send them later (you will forget if you don't write it done, I promise!)
- Several kitchen towels. I use a handy towel holder that fits over a base cabinet door so I have a towel right in front of me, but not on the countertop.
- Lipstick
- Your phone, ringer turned off, in case students having trouble logging in try to contact you.
- Post-It Notes to mark things
- Sharpie pen to mark mise en place containers at last minute
- Binder clips—because they work for so many things, including securing errant cables and cords, and even your hair, if it's not cooperating with you all of a sudden and you need to pull it back!
- Your smile, a deep breath, and just roll-with-it-and-have-fun state of mind!
Food Photos
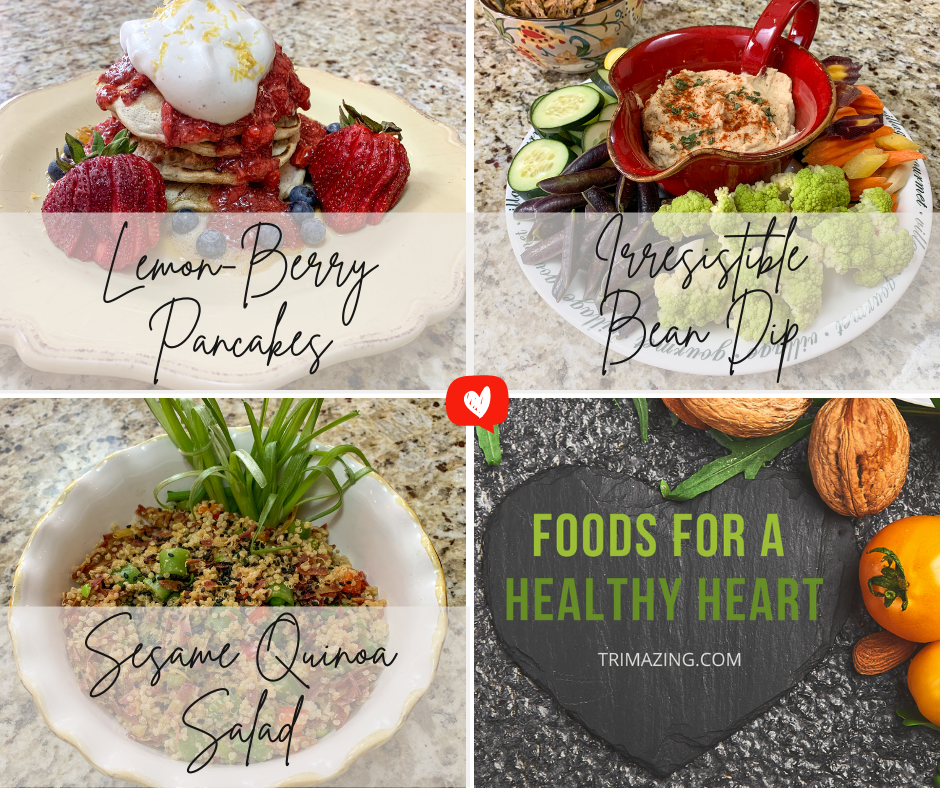
Immediately after class, before I clean everything up, I take photos of my plated dishes. Sometimes I have to re-plate them so they look the best after setting for the duration of class. This way you have your perfect lighting set up for the photos.
I include these photos in the follow up email to students because Zoom doesn’t always give you a beautiful view of your food, no matter how well you set up your lighting and cameras.
I use my iPhone to take the food photos, you don’t need a special camera!
Other Resource Categories
Trimazing! Health & Lifestyle Coaching is a participant in the Amazon Services LLC Associates Program, an affiliate advertising program designed to provide a means for sites to earn advertising fees by advertising and linking to Amazon.com, Share Azure, a referral program linking to AzureStandard.com, Peleton, MamaSezz and Misfits Market.
